Showing posts with label pattern testers. Show all posts

Saturday, August 8, 2015

Project Caddy Pattern by Aneela Hoey


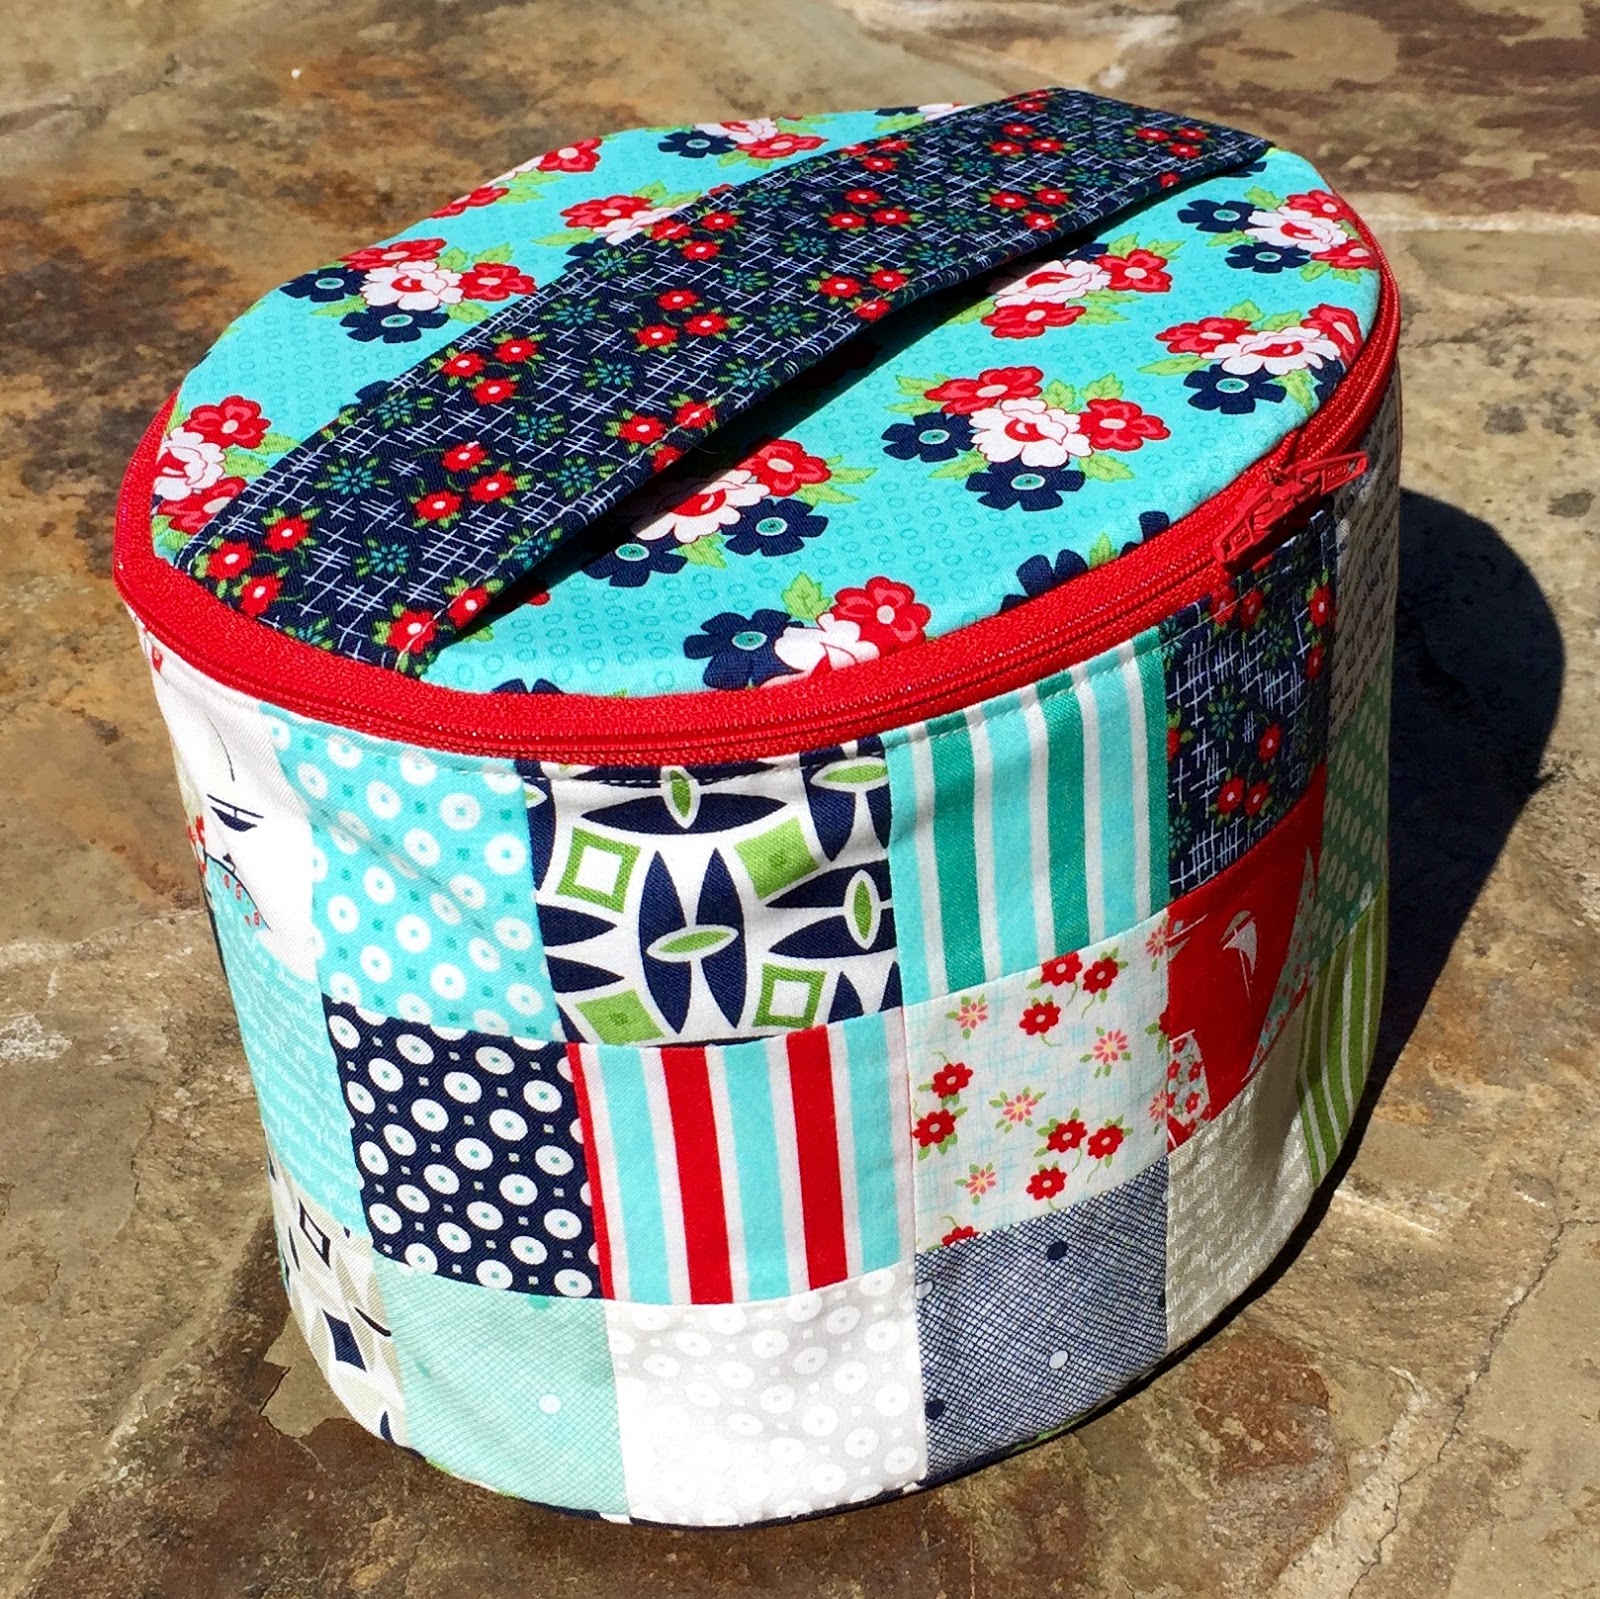
Earlier this summer, I was thrilled to have the opportunity to test Aneela Hoey's new Project Caddy Pattern. Aneela writes very clear and detailed patterns with great design, and this pattern is no exception; I love the lid construction and zipper installation. So clever. This caddy was the perfect size for my college age daughter to take on her beach vacation to tote essentials.

Caddy Details:
Fabric: Bonnie and Camilly Daysail
Exterior Patchwork: Mini Charm Pack
One complete mini charm pack works perfectly to piece the exterior
14 squares across x 3 down
There is an extra ½” that needs to be trimmed off to make the panel 28” across. To account for that, I just chain pieced four sections more towards the side of the panel, 2 across and 3 down and then trimmed 1/8” off those four before attaching them to the rest of the panel

I absolutely love the handled lid and double zipper on the exterior of the caddy. I am always interested in learning new techniques, and Aneela made the lid construction a breeze. With an added interior zip pocket and open pocket, it is easy to keep your items organized. 

Construction options:
I appreciate that Aneela designs her patterns to be easier to assemble with less machine wrangling. I tested the pattern as written, but I am not afraid of a little machine wrangling (my motto: interface all the things and then interface some more), so I made some notes with two options in addition to the pattern instructions for the intrepid assembler to make the caddy sides super sturdy. 


1. Quilted exterior: Add batting and then fuse Peltex 71 (cut the size specified in the pattern) on the back of the batting and quilt through all of the layers (or use Peltex 70 behind the batting and hold in place with basting spray to quilt). 

When I pieced my weekender bag panels, I used the fabric with shape flex fused behind, batting behind the shape flex, and then a smaller piece of Peltex basted behind the batting. I quilted through all the layers. I was so happy with the outcome, and I think the same technique works well here.

2. Peltex 70 placed behind the exterior panel (1/2” from the bottom edge) with a piece of Shape Flex the same size as the exterior panel fused over the Peltex 70. The Shape Flex will hold the Peltex in place.


The interior has a huge amount of storage to carry projects, toiletries, toys, etc.


Tuesday, August 4, 2015

The Hexie Box Pattern


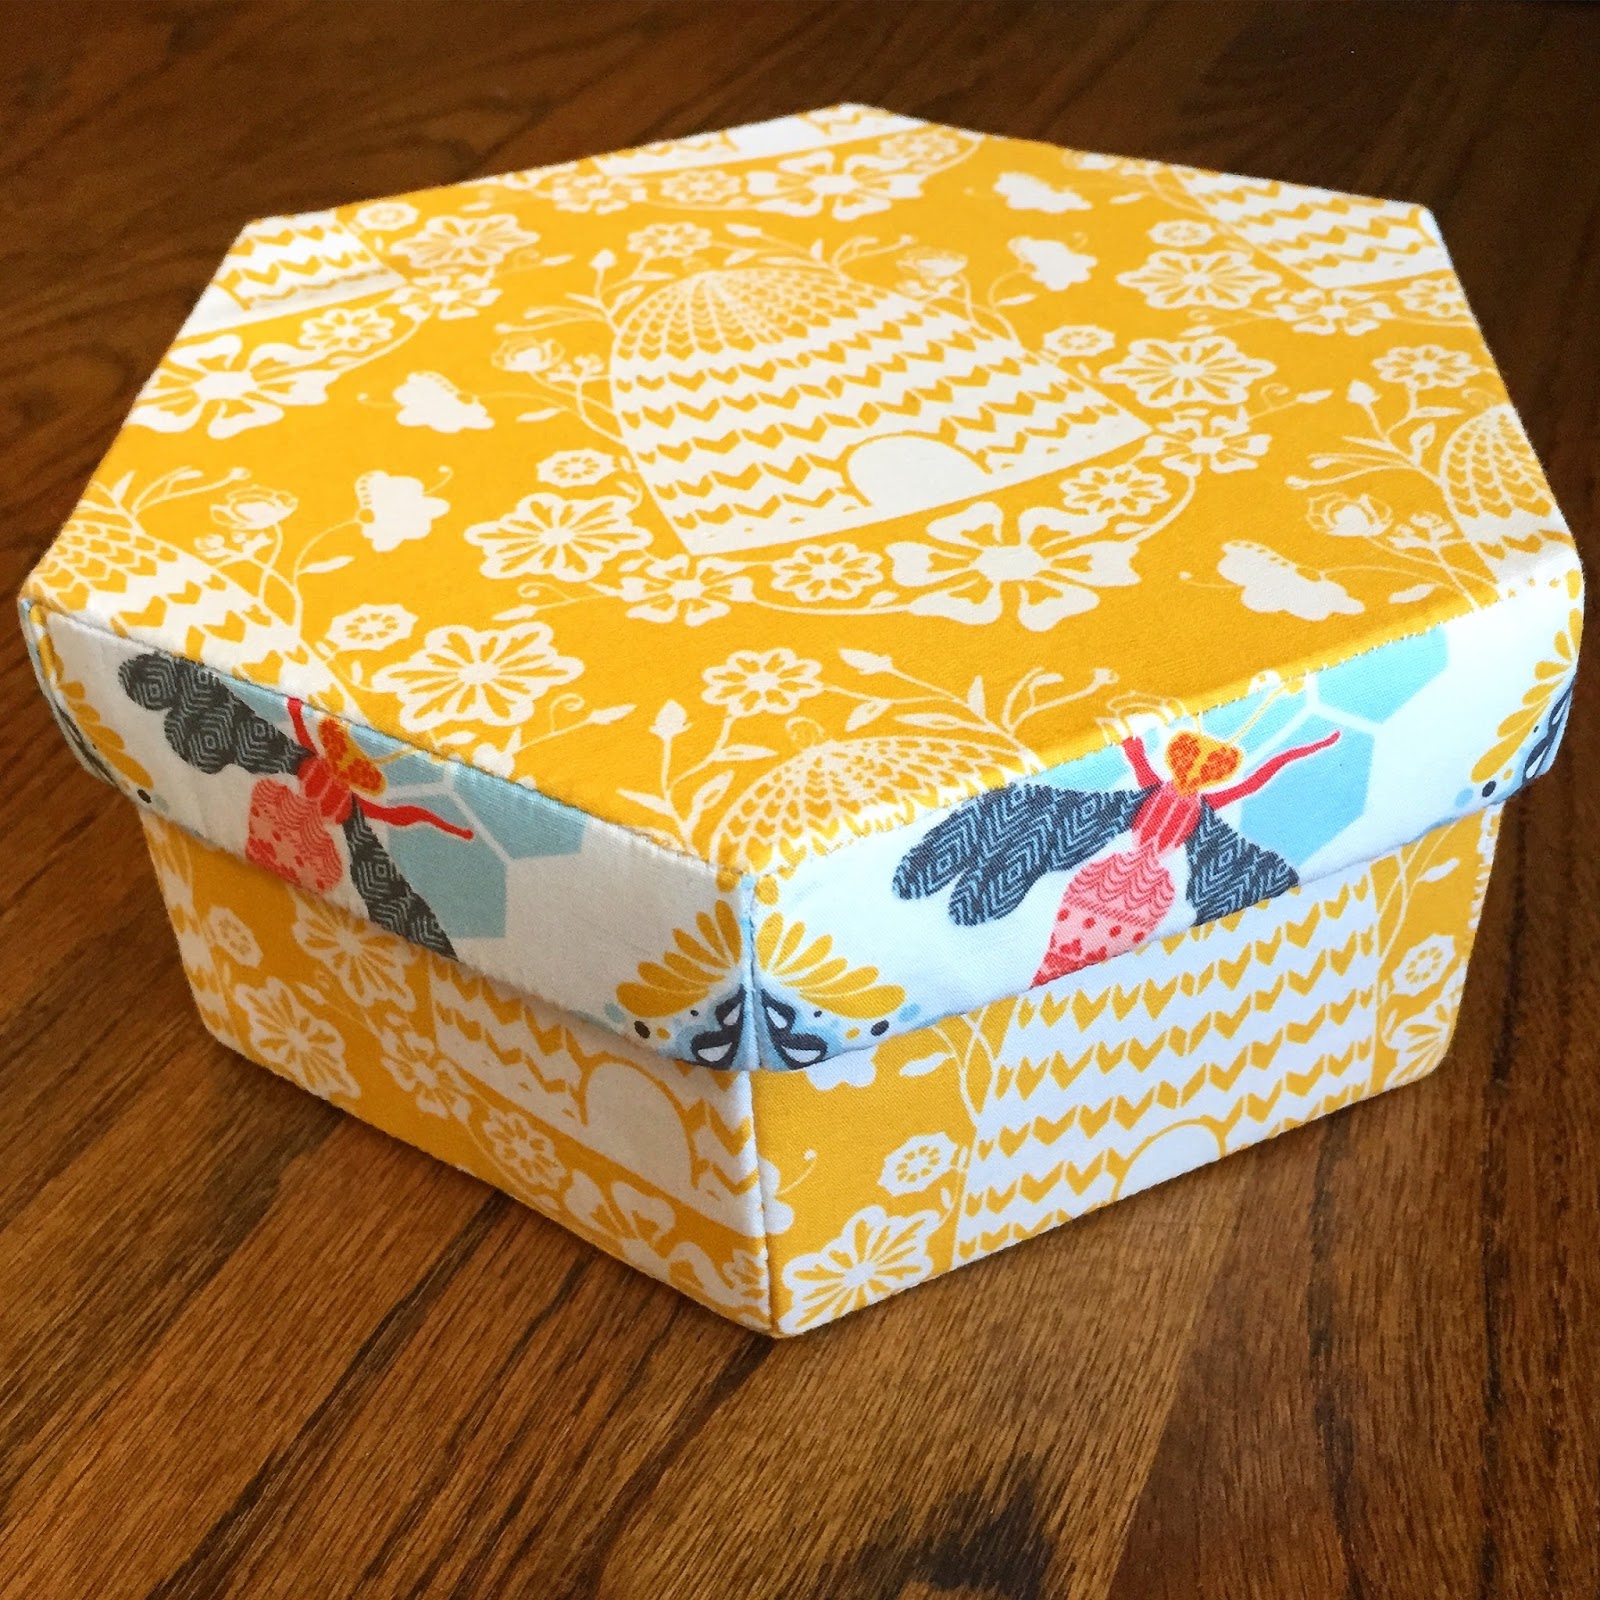
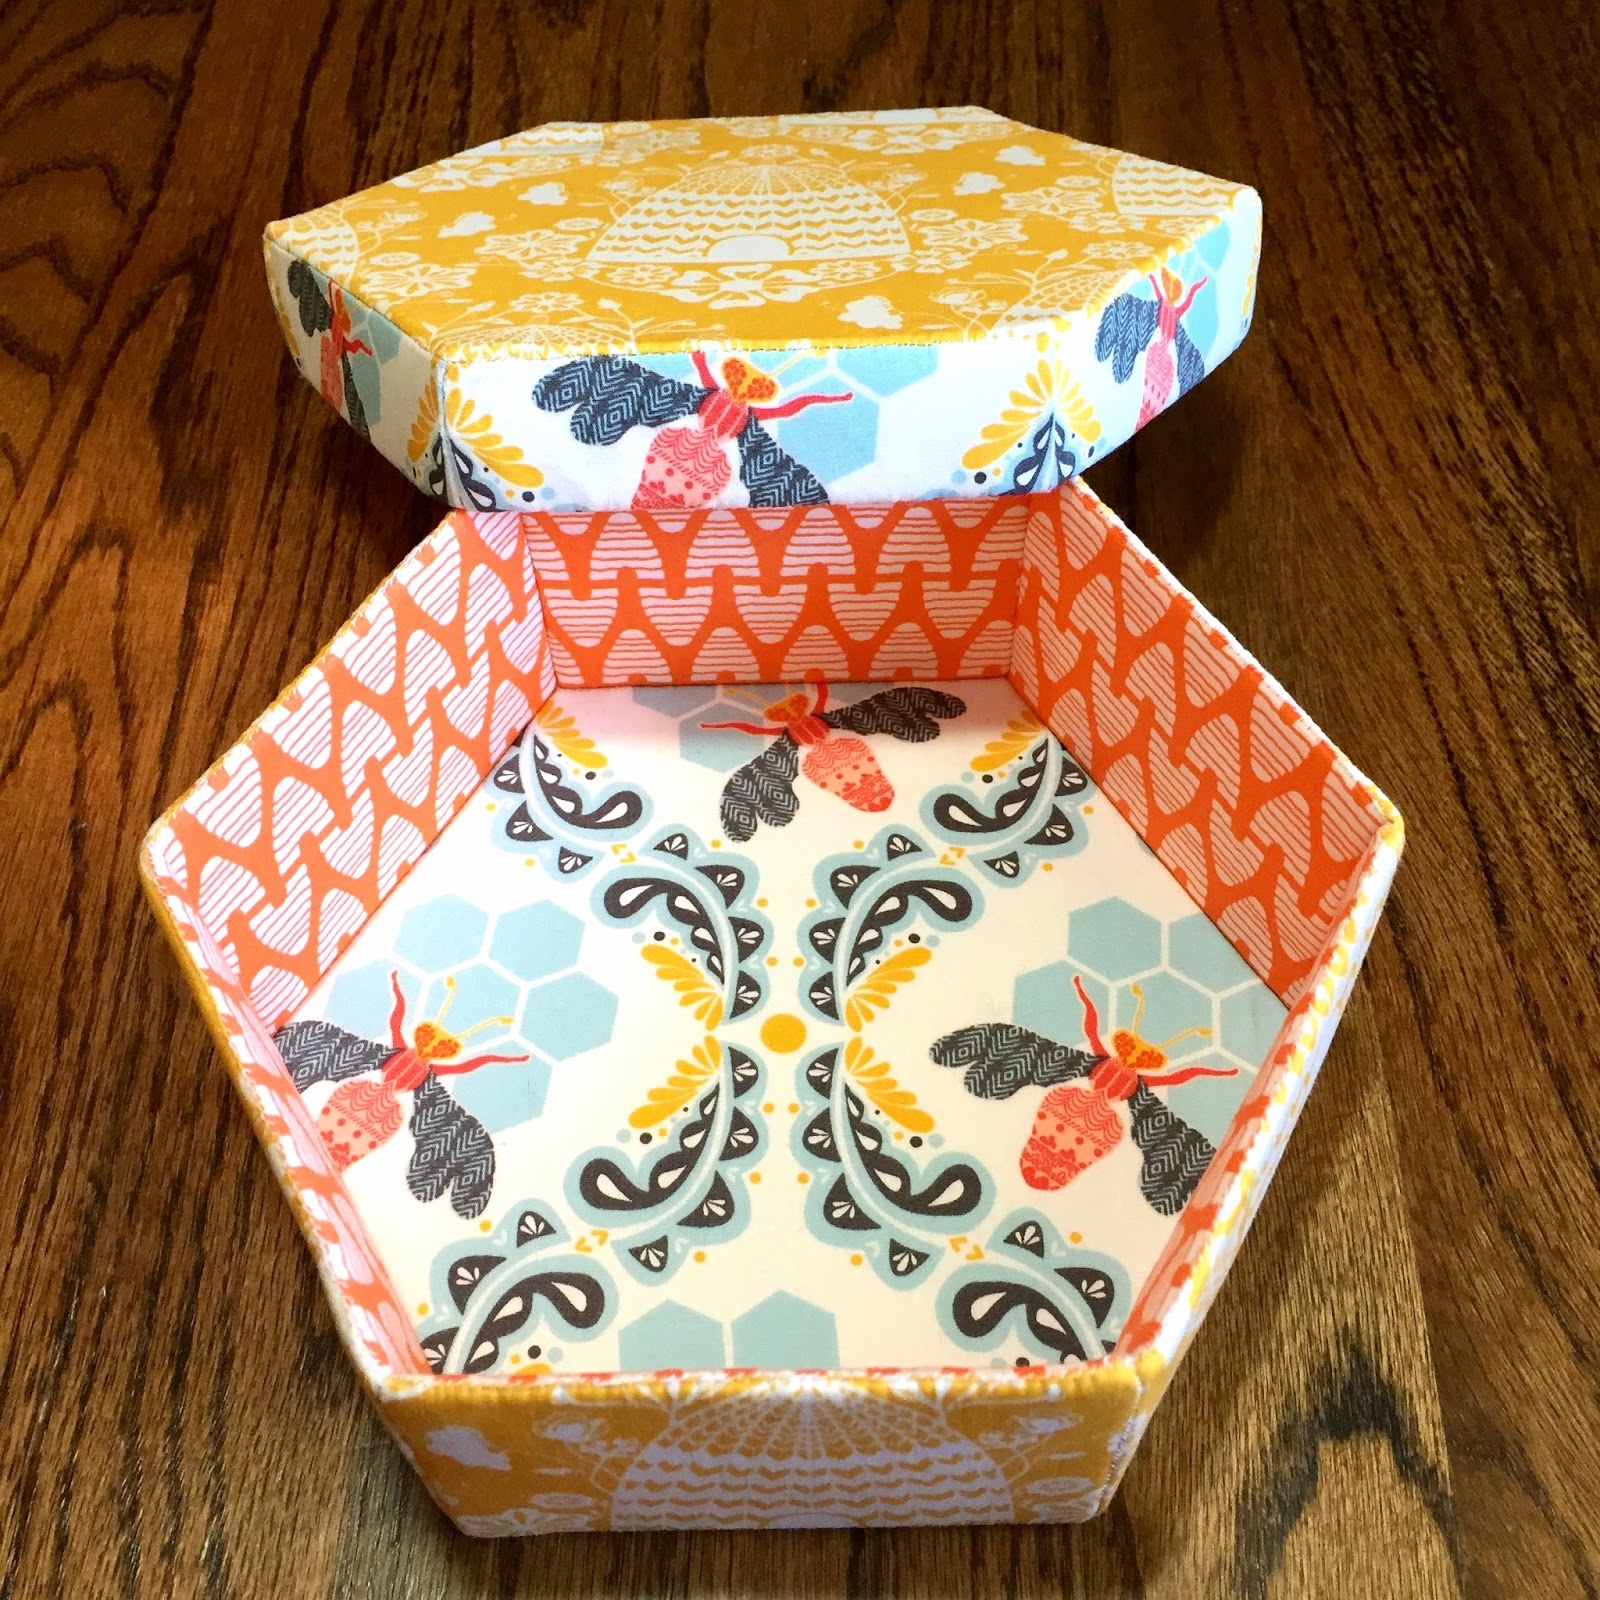
Recently, I had the opportunity to test a fun new EPP hand sewing pattern called The Hexie Box by Amber Crawley. Amber asked me to test the large 7" box, and I knew it was the perfect project to use some of my stashed Sweet as Honey fabric.

My eldest daughter said recently that she needs more gold accents in her room, so I made the exterior the gold beehive print. I am pretty excited that I used supplies entirely from my stash, including scrap Peltex (I knew I was saving it for a good reason).


I wouldn't call the large size a quick project. Using Netflix shows as a guide on the time spent to make this box, it took approximately nine hours from start to finish. Bear in mind that I fussy cut all but the exterior side panels. I would have also fussy cut those, but the beehive print is staggered and I couldn't bear to cut holes in a half yard of fabric to make the beehives all match on each side. I feel like the lid side fussy cuts more than make up for that. I also stitched a million tiny whip stitches to make the box extra sturdy. All well worth the effort and time.

The pattern gives basic instructions on how to thread baste the fabric to the interfacing, and mentions glue basting. I usually prefer to thread baste, but on this project I am all about the glue basting. I didn't mess around with a little glue pen, and went straight for the Elmer's glue stick; I used a fair amount of glue. My one tip would be to glue the interfacing and try not to gunk the glue all over where you will be stitching because the resulting stiffness makes it harder to sew through. The patterm also calls for Peltex 71, but I didn't have even a scrap left on hand, so I just used a glue stick to baste the fabric to the Peltex, and heat set it with my iron; it worked perfectly.

I'm ecstatic with the finished project; the design is genius and flawless, and it has a very functional and satisfying sturdiness.

The Hexie Box pattern is now available to purchase on Craftsy.


Monday, March 30, 2015

Vintage Candy Cottage Pattern


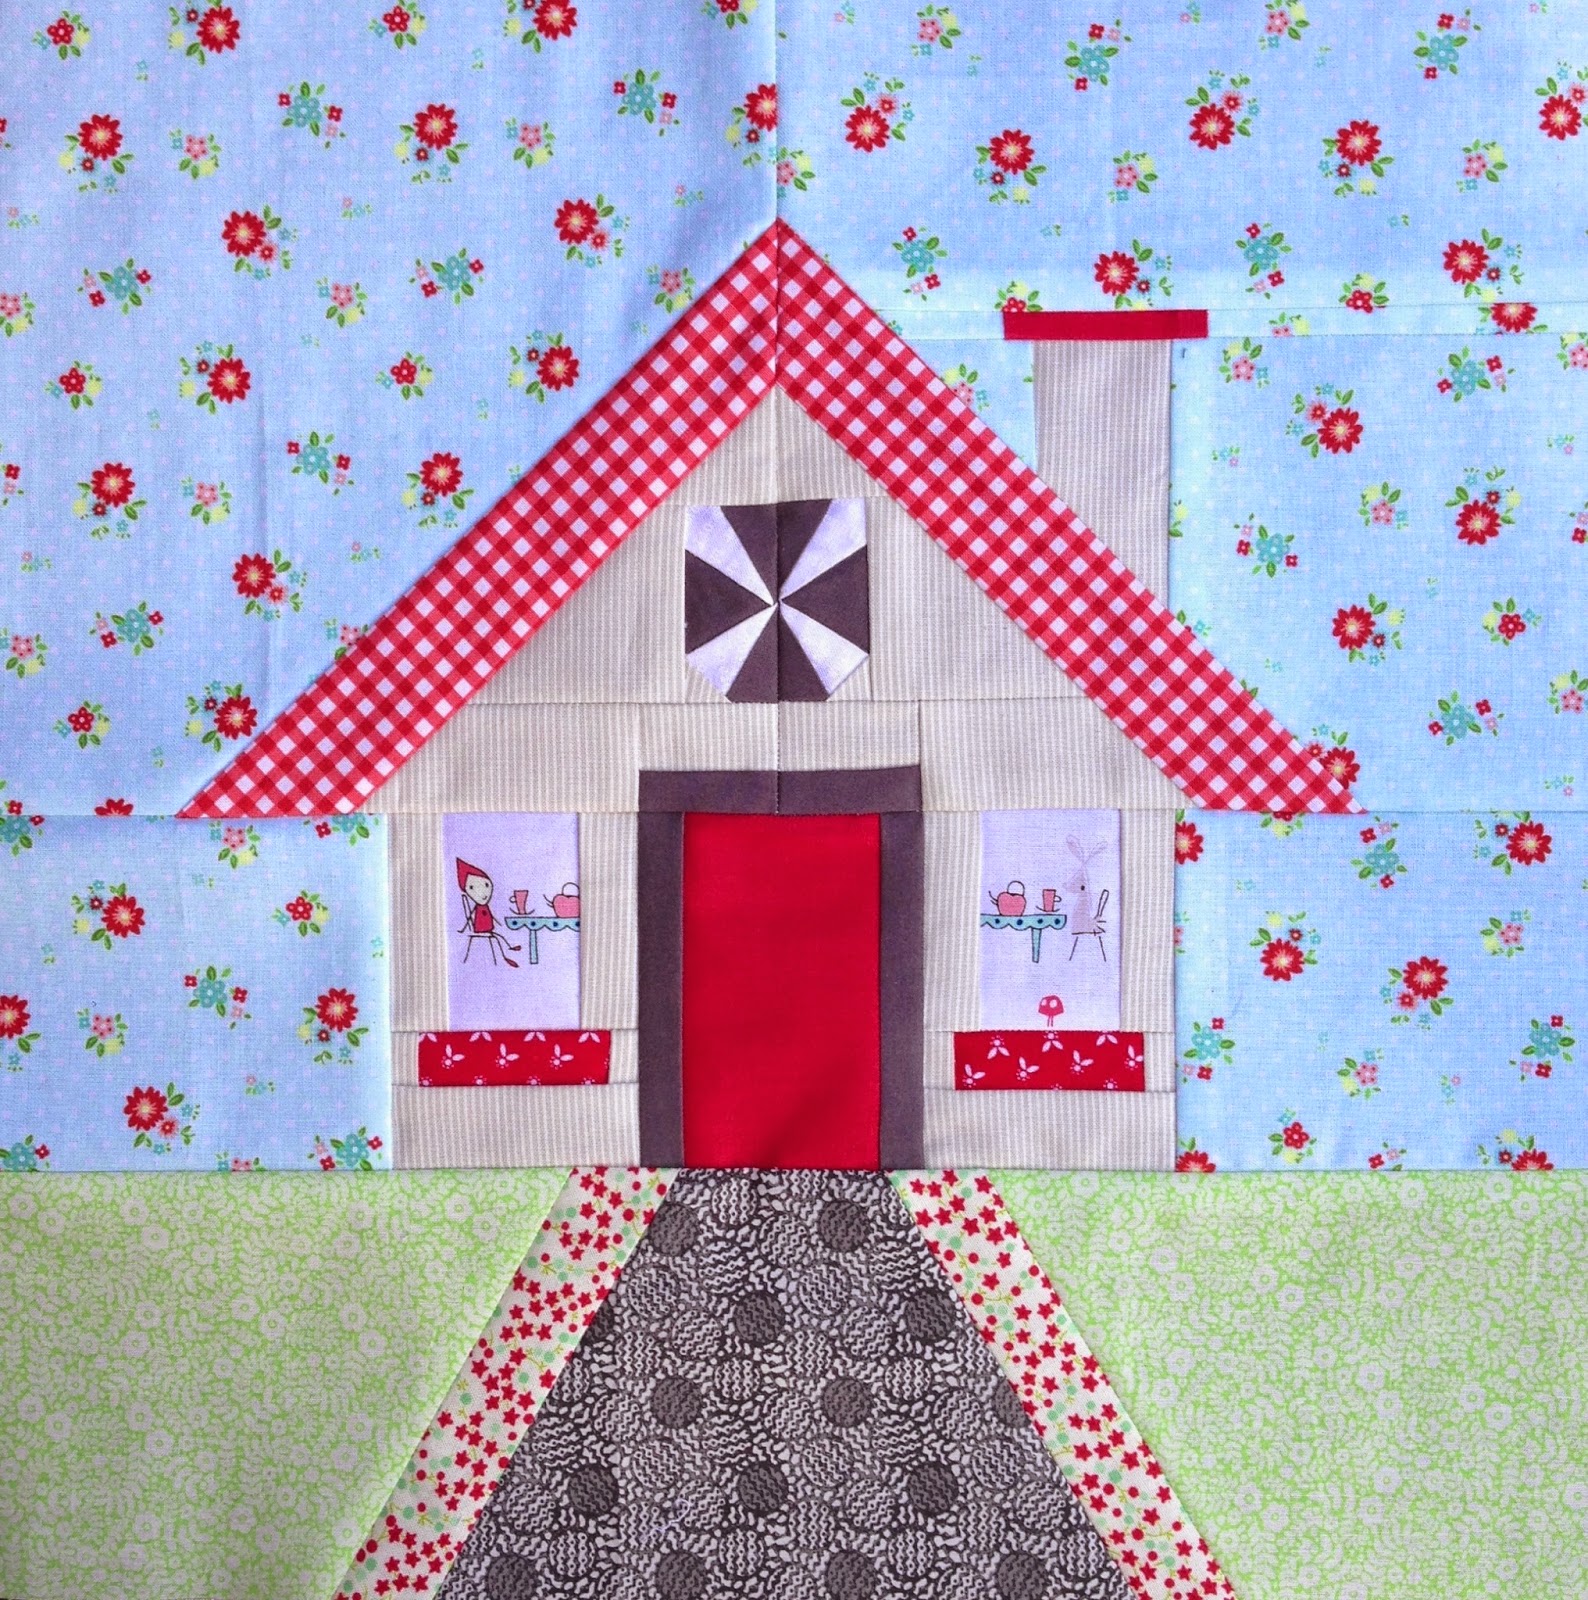
I drafted a pattern for a holiday pillow swap a while back, and I added extra pattern pieces which can be substituted to make the pattern with a year round theme. The Vintage Candy Cottage pattern was once available to purchase on Craftsy, but I now have it available on Payhip. I dusted off my pattern this month to make a pillow for a friend. I used some of my favorite Tasha Noel fabric for the house and border, and quilted with 1/2" diagonal crosshatching and Miss  Kate red and white scallops for the binding. Pillow finishes at 20" square.


The original Vintage Candy Cottage pillow I made for a holiday swap adds candy canes to the yard and wreaths to the windows, along with a patchwork border.


I made a spring mini quilt for a friend last year with 1/4" crosshatch quilting and also using my favorite Tashe Noel floral, this time in aqua for the background.


At some point I would like to make myself a mini to hang in my sewing room, but I have many other things planned before I get there.

Thursday, September 11, 2014

Nova Tote Pattern Testers

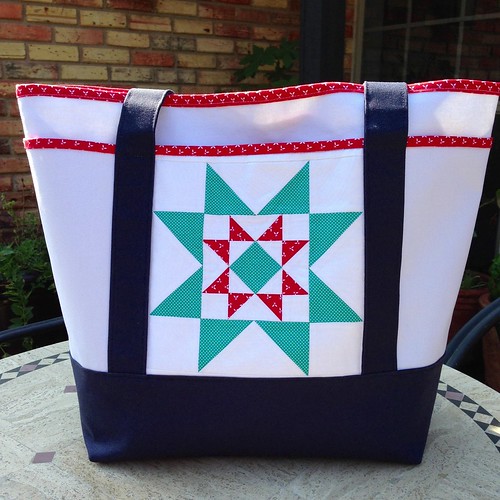
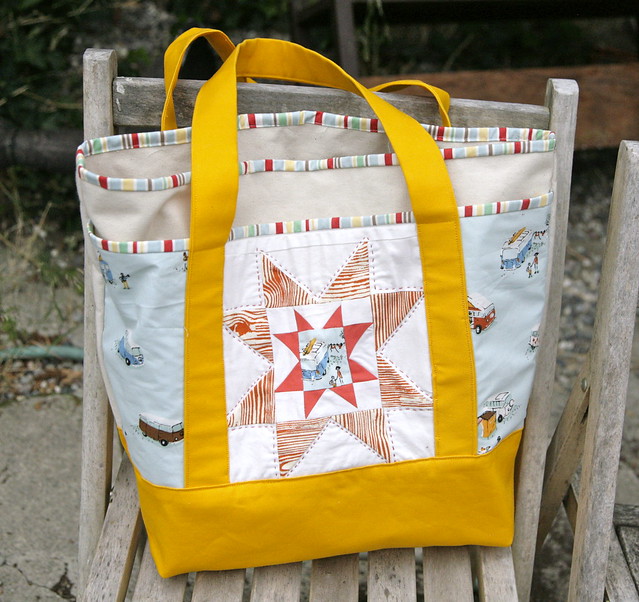
While I love making quilts, I can't carry them everywhere, and I gravitate towards making quilted items I can integrate into my everyday life. When I drafted the Nova Tote pattern, I was really just looking to make a canvas tote with a bit of quilt block flare that is tough enough to take to the beach or Costco (we fill a lot of bags at Costco!), and can get a bit dirty without me crying over the many hours I spent making it.

Several people asked me to write the pattern to market, and I am so glad that I did. I knew that there would be a lot of options for finishing and quilt block pocket panels, but I have been astounded by the creativity of the pattern testers, and the possibility of customizing the Nova Tote to fit an individual's needs; it can be a simple market tote, it can be a plush pieced travel bag, or anything in between.

While any 8" quilt block can be used on for the pocket panel on both the large and medium size bags, I wanted to include a block pattern for purchaser's to use. I settled on a double star, which is fairly quick to construct and has a lot of visual impact.

The Nova Tote pattern is available to purchase on Payhip.

Untitled
I apologize in advance for a super long post, but there are some great tester finishes I want to share.

I owe a big thanks to Chrissy (Sew Lux) for being the first person to test my pattern while it was still in the rough draft stage; her jawdropping Nova Tote really showed the pattern's full potential. You can read Chrissy's post here.


The Nova Tote pattern includes instructions to make a plain pocket panel as well as the double star quilt block. I had a few testers volunteer to make plain pocket panel versions, and the looks are as diverse as the quilt block versions.

Jennifer made a large bag using an Alexander Henry print and Pellon interfacing. She really showcased how well large scale prints work on the tote:


I was so happy Jade (Stitch Mischief) was able to test my pattern. I love her work and felt really honored that she was able to find the time to help me in between running a house, blog, business, and creating beautiful quilted treasures for the Sewvivor competition. I am so in love with the polka dot canvas and indelible low volume pocket panel.


Erin made an unlined bag with a printed canvas as the second layer of canvas. Her interior is just fabulous. I love how every unlined bag what was tested used a contrast or printed binding; the unlined bag I have made has been with a binding color that matches the canvas and seem quite boring in comparison. I love this printed binding next to the polka dot canvas.


I roped one of my favorite people, Inder (Inder Loves Folk Art), into testing the pattern by first asking her to just proofread it, and then repeatedly reassuring her that she could make it quickly and with NO INTERFACING. I love her style, her blog post (read about it here), and her invaluable feedback. Check out the photos on her blog showing the contrast binding she did on the interior of her unlined bag.

Nova Tote

Hilary (Young Texan Mama) used the double star pattern to create a completely different look on Texas A&M bag. Read her blog post here and see all the additions she made and see how wonderfully she quilted the Essex linen.


Sharon (Daisy Cottage Quilting) makes some of the cutest things around. I just love her medium aqua and red Nova Tote! This looks exactly like a bag I would make for myself.


I was very excited for Lisa Chambers  to test my pattern. Her large Nova Tote, using Arizona fabrics, is one of my favorites - from fabric choice to fussy cutting.


I had a few testers offer to test the pattern using other quilt blocks.

Lisa Lake-Johnson aka Lisa Quilts Like a Boss (really she does!) blew me away with her quilting and super smart use of automobile headliner foam (available at Joann's) as stabilizer. I am dying to try this - the quilted texture is great! And I just love her Ferris Wheel Block (also called Country Crown on EQ7) in Cotton + Steel fabrics.


Gabrielle made a bag using Triangle Party block. I lover her color combos and contrasting straps to make the quilt block pop. Gabrielle added lining and pockets on both sides of the interior.


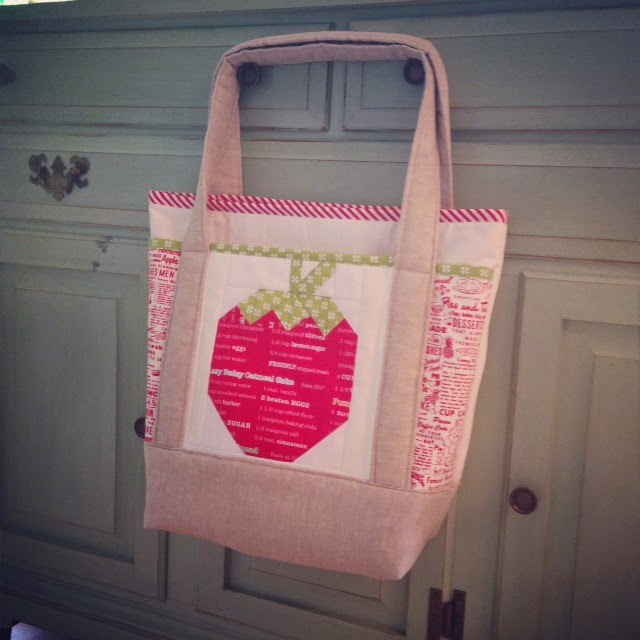
Michelle made the most adorable medium bag with a strawberry block on the pocket:


Abby made not one, but two different bags. I am super excited about the upcycled wool and leather Nova Tote she made:


Thank you to all Nova Tote pattern testers!