Showing posts with label english paper piecing. Show all posts

Tuesday, September 8, 2015

Diamond Star EPP Quilt in Progress


In March I wrapped up a lap size 2" hexie EPP quilt; I am pretty sure I neglected to blog pics of the finished quilt, so maybe I will get around to doing that soon. I felt a bit lost, and so I started sewing some 2" 60 point diamonds in Elea Lutz Milk, Sugar, and Flower. I quickly realized that a mini wasn't going to be big enough to satisfy my enthusiasm, and so I resigned myself to making a twin size quilt for my youngest daughter.

I have a bit over 2/3 of my blocks completed, and almost all of the remaining diamonds cut and/or basted to be sewn. I will wait on the final layout until after I have all of the blocks done. The pic above was hastily laid out to give me an idea of how many more I needed to make.

This will be my biggest hand sewing project to date. I have also really stepped up my fussy cutting game. I usually just kind of approximate my fussy cut pieces for EPP, but that doesn't work as well with diamond stars from the same fabric. It uses so much fabric, but I am having a blast.


This Momo trees diamond may be my favorite ever.


I take my diamonds everywhere, but it is still slow going.


Monday, September 7, 2015

Minis, minis, minis


My sewing space consists of a small corner of our multipurpose game room. Even so, my little corner of mini quilts has been a slow, evolving work in progress. I have a lot of mini quilts from various quilting friends and swaps, and a few minis I have made as well.

A month or so ago, I finally made a little mini I have had on my mind for a long time. I grew up a huge Star Trek fan, especially Next Generation. "Make it Sew" gives a nod to two of my favorite things. I used the foundation paper pieced pattern called My First Alphabet by From Blank Pages. Fabric is a mix of Bonnie and Camille lines on Vintage Modern low volume dots with Tasha Noel Vintage Market navy binding. Let's just pretend that the word "sew" is perfectly centered, or let's call it jaunty.


I originally had it hung in the top left of my sewing corner, but it was too narrow for the space. I decided to move it, and wanted to fill the space left. My quilting friend Ellyn and I decided to do a little mini quilt swap for our respective sewing areas. I was pretty excited about it; Ellyn and I are kindred spirits and I love her work. I was also happy to have a small, short time period swap with no pressure of extras. 

I have been eyeballing CraftyPod's free Cover Girl Rosette Pattern (from the cover of her book on English Paper Piecing called All Points Patchwork). I decided to make four blocks and applique them onto a netural background. Ellyn's only space requirement was to keep the quilt width at 16" or less. To accommodate Ellyn's wall space, I scaled the pattern down to 85%. I am disappointed that I didn't take any decent photos of the blocks as I made them. I didn't set out to fussy cut Bonnie and Camille scallops for each block, but after I did one it just seemed to be the natural progression of things. I love the effect. 


I hand appliqued each block onto a Carolyn Friedlander botanics low volume print. Sorry it is so hard to see in my too-bright pic. Placement of the blocks was interesting. I creased the center and halfway from the center to the edge, measured where each block should be to line up, and then made little dots at where each point should line up with water soluble marker. You can see creases and dots a bit in the pic below. I have no idea if this is a good or goofy way to line it all up, but the end result worked out fine. I tried doing the applique in a hoop, but that mostly annoyed me. I appliqued the last three without a hoop.


I was able to use my new custom rubber stamp on a twill label. 


Ellyn made me an awesome Thimble Blossoms Picadilly Circus dresden plate using Hello Darling (my current fabric line obsession) mini with paper pieced "Create" underneath. I love to have quilty messages on my wall, along with super bright and scrappy fabric. I also requested a bit of an odd size to fit the hole in my space. She nailed it! I love how the orange background makes the dresden plate and "create" pop.


Tuesday, August 4, 2015

The Hexie Box Pattern


Recently, I had the opportunity to test a fun new EPP hand sewing pattern called The Hexie Box by Amber Crawley. Amber asked me to test the large 7" box, and I knew it was the perfect project to use some of my stashed Sweet as Honey fabric.

My eldest daughter said recently that she needs more gold accents in her room, so I made the exterior the gold beehive print. I am pretty excited that I used supplies entirely from my stash, including scrap Peltex (I knew I was saving it for a good reason).


I wouldn't call the large size a quick project. Using Netflix shows as a guide on the time spent to make this box, it took approximately nine hours from start to finish. Bear in mind that I fussy cut all but the exterior side panels. I would have also fussy cut those, but the beehive print is staggered and I couldn't bear to cut holes in a half yard of fabric to make the beehives all match on each side. I feel like the lid side fussy cuts more than make up for that. I also stitched a million tiny whip stitches to make the box extra sturdy. All well worth the effort and time.

The pattern gives basic instructions on how to thread baste the fabric to the interfacing, and mentions glue basting. I usually prefer to thread baste, but on this project I am all about the glue basting. I didn't mess around with a little glue pen, and went straight for the Elmer's glue stick; I used a fair amount of glue. My one tip would be to glue the interfacing and try not to gunk the glue all over where you will be stitching because the resulting stiffness makes it harder to sew through. The patterm also calls for Peltex 71, but I didn't have even a scrap left on hand, so I just used a glue stick to baste the fabric to the Peltex, and heat set it with my iron; it worked perfectly.

I'm ecstatic with the finished project; the design is genius and flawless, and it has a very functional and satisfying sturdiness.

The Hexie Box pattern is now available to purchase on Craftsy.


Thursday, February 12, 2015

Rainbow Hexie Mini and EPP Finishes

Rainbow Hexie Mini - 10" x 12" using 1/2" hexagons 

I posted last month about the rainbow (plus pink) mini quilt I was working on, using 1/2" hexies. I haven't been sewing as much this year as I try to reclaim an organized craft and home space, but I managed to finish the quilt a couple of weeks ago.I am so happy with this little quilt. It finished at approximately 10" x 12", which is the perfect size for the wall in my little sewing corner. 

I taped it up on my wall temporarily, but as of yesterday, it has been removed along with all the other minis while I reconfigure the wall space after adding a fresh coat of paint to the room.

Happy little corner

I dusted off a 36 degree diamond WIP with Lecien Flower Sugar 2013 that had been languishing in my closet drawer for over a year. I was not pleased with my center points (these diamond points are sharp and I tried to be clever when I pieced them - to my detriment), but with the addition of a center circle applique, I found a way to love and finish this project.

I hand appliqued the diamonds to Carolyn Friedlander's Architextures scribble fabric while watching the Super Bowl, straight line quilted, and made a 20" pillow with covered zipper back. It fits in perfectly with the other pillows on the sofa. Stay tuned - there will be many pillows made this year.

Diamond EPP pillow

My final recent EPP finish is a little hexagon heart pillow. I thought this would be a fun way to continue moving through some of the 1/2"hexies I basted from my scraps. I hand appliqued the heart to Riley Blake Le Creme Swiss Dots (one of my favorites!), did some easy straight line quilting, and added a covered zipper back. This little pillow finishes at 10" square.

Quilted Heart Hexagon Pillow

Quilted Heart Hexagon Pillow

Heart Hexies

Pillow back - covered zipper

Well, I suppose I appear to be doing a little sewing lately. I'll have a separate post on a project that took a week or so from quilting...

Tuesday, January 13, 2015

Hexie Works in Progress & Getting Organized

1/2" rainbow hexies in progress

This year, I am committed to organizing my home and fabric stash, and more importantly, staying on top of it. I know there are people who diligently cut scraps into usable pieces and then put them away in color coded bins. I am not one of those people. I fill a waste bin behind my sewing table as I sew, and when it is full, I stuff the fabric into one of many closet drawers designated for scraps, and then I dig through the drawers when I have a project in mind.

Because I like working with little scraps, I have a tendency to save too many little odd bits. Every scrap has potential. I decided to take some of these irregular bits and cut them into 1/2" hexies. At some point I will cut some squares for tiny patchwork, and perhaps make some more 1/4" hexies. It feels pretty good to process the fabric, however, even though I fly through the actual cutting process with my less than scientific method of cutting, it is severely taking away from my actual sewing time.

Cleaning out the scrap bin

Making 1/2" hexies, cleaning out the scrap bin

Of course, I have to have a little hand sewing project going on to keep me motivated, so I started pulling rainbow colors. I wanted to make a little rainbow mini or pillow using fabrics similar to the rainbow sew together bag I made for a friend last year.

Rainbow Hexie Sew Together Bag

I didn't want to do the exact same layout, and I didn't want to spend as much time with gradation of color, but I wanted a similar feel. I did a lot of coloring and decided on this layout. My husband would rather I made a pillow than a mini, so I may add some rows to the side to make it more square, or I may just add a border; we will see. The pic at the top of the post is most likely my final layout - made with minimal fussing; I swapped out a few fabrics that seemed off, but they are most are right where I stuck them out the outset.

Hexie coloring for inspiration

Once I am done with this project, I am back to working on a big hexie project that has been in my closet untouched for months - a lap size quilt with 2" hexies. It is probably 60-70% complete, and most of the hexies I need to finish it are already basted. I worked like a madwoman on this quilt for about five weeks and then had to take a break because my hands were screaming at me. I put it in the closet, and you know, out of sight, out of mind. 

Here is my first progress pic, taken on July 9th.

Airport EPP

Here is my last progress pic, taken on August 7th.

Untitled

Organization is going well. I have all of my strips, strings, selvages, and binding scraps nicely stacked/bagged. I discovered I have enough scrappy trip strips to make a second lap size quilt. I broke down and bought some matching storage shelves for fat quarters and yardage to replace the mishmash storage I had before. I am determined to sew as much of the stash as I need to in order to keep from overflowing these shelves, and to keep returning the fabric to the designated cube when I complete projects.

Getting organized

Finally, I leave you with a meme generated by my daughter to memorialize the night that my husband came home hours earlier than expected and found me sitting on the floor of my closet with all of these fabric in piles around me, folding and sorting my entire stash. Let me tell you, it looks like a lot more fabric when you are sitting in the middle of it on the floor.
Untitled

Wednesday, January 7, 2015

Handmade Stockings

Handmade Christmas stockings - finally.

Handmade stockings

In 2013, it occurred to me that if I wanted to make childhood stockings for my children, as I have always intended to do, that I might want to get moving. After all, my eldest was due to turn 18 years old after the holiday. That was when I realized that her childhood was coming to a close, and her childhood memories were pretty well formed, but this was one last thing I could give her before she became an adult. That summer, fueled by guilt and a deadline, I purchased an 18" Bucilla felt Christmas stocking kit she picked out, and I hand stitched the stocking over the course of a couple of weeks. Several of my friends thought I was a bit nuts to start with my eldest, but they didn't understand that this was the only way it would get done, and I felt that she had earned the privilege to receive one first. 

This project was the first big embroidery project I had ever done, and I learned a lot about how to stitch, but also about the chaos and mess that a project like this brings to the house. First and foremost, I learned that it is best to not dawdle over it; just get it done quickly and say goodbye to the piles of felt, floss, sequins, and beads as soon as possible. 

I love how the stocking turned out, and I love that it matches my daughter perfectly. I substituted the backing felt that came with the kit for a wool/rayon blend, and added a silky lining. The kit does not come with lining, but I think stockings really need it.

Felt Christmas Woodland Snowman Stocking

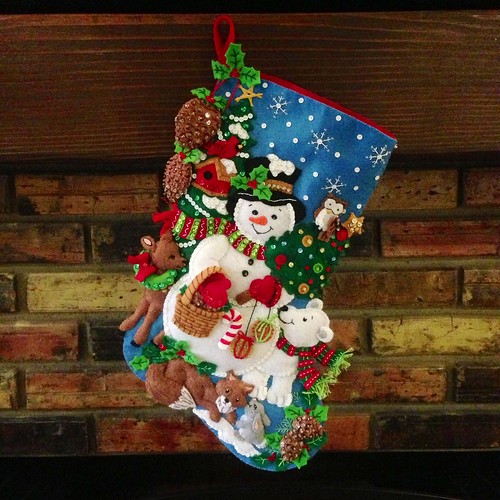
I have two other girls who were eager to have stockings on par with big sister's. Earlier last year, they selected the stocking style they each wanted. I stuck them in a cabinet for months. In July I started feeling guilty and pulled out my now 12 year old's candy snowman stocking. I made a bit of progress on the background and snowman base, but quickly grew bored with the project and shoved it back in the cabinet until early November. My plan was to have both girls' stockings done in 2014, as well as mine, and I was behind schedule. Nothing like a deadline to get you moving.

This past Christmas was my Supernatural Christmas. I stayed up into the wee hours each night watching Sam and Dean fighting supernatural creatures season after season while I stitched stockings for my younger girls and then myself.

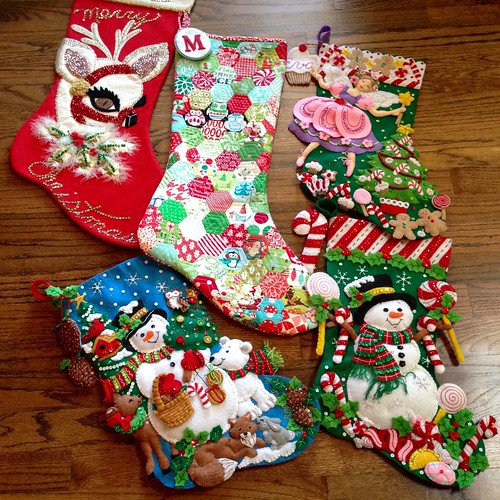
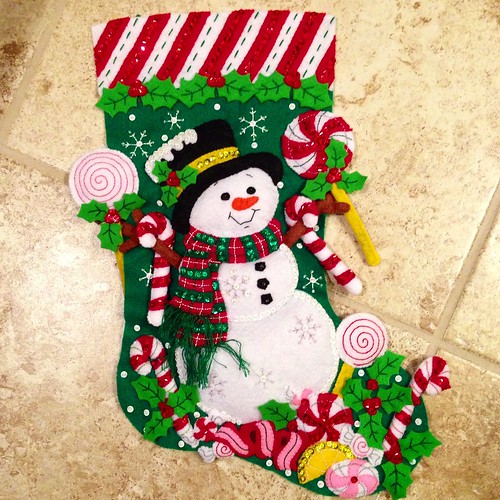
This candy snowman stocking makes me smile; making his scarf almost did me in (so many hours), but it was so worth it. I loved making all the little candy pieces, and it is so appropriate because my 12 year old is the one with a sweet tooth.

Candy snowman stocking

Predictably, my six year old daughter chose the girliest stocking she could find, but I was happy that the sugar plum fairy stocking is not too juvenile and will work for many years. (You may have noticed that they also all chose the most elaborate kits they could find. They think big - like me - and I don't discourage them often.) By this point, I was in full obsessive compulsive Supernatural and stocking mode, and I flew through this one. 12 days of sewing and 1.5 seasons of Supernatural, and it was done. It probably isn't evident in the picture, but the Christmas tree candy cane stripes are all satin stitched. It took forever, and Bucilla (as always) didn't supply near the amount of red floss that was needed for the stocking. They also failed to pack the beads for the tree garland, so I substituted with some beads I found at Michael's. They are larger, but I really like how they turned out. Again, I loved making the candy, especially the swirled felt lollipops and ribbon candy.

Sugar Plum Fairy Felt Stocking

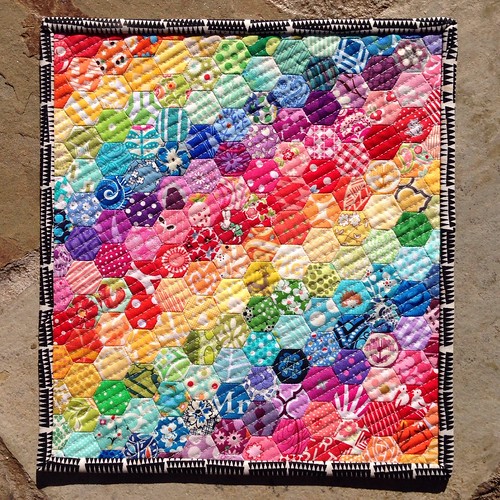
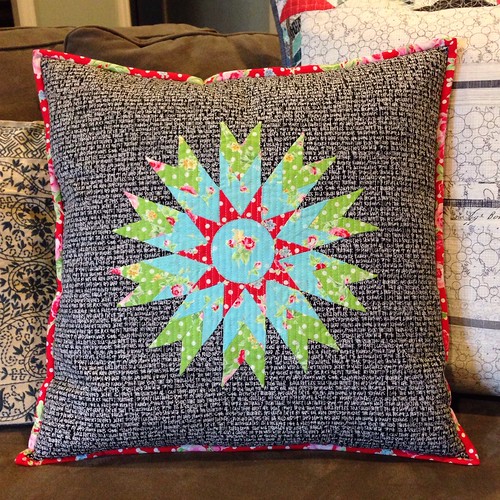
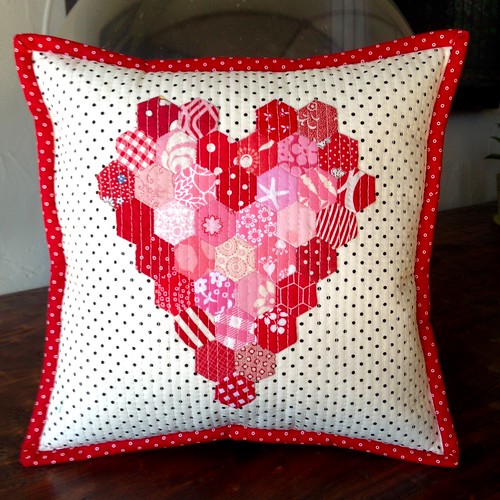
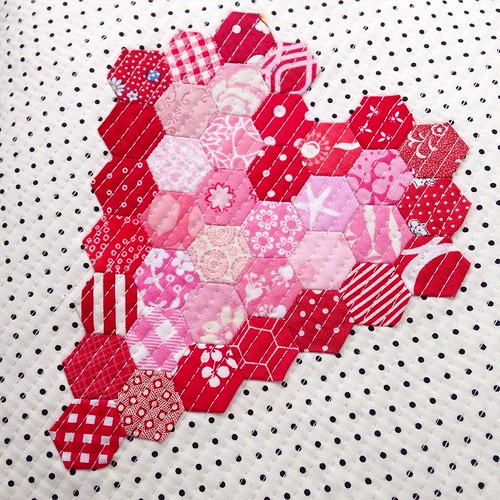
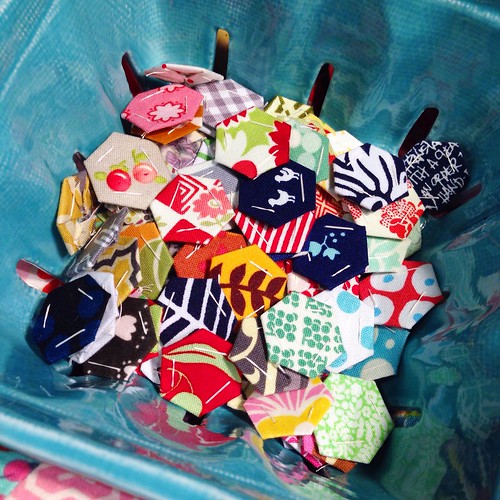
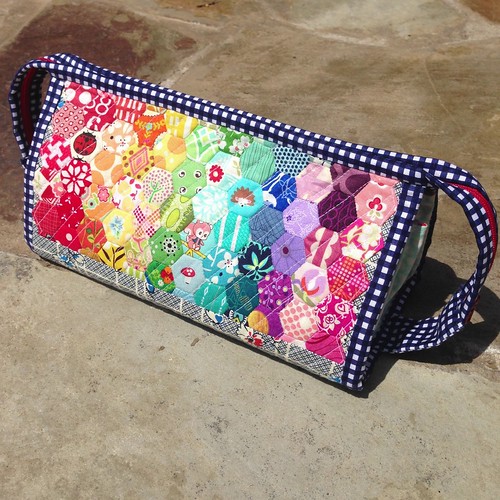
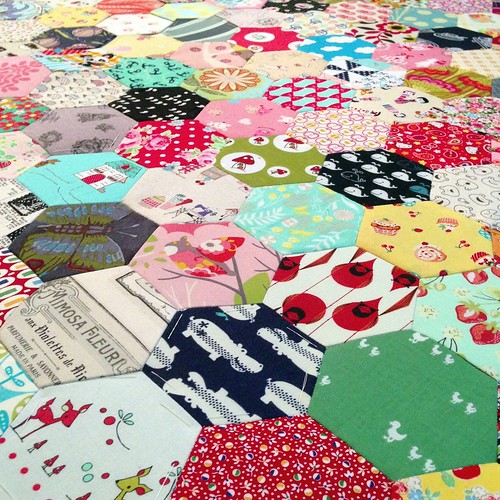
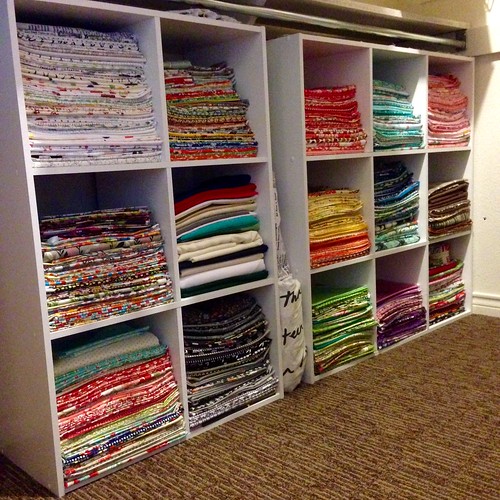
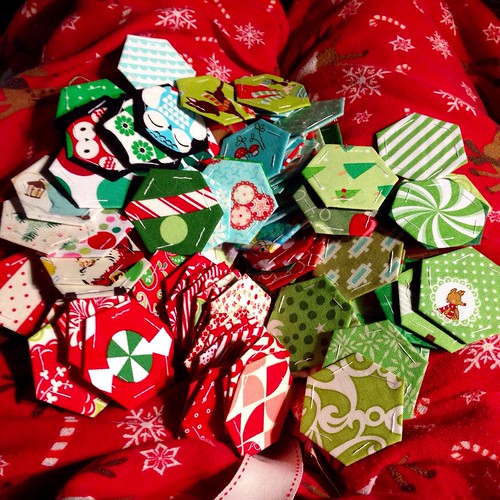
I really didn't have any desire to make an ornate felt stocking for myself. I decided to make what I love most - quilted scrappy English paper pieced hexies. My husband has a lovely handmade felt stocking that his grandmother made for him when he was a child. It is huge, and I love the shape. I used it as a template for my stocking and started digging through my fabric. 

Stocking fabric pull

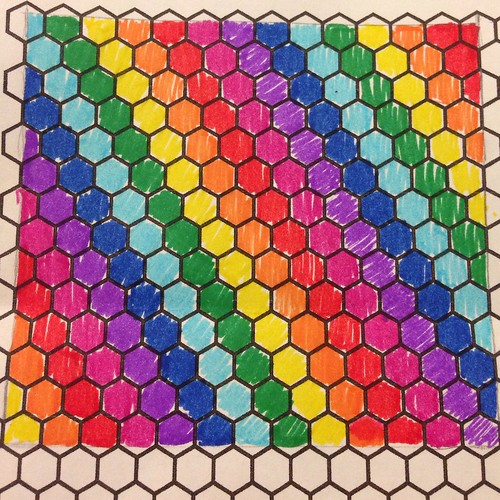
In order to not go crazy making hexies, I traced the outline of the stocking on wax paper and then traced tessellated 1" hexagons onto the paper so I could count how many I needed. I originally planned to add a white cuff to the top with my name, but I was so sad that I only needed 100 or so 1" hexagons and I didn't want to reduce that number to account for the cuff. Making it larger was also out of the question, as I didn't want it hanging in the fireplace.

Basted hexies for my Christmas stocking

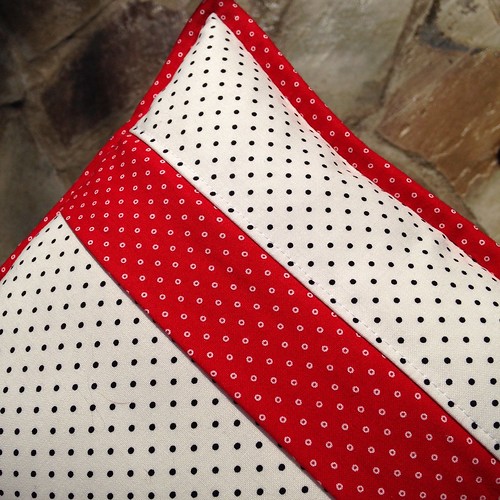
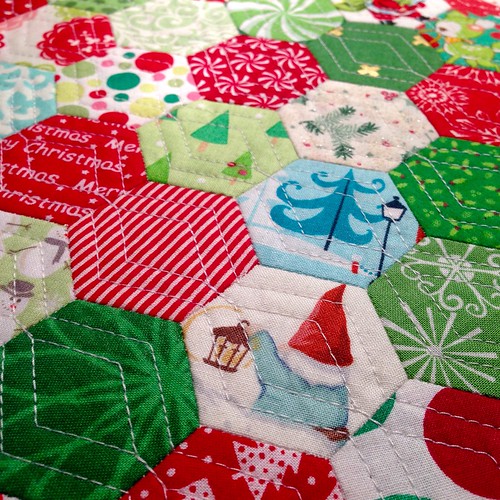
This stocking went by so fast, and I am in love with everything about it - the fabric, the shape, the quilting. It pained me to pack it away after Christmas, and I already can't wait to see it again later this year. The backing, binding, and hanger fabric is a snowflake print from Kate Spain's line In From the Cold. The lining is a solid pale aqua.

Hexie stocking quilting detail 

Quilted hexie Christmas stocking

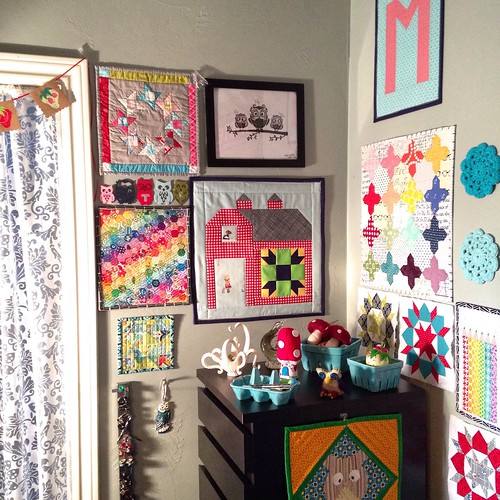
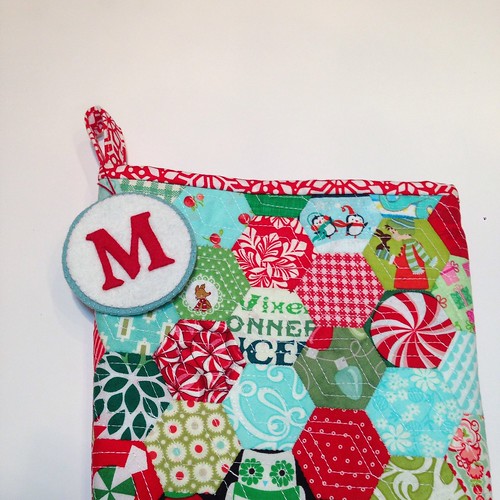
After Christmas, I sat down and made myself a simple monogrammed felt stocking hanger.

Monogram name tag

Finally, each family member has a handmade stocking. Next Christmas, the sewing will be more relaxed, but not nearly as epic.