Wednesday, July 30, 2014

Confessions of a Sew Together Bag Lady

Sew Together Bag Collage

I have had several people ask me about how I construct the Sew Together Bags I make, particularly the binding method I use. I'll post a bit about how to hand bind around the zipper, and a few pics of the bags I have made to date.

My preference for interfacing bags is Pellon SF101 Shape-Flex. It fuses nicely and keeps the fabric soft and pliable. I have added interfacing to the back of the main panel twice, once to help stabilize hand pieced hexagons, and once to quick piece tiny patchwork squares. On those panels I used Pellon 906F fusible sheerweight interfacing to keep them from getting too bulky.

Each bag I have made to date has been quilted. I used fusible fleece behind the floral kitty bag, and I was not happy with how the shape warped when it was quilted. In the future I will stick to using quilt batting unless I leave the exterior unquilted.

I like to hand bind the bags with a ladder stitch for a cleaner look. It does take a bit longer, but it is so worth it. The only tricky piece to bind is the free zipper portion if you are using a thread color that does not match the zipper tape, because the stitches can be visible on the top of the zipper tape. To remedy this, I fold the binding to the underside, just over the stitching line, and rather than sewing through the folded edge of the binding, I grab some fabric just to the underside of the fold. When I take the stitch into the zipper tape, I make sure to sew behind the stitching line where the zipper tape is covered by the top side of the binding. It is a bit confusing to explain, but hopefully this pic will help:


And now on to the retrospective pics.

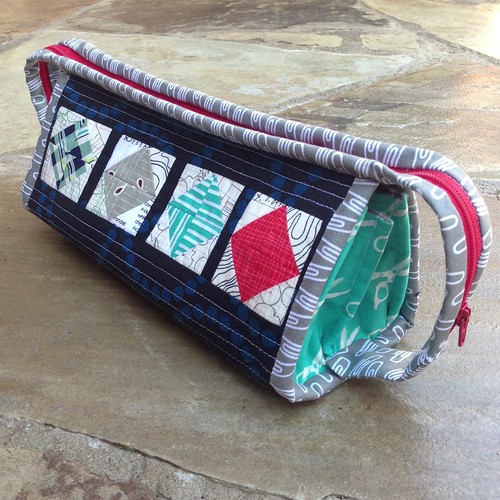
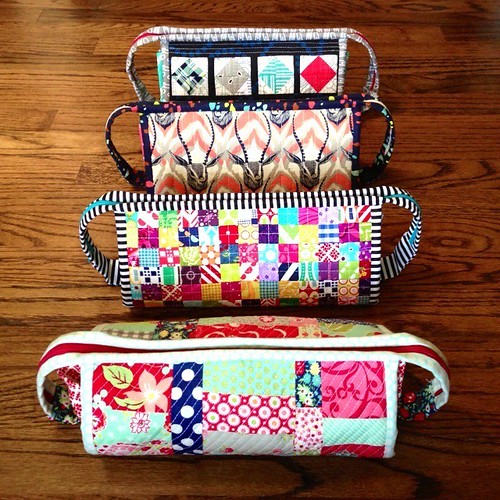
My first bag I made for myself using 1" HSTs.

                   Sew Together Bag

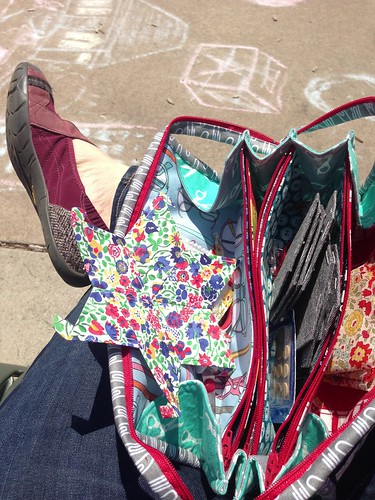
My bag gets heavy use and has been covered in coffee and tea (I am glad I opted to use a dark background fabric!)

                                  Springtime EPP at the park

Not all of my bags have been used for sewing; my daughter uses her Bonnie and Camille QAYG bag for makeup.

                Sew Together Bag - Bonnie and Camille fabrics

                Untitled

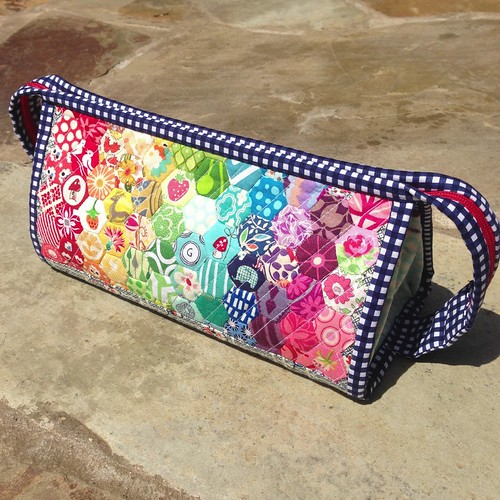
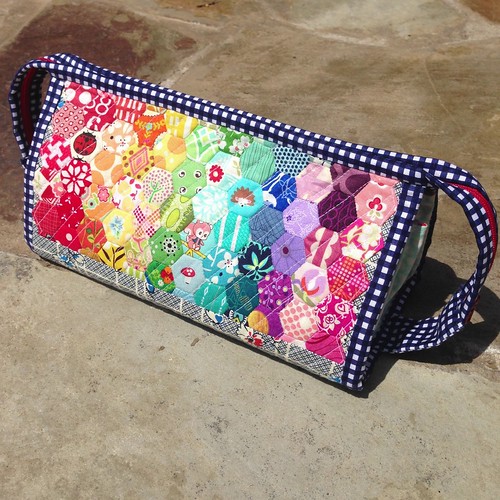
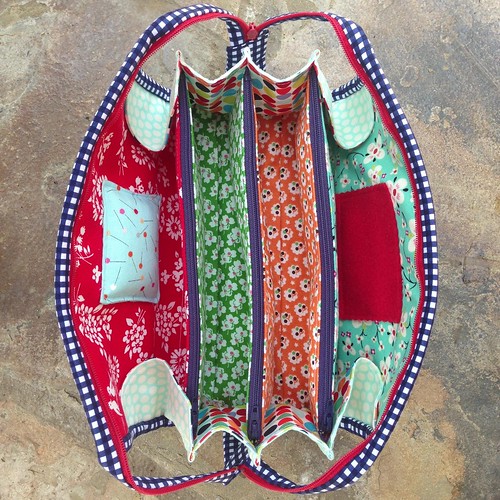
One of my all time favorite creations was a rainbow hexie bag I made for my friend Gwen. I love everything about this bag, including the interior.

                 Rainbow Hexie Sew Together Bag

                 Rainbow Hexie Sew Together Bag

                 Bonnie and Camille bliss dots with Riley Blake gingham - love!

                 Rainbow hexie sew together bag interior

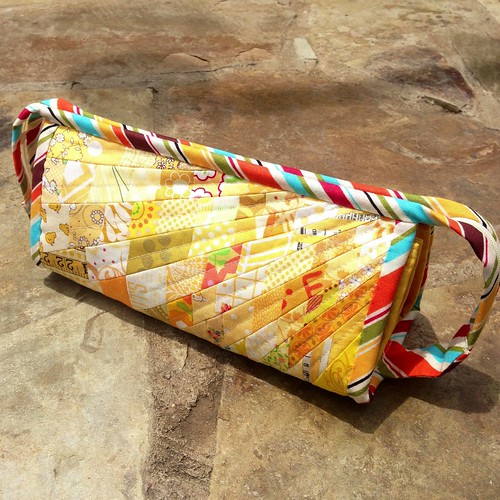
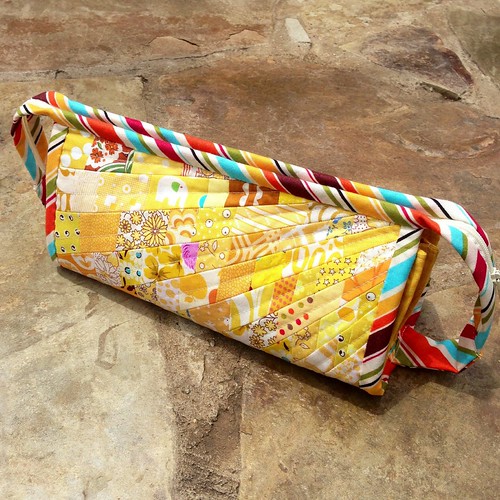
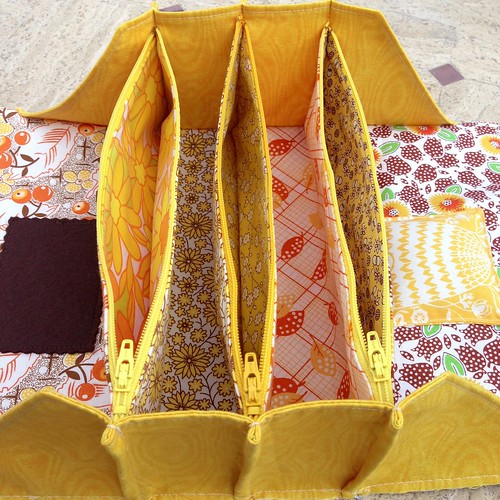
I made a glorious yellow bag for my friend Inder of Inder Loves Folk Art. We share a love of gold, mustard, and groovy things in general. I drafted a panel in EQ7 to paper piece sunbeams and I am in love with the result. It is so very Inder. A very big thanks to my friend Gwen who sent me yellow scraps so I could have a large variety.

                Sew Together Bag #5 - sunshine edition

                Sew Together Bag #5 - sunshine edition

                Sew Together Bag #5 - sunshine edition - interior

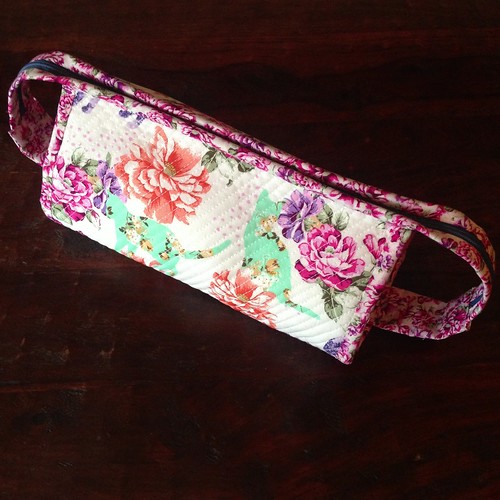
The most basic bag I have made is the floral kitties bag for a dear friend. She picked the fabric and the layout. These kitties are so cute!

               Sew Together Bag - Floral Kitties Edition

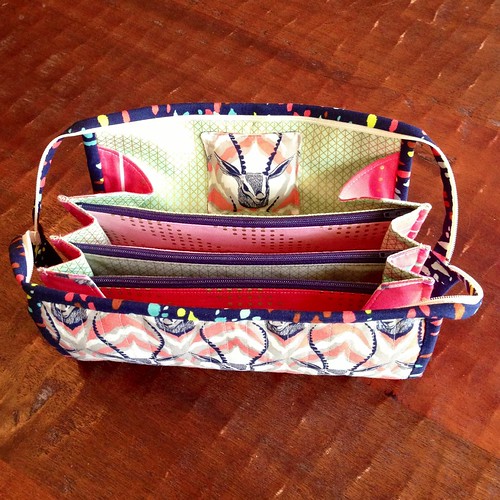
Cotton + Steel Sew Together bag with August gazelles exterior

               Cotton + Steel Gazelle Sew Together Bag

               Cotton + Steel Gazelle Sew Together Bag

               Four of seven sew together bags

Tuesday, July 29, 2014

Fast and easy tiny patchwork Sew Together Bag


I keep saying that I am done making the Sew Together Bag, but it is a hopelessly addictive pattern - not only for me, but my friends and family. As soon as someone sees the bag, they want one - and so I keep making them. This bag is my sixth bag, and though it has a detailed exterior, it is one of the fastest exteriors I have pieced because I used precuts and cheated a little on the piecing process. I'll detail my method here for anyone looking to make a fun, scrappy patchwork exterior.

I originally set out to make this bag a very simple patchwork with minimal piecing, as I needed to have it done quickly. As I started digging through my mini charm shoe box, I remembered trying piecing with fusible interfacing on a patchwork project when I first started quilting. Normally I would rather just chain piece, but I needed fast and these are little pieces.  Previously I used the fusible 1" grid from Joann's, but I remembered seeing a tutorial on Sew Mama Sew to draw your own grid on plain lightweight fusible interfacing. That method works best for the sizes of the squares in this project, and I happen to have a bolt of sheerweight interfacing on hand.

Materials used:
59 assorted mini charms (or any other 2.5" squares)
Pellon 906F fusible sheerweight interfacing 16.25" x 22.5"
the usual quilting supplies

From your 59 mini charms, subcut each charm into four 1.25" squares = 236 squares. You will have two more than you need. I was not overly concerned with extreme precision and stacked four or five charms together at a time. When you are done, you will have a pretty stack of tiny squares.


On your interfacing, draw 1.25" grids as detailed in the tutorial linked above. You should have 13 squares across x 18 squares down.


I won't detail all of the assembly instructions, as the tutorial I linked is comprehensive. The process moves quickly...unless you have a five year old helper and all of the fabric is not even remotely in the lines. Another word of advice with so many tiny squares - it was easier for me to line up a row or two at a time, fuse, then line up the next row or two at a time, fuse, until all rows are fused (also perhaps a byproduct of my five year old helper). They will look something like this after fusing - it is not completely perfect along the edges, and it doesn't need to be; it will be trimmed a bit to fit the pattern dimensions.


Sew your rows and columns and press the seams open. Pressing the seams is a bit of a chore - there are a lot of them and they are a bit more resistant to laying flat than plain quilting cotton or larger squares. I opted to then add batting and quilt the panel. Your panel will be 10.25" x 14". After assembling my interior panel, I only needed to trim off 1/4" from each side; the length seemed to work well with the interior panel, which is usually (in my experience) a bit longer than the exterior panel.

Attach your bag pieces, add your binding, and behold your scrappy bag:


My little helper, E, took some photos as well, complete with the customary finger across the lens:


Friday, July 25, 2014

First Blog Post -- Free Paper Pieced Whale Pattern

Though I am fairly active on Instagram and Flickr, this is my first attempt at blogging and my very first blog post. I have considered blogging when I have something more in depth to share, but it is a bit daunting as there is a learning process (meaning I am not really technologically savvy) and I tend to spend most of my discretionary time quilting or planning to quilt. However, it would be nice to keep track of some of my projects for future reference, so I am taking the plunge. My blogging will be a bit rough around the edges as I learn to navigate this new world, so bear with me!

First, I'll share my most recent finish - I made a nautical themed version of Grainline Studios Lakeside Pajamas for my oldest daughter. I used a combination of voile and lawn fabric with paper pieced blocks. It is fully lined to reduce sheerness and cover the quilt piecing on the back. I also added a small amount of interfacing behind the quilt blocks to prevent fraying over time. I used prepackaged binding, but I think making my own would have resulted in a softer finish.


I looked at several different patterns for the blocks and ended up merging some different anchor details into a paper pieced pattern I drafted, as well as drafting a paper pieced whale. 


For a fun detail on the back, I added an anchor to the top.


I am quite happy that it turned out as I envisioned - this is the first time I have added paper pieced quilt blocks to a garment, and with the added challenge of angled seams.


And now for the fun part. I am offering the little paper pieced whale pattern I drafted for free on Craftsy. It measures 5" x 6" finished, but can be easily enlarged or reduced to customize the size.