Showing posts with label kids. Show all posts

Friday, March 20, 2015

Rainbow Meadow Mini Quilt + Giveaway


I am excited to participate in the Shabby Fabric 2015 Blogger Challenge. This blogger challenge highlights the versatility of the pre-fused laser cut Shabby Shapes. You can see the whole selection of available shapes here. For my mini quilt, I selected a set of small 2" butterfly prints and a set of small pindot tulips. I've included instructions with how I made this mini quilt, but it is really more of an improve piece.


Rainbow Meadow Mini Quilt
Finished Size: 20" x 20"

Materials:
6 Shabby Shapes pre-fused laser cut small tulips
Shabby Shapes pre-fused laser cut leaves and stems for 6 tulips (12 leaves and 6 stems)
9-12 Shappy shapes pre-fused laser cut small butterflies (or 6 small and 3 medium butterflies)
1 fat quarter (18" x 21") of background sky fabric
1 strip of 3.5" x 21" green grass fabric
Assorted 1.5" wide strips of rainbow color fabric
Approximately 6.5" square of yellow/orange fabric for sun
23" square of quilt batting
23" square quilt backing fabric
(2) width of fabric strips cut 2.25" (or preferred width) for binding

Mini Quilt Assembly & Finishing:
The layout of this mini quilt is a simple process, less about precision and more about fun. Square up the background sky fabric; orient it so that it is 18" vertically and 21" horizontally. Lay the various components out on top of the background fabric. Trim tulip stems to approximately 3" tall. Align the tulip stems along the bottom edge of the background fabric. Once satisfied with the placement, peel the paper backing off of each pre-fused shape and fuse them in place with an iron. So easy! Attach grass fabric strip to bottom of background fabric with 1/4" seam allowance. If you are concerned about placement of the tulip leaves to prevent them getting stitched in the seam allowance, you may fuse those after adding the grass fabric; I fused them in place 3/8" from the bottom edge of the background fabric prior to adding the grass strip.


I whip stitched by hand around each shape, but machine sewing works great as well. 


To make the sun shape, use a large bowl turned upside and move it around on the corner of the background fabric until you find a size that you like. Trace the shape on freezer paper, cut it out, and iron the freezer paper on to the back of the sun fabric. Add a 1/4" seam allowance, cut the fabric, and press the seam allowance to the wrong size of the fabric. Alternatively, you may leave the edges raw if you prefer. Use pins or water soluble glue to hold in place to applique.


For the rainbow - I laid out my 1.5" strips, using lengths in each color corresponding with lengths needed to extend from one edge to the next and estimated by laying them on the background fabric, but longer strips can be pieced together and then cut down. Once the rainbow strips are pieced, lay in place face down on the mini quilt top and stitch the violet strip in place with a 1/4" seam allowance. Turn under 1/4" seam allowance on the red strip, flip the rainbow right side up and sew in place on the upper right hand corner of the mini.


Once you have all of your shapes appliqued down, baste your quilt sandwich, quilt, and bind as desired.

I gave hand quilting a try on this mini. This is the largest project I have ever hand quilted, and it is not easy for me to master the quilting needle rocking motion. It looks kind of cute, but it's not as flat as I would like; maybe I'll use a hoop next time. More practice is needed.


Giveaway

Now for the fun part! Shabby Fabrics has graciously given each blogger a set of pre-fused laser cut shapes to give away. To win a set of these small 2" tulips in pindots, please leave a comment below (be sure to leave an email). Contest closes Tuesday March 24, 2015 and is open to international entries. Contest winner will be notified via email.


Be sure to check out all the other great bloggers who are participating in this blog challenge.


Wednesday, January 28, 2015

Tooth Fairy Pillow Pattern


People sometimes say that the youngest child is the one to get all the hand me downs and to have the baby book without any entries. With the big age gap between my children, that isn't really the case for our family. I sew a lot more than I did when my older girls were younger, and I am now a stay at home mom with all the kids in school (the oldest is in college). This means that everyone has more handmade by mom, and that we finally have a tooth fairy pillow in the house rather than a little plastic Barbie present box. My 12 year old has one tooth left to lose, so she will get to use it one time. My six year old has four loose teeth, so she will likely get to use it very soon.

I sent a friend of mine the tooth template I made as well as my construction notes, but I thought I would share them here for anyone else interested in making one. This isn't a full tutorial, so basic sewing and embroidery skills are necessary to make it. My daughter, E, insisted that she needed a zipper pocket on her pillow (although I guess this is more of a pouch since I didn't stuff it...). I liked the idea of a front pocket, so we ended up with both - a front slip pocket and a back zip pocket.


Materials:

Exterior: 
(2) 5" squares of fabric
(2) 5" fusible interfacing or fusible fleece

Front Pocket:
(2) 3" x 3.5" rectangles of fabric
(1) 3" x 3.5" rectangle of fusible fleece (I used Pellon Shape Flex SF 101)
Fuse one pocket panel

Tooth applique: Approximately 2.5" square of white felt
DOWNLOAD PATTERN PIECE HERE - print at 100%
Embroidery floss: I used two strands of dark brown to embroider face details

Lace Trim (optional): approximately 23"

Ribbon hanger: 11" of 3/8" wide grosgrain (adjust length and type of ribbon as desired)

Back Zip Pocket (optional):
(2) 2.75" tall x 3.5" wide pocket lining pieces
(1) 2.75" x 3.5" fusible interfacing
(1) 2" x " 3.5" fusible interfacing
4" zipper (trim down zipper stop end to make zipper tape 3.5" wide total)
Interface the zipper lining side that will be attached to exterior and have zipper. Add the second strip of 2" x 3.5" of interfacing to the top of the same lining piece

Instructions:

Tooth:
Use tooth pattern piece to cut wool felt.
Embroider face detail onto wool felt

Front Pocket:
Center tooth on interfaced pocket piece
Applique in place
Add optional trim at the top, folding down the trim to the inside
Place both pocket pieces right sides together and sew with 1/4" seam allowance, leaving a space at the bottom to turn
Trim pocket corners
Turn right side out and press well
Center on front 5" exterior piece and topstitch in place

Optional Back Zip Pocket:
I am not including instructions for how to make an inset zipper as there are many tutorials out there. U-Handbag inset zipper tutorial has a good tutorial.
On the double interfaced piece, 1/2" from the top, draw the zipper placement box making sure to center on the pocket lining fabric
Attach the pocket lining fabric to the 5" back exterior panel 1/2" from the top edge, matching center of lining to center to exterior.
Follow tutorial instructions to make lining.
Add zipper.

Ribbon Hanger:
Baste ribbon hanger in place on front exterior panel. I lined my ribbon up with the outside front pocket edges.
Make sure to baste match the raw ends of the ribbon to the raw edge of the exterior piece, just as you would a bag handle.

Optional Lace Trim:
I don't actually measure the lace before attaching, I just take a longer piece and work my way around and then trim the excess. Turn lace edge under twice on the end to enclose raw edge. Pin and baste lace trim in place around front exterior panel, with the lace facing in, matching the raw edge of the exterior fabric to the gathered (non lacy) side of the lace trim.

The Pillow:
With right sides together, stitch the two exterior panels together, leaving an opening at the bottom to turn. Use the basting stitch on the seam as a guide for seam allowance. The lace I used needed a 3/8" seam allowance to cover the edge all the way. Go slowly and make sure not to catch the ruffled side of the lace in the seam allowance.
Trim corners.
Turn and press well.
Stuff if desired.
Close pillow opening with ladder stitch.


I meant to take a nice photo of E holding the little pillow for scale, but apparently the only time I think of such things is after I drop her off at school and her college age sister, R, is about to run out the door for class. So this morning, I grabbed R on her way out and asked her to pose. Rather than highlighting the sweetness of my little one, this pic managed to highlight the different ages and stages from oldest to youngest in our family. :)


Monday, November 10, 2014

All the Fall Things

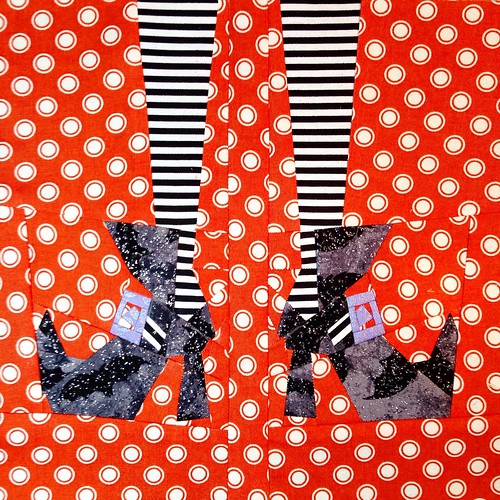
Trillium Designs Witchy Toes
One would think that being a quilter and crafter would mean a house full of handmade autumn decor and accessories, but my house is actually lacking. Most of my fall sewing revolves around making costumes my children wear for a maximum of three hours, dump into the dress up drawer, and promptly outgrow. When my now-12-year-old was one year old, she had a handmade sheep costume, complete with a fleecy hat that had ears and a chin strap. It turned out to be the hottest Halloween I can remember, so she didn't wear it. I never even took a picture of it. Ok, ok, I live in Texas and I knew it was a weather gamble.

I have dialed back on handmade costumes, but all the time I spend on Instagram watching creativity happen has had me itching to make some fun fall and Halloween items that can be used year after year. I resisted as long as I could because we are overflowing with holiday storage in the attic, but I can't help myself with the super adorable fabric lines like Spooktacular Too taunting me.

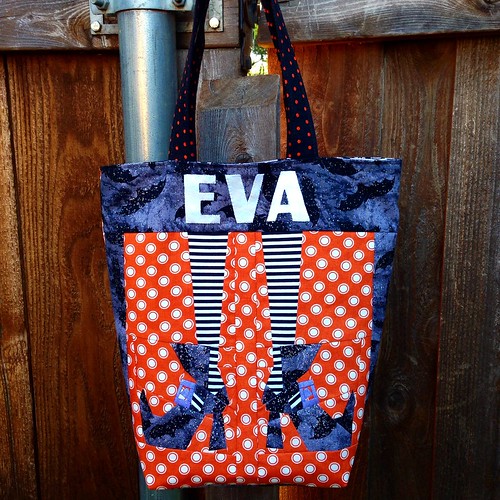
I saw my friend Gwen's version of Trillium Designs Witchy Toes, and I knew I had to make them! I have sewn quite a few paper pieced blocks and yet I was somehow surprised by the number of sections in this block. It took quite some time to label the pieces and piece them. I thought I might save some time by using striped fabric rather than piecing them. Ha ha. I didn't account for the time it would take to carefully line up my stripes because there are three seams on each side. I will say that I am so, so happy with how they lined up so nicely  - well worth the effort, but if I make this block again I will be sure to piece the stripes!

I really struggled with the back part of the shoes, particularly on the right side. I ripped that side and re-sewed once, but it still didn't line up properly. (watching The Vampire Diaries while I pieced probably didn't help matters) At that point, I reminded myself I was sewing a trick or treat bag for my six year old; she won't care! And is is still super cute. 

My 18 year old daughter helped me select the fabrics for the bag; she has such a good eye for mixing colors and prints. Eva picked the fabric to applique her name - Michael Miller mirror ball dots. The handle fabric, the DS Quilts orange dots, and the glittery bats fabric are all from Joann. The stripes are from Timeless Treasures and the buckle is purple MM mirror ball dots.

Witch Toes Halloween Trick or Treat Bag

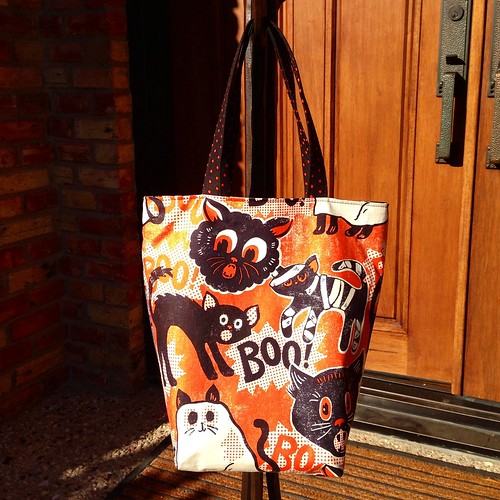
This back of the trick or treat bag is Spooktacular Too Scaredy Cat. This fabric is my new Halloween obsession. I love, love, love the vintage feel to it and I want to sew everything using it. It is a large scale print, and I chose the bag dimension to fit every cat on the bag.

halloween trick or treat bag

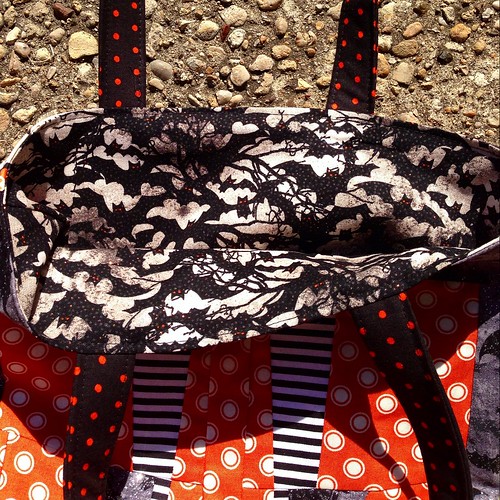
To add a little bling to the inside of the bag, I used a glittery bat fabric I found at Joann. It's super cute!

Halloween trick or treat bag lining

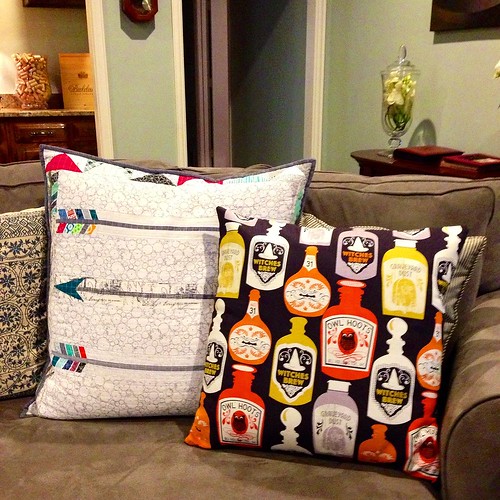
Continuing the Halloween theme, I made a quick bottom zipped pillow cover. Rather than remove existing pillow covers from pillows on the sofas, I used one of the less attractive pillows that matches the sofa upholstery. The bottle fabric is my other favorite Spooktaculer Too fabric.

First Halloween pillow finish

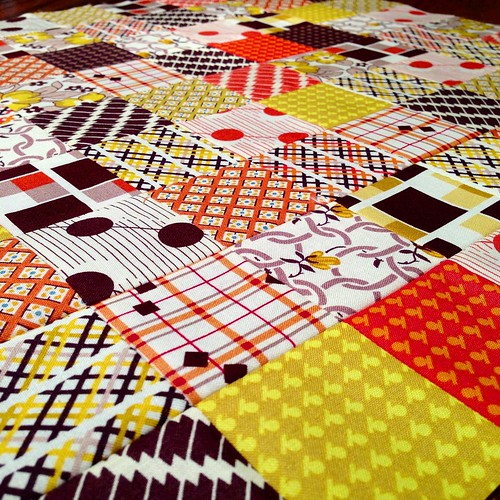
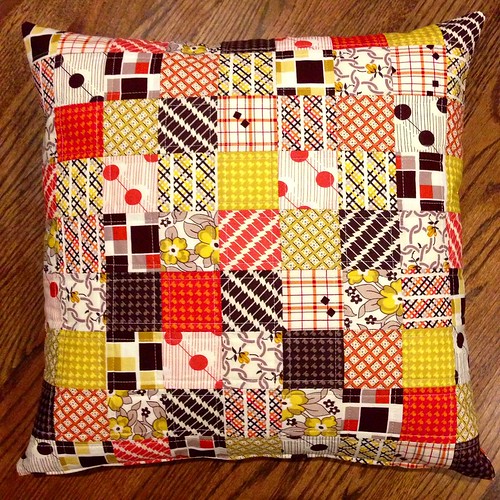
I'd like to have an autumnal pillow on the sofa through Thanksgiving, so I cut into my precious Hadley fabric by Denyse Schmidt. Removing the blues from the bundle give this line a decidedly autumnal feel. This is the fastest pieced pillow I have ever made. I stacked my fat quarters four at a time, cut strips, and then subcut into 2.5" squares also stacked in groups of four. I tried not to get overly worked up about precise cutting and matching seams as I was cramming this project in between party preparation activities, but I was pleasantly surprised with the outcome.

Hadley patchwork

Denyse Schmidt Hadley autumn patchwork pillow top

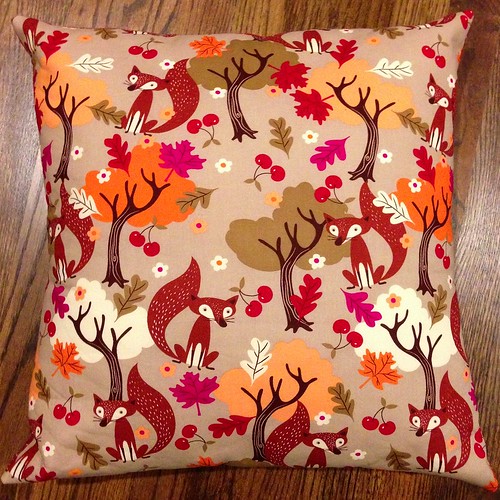
Once I added two pillows to the sofa, I decided we needed a couple more - for a total of two Halloween pillows and two general autumn pillows. A cute foxy print from Joann Fabric and more Spooktacular cats.

Foxy pillow

                   Spooktacular cat pillow 

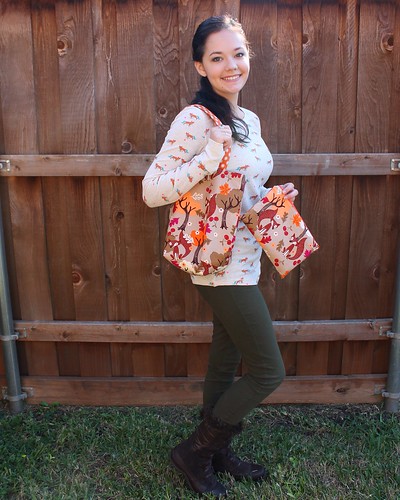
My daughter fell in love with the fox print fabric and made herself a little tote bag and pencil pouch.

Little fox tote bag and pencil pouch

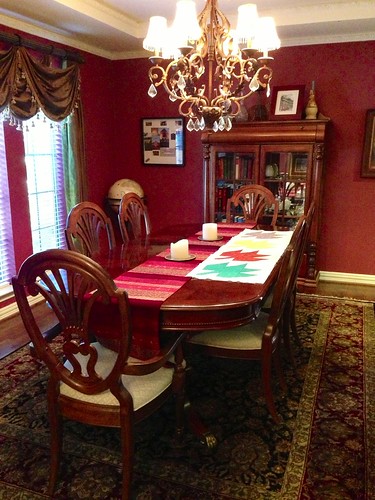
I have been dying to make a modern maples quilt, but with so many projects I thought maybe a table runner for my formal dining room would be a better project. I absolutely love my blocks, but my background fabric is too white for the rich tones of my dining room. I think I need to seam rip and make something else out of my four blocks, but I have since moved on to Christmas sewing and my modern maples are folded in a closet.

Modern maples top

Untitled

Monday, October 13, 2014

Scrappy Patchwork Lanyards and Key Fobs


My second daughter is in sixth grade this year and is now required to wear an ID badge on a lanyard. I decided to make her a scrappy lanyard. I looked around on the internet to find a basic lanyard tutorial, and I really like construction method used in Ellison Lane's tutorial. I made a couple of adjustments (for length and scrappiness), but my hardware is attached using the tutorial method.

I pulled out a few scrap bins and had my daughter dig through to find fabric for her lanyard. (Our doodle wanted to be part of the process.)


She selected so many fabrics that I made a super scrappy lanyard. I cut (36) 1.5" tall x 2.5" wide strips. I chain pieced, added interfacing to the back. To attach the hardware, press down the center lengthwise, open and press the outside edges in to the center crease, as in bag strap construction. Slide the lanyard hardware on, attach the two ends of the fabric together with 1/4" seam, and topstitch both sides, moving the lanyard hardware out of the way as you stitch. Then stitch the hardware in place.

I also made her a 1.25" scrappy key fob using (10) 1.5" tall x 5" wide strips. I now know I prefer a bit narrower key fob and have subsequently made 1" key fobs using (10) 1.5" tall x 4" wide strips. I added interfacing, pressed in the same manner as the lanyards, topstitched, and added key fob hardware. For some of the key fobs I have made subsequently, I substituted interfacing with with 1" cotton webbing inserted after pressing, just prior to topstitching, and I prefer the feel of the webbing. To attach the hardware, I used the instructions in The Liberty Craft Blog post for key fobs

I love how her lanyard and key fob turned out!


I had so much fun making them that I decided to make some for birthday party favors for her friends in colors to suit each of their color and style preferences. I didn't want to make them quite as scrappy, and used 18 fabrics for each. I played around with some different piecing methods to quick piece using precuts and to make multiple lanyards at one time.


Mini charm lanyards
One lanyard uses (18) 2.5" mini charm squares. One mini charm pack will make two lanyards. Piece end to end, press seams, add interfacing.

Charm square lanyards
Four lanyards:
Cut 18 charm squares into two 2.5" tall x 5" wide strips to make two sets
Strip piece each set of 18, press seams, add interfacing, and cut each set in half lengthwise to make two lanyards.


Two lanyards without waste:
Cut 9 charm squares into two 2.5" tall x 5" wide strips and use each print twice for each lanyard.

One charm pack makes eight lanyards.


Making multiple lanyards using larger cuts of fabric

Super scrappy with (36) 1" finished strips
Cut (36) 1.5" tall fabrics x  multiples of 2.5" for the number of lanyards you want to make.
        ex: three lanyards = (36) 1.5" tall x 7.5" wide
Strip piece, add interfacing, subcut lengthwise into 2.5" wide strips for each lanyard.

Scrappy with (18) 2" finished strips
Cut (18) 2.5" tall x multiples of 2.5" for the number of lanyards you want to make.
       ex: four lanyards = (18) 2.5" tall x 10" wide
Strip piece, add interfacing, subcut lengthwise into 2.5" wide strips for each lanyard.

Scrappy with (9) 4" finished strips
Cut (9) 2.5" tall x multiples of 2.5" for the number of lanyards you want to make.
      ex: two lanyards = 4.5" tall x 5" wide
Strip piece, add interfacing, subcut lengthwise into 2.5" wide strips for each lanyard.

A friend of mine also asked me if I could make a shorter lanyard for her son, who uses them for his keys. The finished length is half as long as the regular lanyards - 12" long x 5/8" wide. I used
(24) 1.5" tall x 2.5" wide strips.


Making multiple 1" key fobs

Super scrappy with (10) 1" finished strips
Cut (10) 1.5" tall x  multiples of 4" for the number of key fobs you want to make.
        ex: four key fobs = 1.5" x 16" wide
Strip piece, add interfacing, subcut lengthwise into 4" wide strips for each key fob.
Alternatively, strip piece, subcut in 4" side strips for each key fob, press, insert webbing prior to topstitching.

Scrappy with (5) 2.5" finished strips 
Cut (5) 2.5" tall x multiples of 4" for the number of key fobs you want to make.
       ex: two key fobs = 2.5" tall x 8" wide
Strip piece, add interfacing, subcut lengthwise into 4" wide strips for each key fob.
Alternatively, strip piece, subcut in 4" side strips for each key fob, press, insert webbing prior to topstitching.

Single fabrics
Cut one fabric 10.5" tall x multiples of 4" for the number of key fobs you want to make.
      ex: three key fobs = 10.5" tall x 12" wide
Strip piece, add interfacing, subcut lengthwise into 4" wide strips for each key fob.
Alternatively, strip piece, subcut in 4" side strips for each key fob, press, insert webbing prior to topstitching.

Once I started making lanyards and key fobs, I had a hard time stopping! I have made several for gifts and have extra on top of that.