Wednesday, January 28, 2015

Tooth Fairy Pillow Pattern


People sometimes say that the youngest child is the one to get all the hand me downs and to have the baby book without any entries. With the big age gap between my children, that isn't really the case for our family. I sew a lot more than I did when my older girls were younger, and I am now a stay at home mom with all the kids in school (the oldest is in college). This means that everyone has more handmade by mom, and that we finally have a tooth fairy pillow in the house rather than a little plastic Barbie present box. My 12 year old has one tooth left to lose, so she will get to use it one time. My six year old has four loose teeth, so she will likely get to use it very soon.

I sent a friend of mine the tooth template I made as well as my construction notes, but I thought I would share them here for anyone else interested in making one. This isn't a full tutorial, so basic sewing and embroidery skills are necessary to make it. My daughter, E, insisted that she needed a zipper pocket on her pillow (although I guess this is more of a pouch since I didn't stuff it...). I liked the idea of a front pocket, so we ended up with both - a front slip pocket and a back zip pocket.


Materials:

Exterior: 
(2) 5" squares of fabric
(2) 5" fusible interfacing or fusible fleece

Front Pocket:
(2) 3" x 3.5" rectangles of fabric
(1) 3" x 3.5" rectangle of fusible fleece (I used Pellon Shape Flex SF 101)
Fuse one pocket panel

Tooth applique: Approximately 2.5" square of white felt
DOWNLOAD PATTERN PIECE HERE - print at 100%
Embroidery floss: I used two strands of dark brown to embroider face details

Lace Trim (optional): approximately 23"

Ribbon hanger: 11" of 3/8" wide grosgrain (adjust length and type of ribbon as desired)

Back Zip Pocket (optional):
(2) 2.75" tall x 3.5" wide pocket lining pieces
(1) 2.75" x 3.5" fusible interfacing
(1) 2" x " 3.5" fusible interfacing
4" zipper (trim down zipper stop end to make zipper tape 3.5" wide total)
Interface the zipper lining side that will be attached to exterior and have zipper. Add the second strip of 2" x 3.5" of interfacing to the top of the same lining piece

Instructions:

Tooth:
Use tooth pattern piece to cut wool felt.
Embroider face detail onto wool felt

Front Pocket:
Center tooth on interfaced pocket piece
Applique in place
Add optional trim at the top, folding down the trim to the inside
Place both pocket pieces right sides together and sew with 1/4" seam allowance, leaving a space at the bottom to turn
Trim pocket corners
Turn right side out and press well
Center on front 5" exterior piece and topstitch in place

Optional Back Zip Pocket:
I am not including instructions for how to make an inset zipper as there are many tutorials out there. U-Handbag inset zipper tutorial has a good tutorial.
On the double interfaced piece, 1/2" from the top, draw the zipper placement box making sure to center on the pocket lining fabric
Attach the pocket lining fabric to the 5" back exterior panel 1/2" from the top edge, matching center of lining to center to exterior.
Follow tutorial instructions to make lining.
Add zipper.

Ribbon Hanger:
Baste ribbon hanger in place on front exterior panel. I lined my ribbon up with the outside front pocket edges.
Make sure to baste match the raw ends of the ribbon to the raw edge of the exterior piece, just as you would a bag handle.

Optional Lace Trim:
I don't actually measure the lace before attaching, I just take a longer piece and work my way around and then trim the excess. Turn lace edge under twice on the end to enclose raw edge. Pin and baste lace trim in place around front exterior panel, with the lace facing in, matching the raw edge of the exterior fabric to the gathered (non lacy) side of the lace trim.

The Pillow:
With right sides together, stitch the two exterior panels together, leaving an opening at the bottom to turn. Use the basting stitch on the seam as a guide for seam allowance. The lace I used needed a 3/8" seam allowance to cover the edge all the way. Go slowly and make sure not to catch the ruffled side of the lace in the seam allowance.
Trim corners.
Turn and press well.
Stuff if desired.
Close pillow opening with ladder stitch.


I meant to take a nice photo of E holding the little pillow for scale, but apparently the only time I think of such things is after I drop her off at school and her college age sister, R, is about to run out the door for class. So this morning, I grabbed R on her way out and asked her to pose. Rather than highlighting the sweetness of my little one, this pic managed to highlight the different ages and stages from oldest to youngest in our family. :)


Thursday, January 15, 2015

Vintage Modern Tiny HST Mini Quilt

The first finish of 2015 is a little Bonnie and Camille Vintage Modern HST mini that was largely complete in December. I had to set the top aside for a few weeks to focus on holiday sewing, and to focus on organizing the closets (a task that has taken far too long).

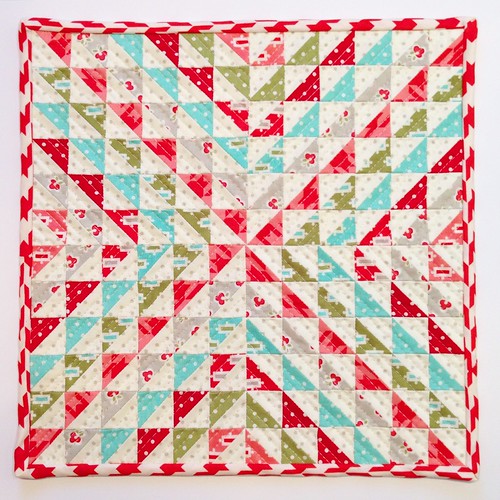
12" Vintage Modern HST Mini

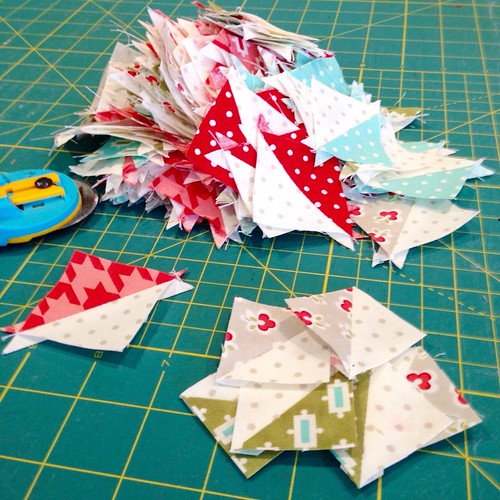
The layout of this mini is almost a happy accident. I didn't have a plan when I started, and the whole process was somewhat organic. I had approximately 176 leftover flying geese units to work with. I pieced, pressed, and trimmed all of them to 1.5" before I started laying them out. To be honest, I dislike trimming HSTs, particularly the teeny tiny ones where every fraction of a centimeter shaved off in error means mismatched points. I decided not to care as much about matching points as I am usually inclined to be; it made the trimming go by faster (and of course, faster is still hours and hours).

175ish HSTs

I played with making an organized layout and was pleasantly surprised when my first layout worked. I had the most HSTs in tonal pink/red houndstooth and laid them out in a pinwheel/X shape. Each V shape echoing the center pinwheel was determined based upon how many HSTs there were of a given print. To make the red and aqua work, I had to mix prints, but tried to make the mix organized and purposeful.

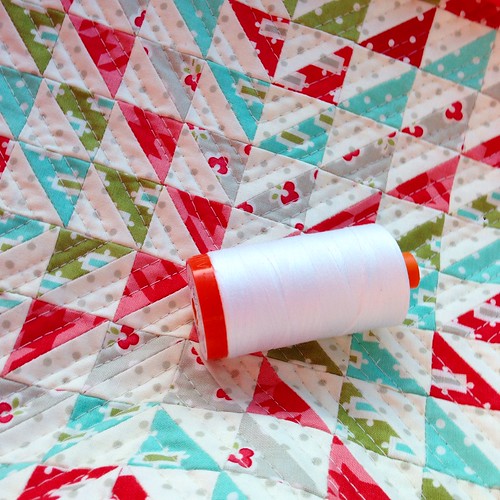
There are so many tiny little seams in this mini quilt, it kept rolling up on itself. I stored the top under a stack of textbooks to keep it flat until I could baste and quilt it. I straight line quilted the mini in Vs and used some leftover vintage modern red and white houndstooth bias binding I made last year for a pillow.

I love this little mini. 144 1" HSTs. Finished mini size: 12" square

12" Vintage Modern HST Mini

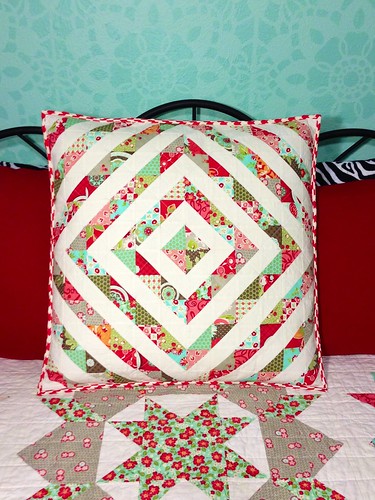
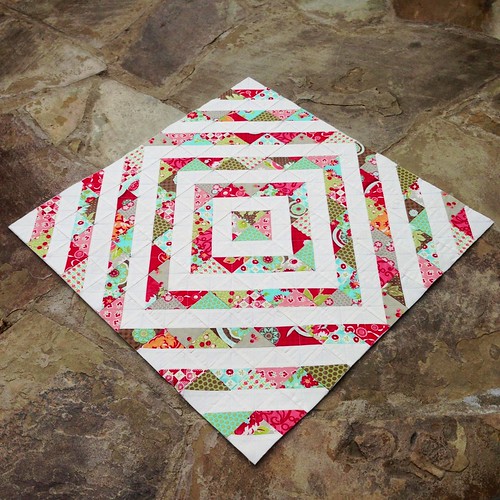
It matches the much larger HST pillow I made exactly one year ago using leftover flying geese triangles after making a Swoon quilt.

Bonnie and Camille HST quilted pillow top

HST pillow from Swoon quilt flying geese leftovers

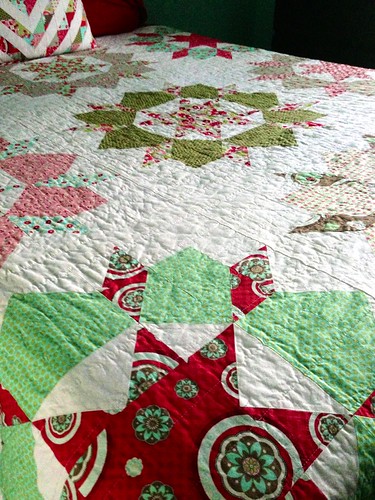
Swoon

Tuesday, January 13, 2015

Hexie Works in Progress & Getting Organized

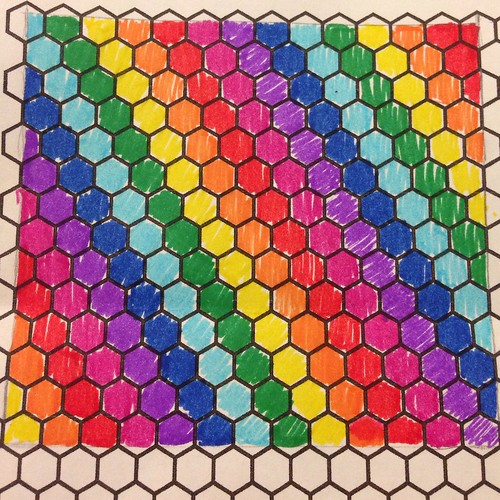
1/2" rainbow hexies in progress

This year, I am committed to organizing my home and fabric stash, and more importantly, staying on top of it. I know there are people who diligently cut scraps into usable pieces and then put them away in color coded bins. I am not one of those people. I fill a waste bin behind my sewing table as I sew, and when it is full, I stuff the fabric into one of many closet drawers designated for scraps, and then I dig through the drawers when I have a project in mind.

Because I like working with little scraps, I have a tendency to save too many little odd bits. Every scrap has potential. I decided to take some of these irregular bits and cut them into 1/2" hexies. At some point I will cut some squares for tiny patchwork, and perhaps make some more 1/4" hexies. It feels pretty good to process the fabric, however, even though I fly through the actual cutting process with my less than scientific method of cutting, it is severely taking away from my actual sewing time.

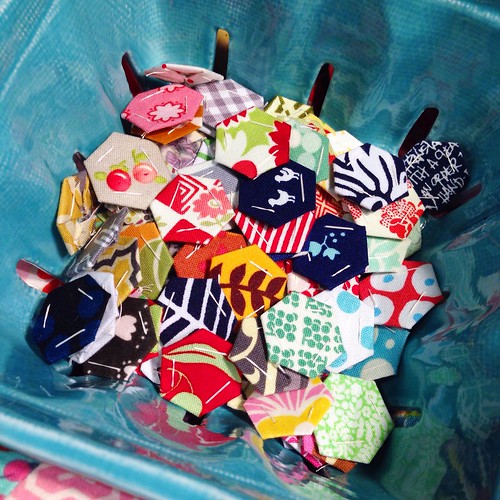
Cleaning out the scrap bin

Making 1/2" hexies, cleaning out the scrap bin

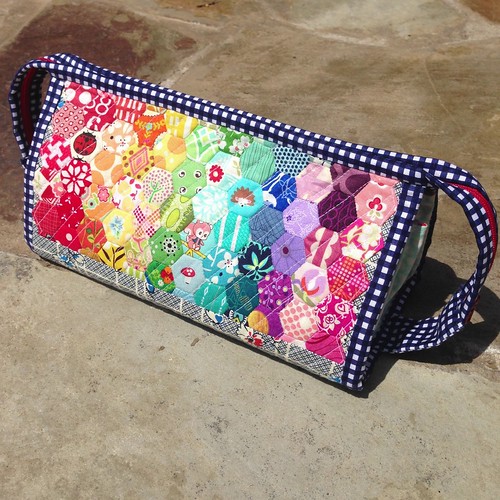
Of course, I have to have a little hand sewing project going on to keep me motivated, so I started pulling rainbow colors. I wanted to make a little rainbow mini or pillow using fabrics similar to the rainbow sew together bag I made for a friend last year.

Rainbow Hexie Sew Together Bag

I didn't want to do the exact same layout, and I didn't want to spend as much time with gradation of color, but I wanted a similar feel. I did a lot of coloring and decided on this layout. My husband would rather I made a pillow than a mini, so I may add some rows to the side to make it more square, or I may just add a border; we will see. The pic at the top of the post is most likely my final layout - made with minimal fussing; I swapped out a few fabrics that seemed off, but they are most are right where I stuck them out the outset.

Hexie coloring for inspiration

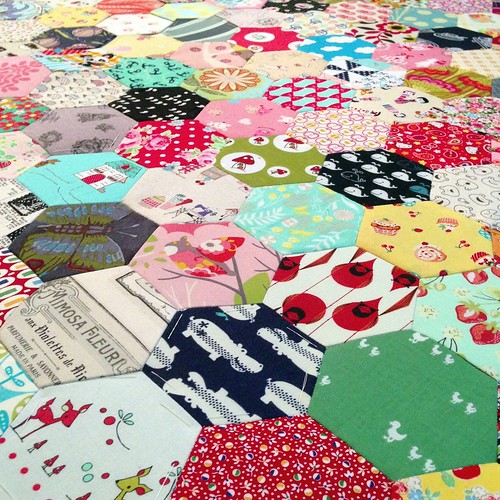
Once I am done with this project, I am back to working on a big hexie project that has been in my closet untouched for months - a lap size quilt with 2" hexies. It is probably 60-70% complete, and most of the hexies I need to finish it are already basted. I worked like a madwoman on this quilt for about five weeks and then had to take a break because my hands were screaming at me. I put it in the closet, and you know, out of sight, out of mind. 

Here is my first progress pic, taken on July 9th.

Airport EPP

Here is my last progress pic, taken on August 7th.

Untitled

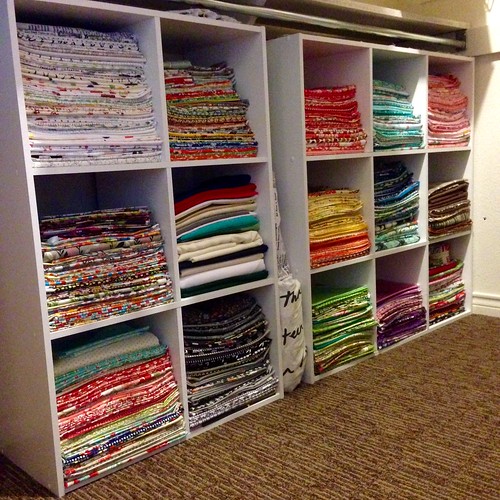
Organization is going well. I have all of my strips, strings, selvages, and binding scraps nicely stacked/bagged. I discovered I have enough scrappy trip strips to make a second lap size quilt. I broke down and bought some matching storage shelves for fat quarters and yardage to replace the mishmash storage I had before. I am determined to sew as much of the stash as I need to in order to keep from overflowing these shelves, and to keep returning the fabric to the designated cube when I complete projects.

Getting organized

Finally, I leave you with a meme generated by my daughter to memorialize the night that my husband came home hours earlier than expected and found me sitting on the floor of my closet with all of these fabric in piles around me, folding and sorting my entire stash. Let me tell you, it looks like a lot more fabric when you are sitting in the middle of it on the floor.
Untitled

Sunday, January 11, 2015

Handmade Christmas Gifts & Swaps

And finally, handmade Christmas gifts and swaps.

There are so very many swaps on Instagram and Flickr that I want to join, but more than anything, I wanted to have time to swap with my friend Gwen; I absolutely adore all of her creations and she has been such a good friend to me.

Gwen made me the most adorable Ho Ho Ho pillow. I forgot to take a photo of the back, but it is the green owl and presents print, and so clever. The side button closures are the perfect finishing touch. This pillow has already been very well loved by all in the family - a favorite to snuggle on the couch.

Ho Ho Ho Pillow

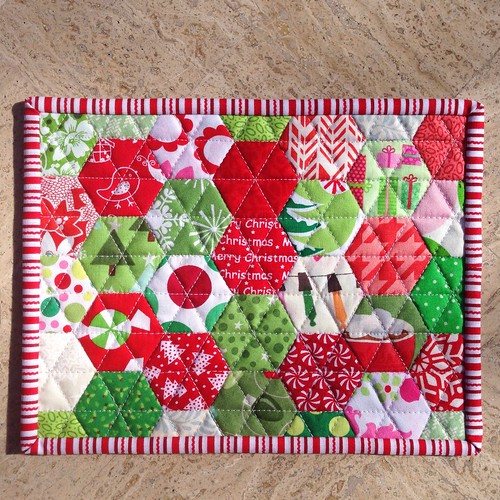
You may notice that there are several fabrics in the pillow that are also in the hexie Christmas stocking I made. Gwen mailed me some fun Christmas scraps to add to my stocking - she has the best holiday fabric, truly. As a little thank you, I used leftovers from the generous scraps she sent, along with some of my own, and made her English paper pieced hexie mug rug/mini quilt.

Christmas hexie mug rug/mini quilt

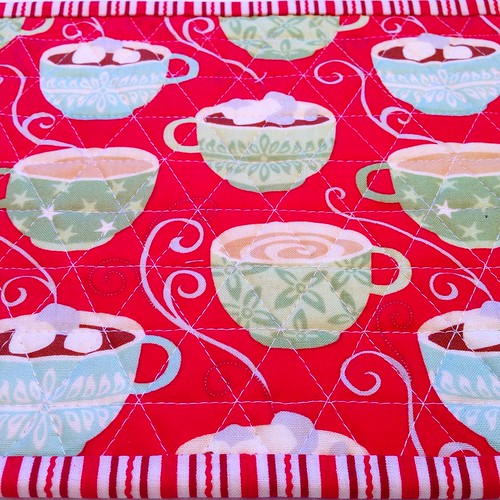
Backing is one of my favorite Kate Spain prints.

Untitled

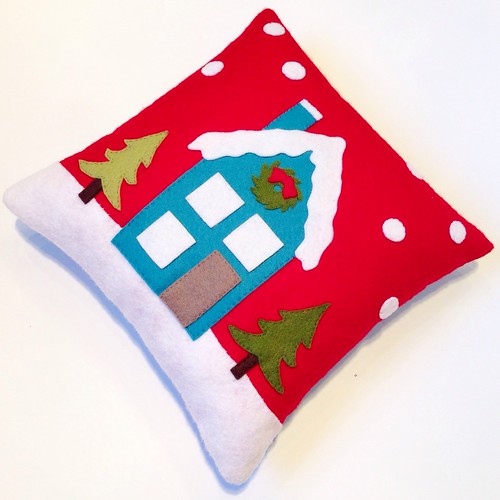
I also made Gwen a mini version of my Crate and Barrel Winter Solstice Pillow copy. 

Mini felt winter solstice pillow

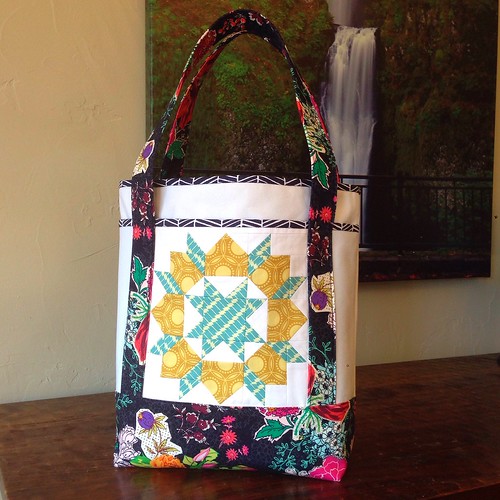
Finally, I made her a medium size canvas Nova Tote using a Swoon block on the pocket.  This bag is not really in the theme of a Christmas swap, but I wanted to make something that can be used all year. The Priory Square contrast bottom is interfaced with fusible fleece. I am so in love with this navy Priory Square print, and Joel Dewberry herringbone is one of my favorite binding fabrics. Inside, I added a DS Prints navy and blue floral lining, and a 9" inset zipper pocket.

Swoon Nova Tote

I made some pouches for quick gifts. Right now, I love to make patchwork zipper pouches. I say quick, but I got carried away cutting mini charms for this pink quilt. I keep trying to find the motivation to cut some from other color scraps, but it hasn't happened yet.
Pink patchwork pouch

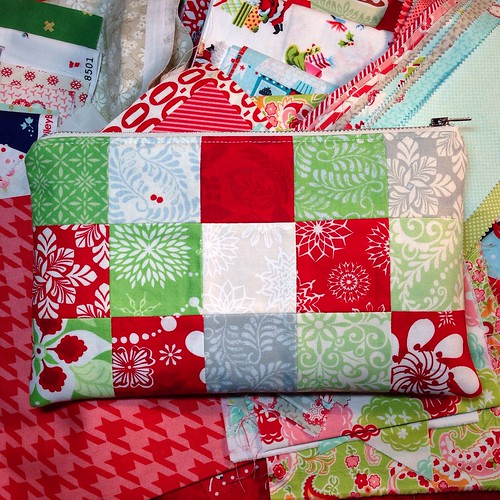
For my Crafty Tuesday holiday swap, I made a Kate Spain Solstice patchwork zip pouch. I used charm squares subcut into mini charms. I used some of the leftovers to make hexies for my stocking.

Solstice patchwork pouch 6" x 10"

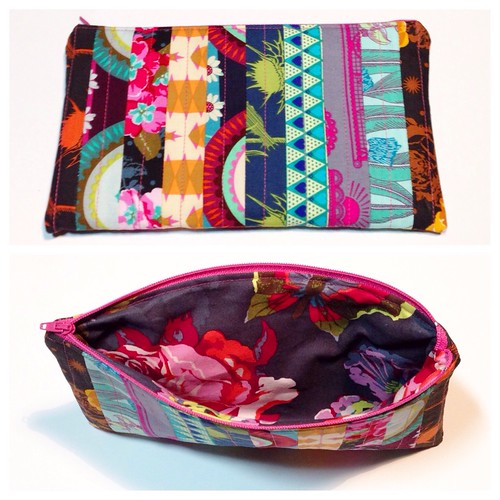
The last pouch I made, I used strips of Anna Maria's Pretty Potent line and lined with another AMH print. This was fun to construct. I usually use two panels for the exterior, but on this one I pieced my strips lengthwise and folded in half as one panel. It was a puzzle to attach the zipper and lining, but not difficult at all. 
Untitled

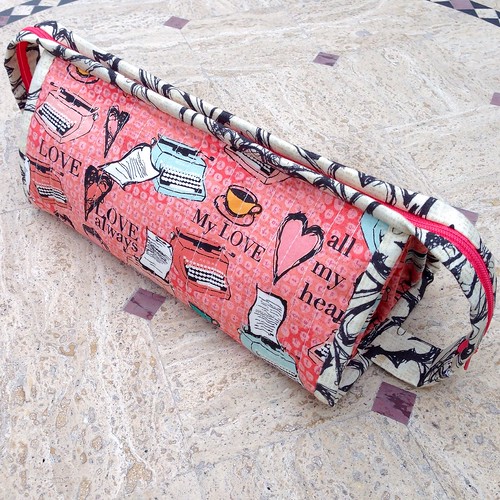
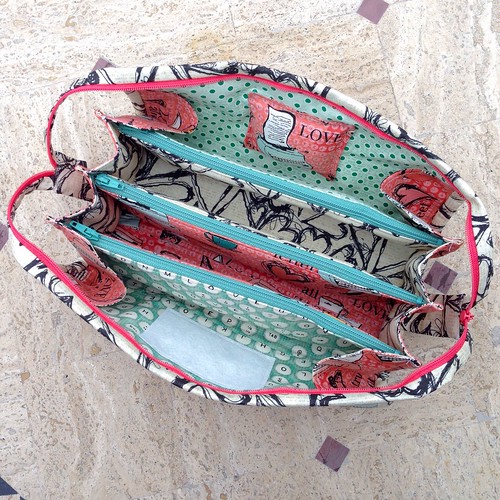
The very last bit of sewing I did in December was another Sew Together Bag. Fabric is All My Heart by Iron Orchid Designs for Blend Fabric.


Sew Together Bag 

Sew Together Bag 

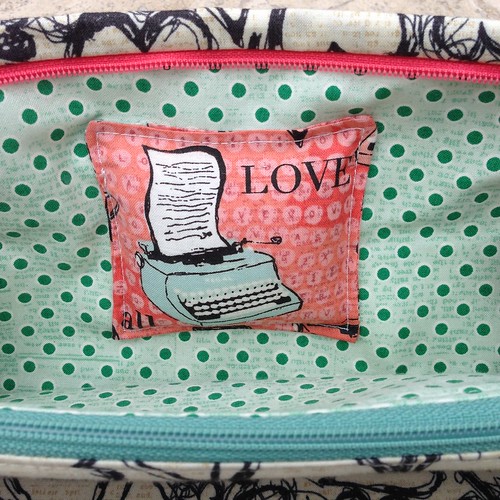
The typewriter pincushion is my favorite detail:

Sew Together Bag

And that's a wrap on December sewing.

Thursday, January 8, 2015

Handmade Felt Ornaments

Gingermelon tiny mouse felt ornament

Over the last few years, I have become increasingly obsessed with felt ornaments. This year was the second year I participated in a felt ornament swap with friends. For my swap recipient, I made a Gingermelon Tiny Mouse wearing a Santa hat and holding a gift. I love, love, love Gingermelon patterns; they are all so adorable and detailed. This pattern has several options for mouse accessories and I want to make them all. I dragged my daughter into my mouse obsession and she made the cutest little Christmas mouse holding a swaddled kitten. (This was her Supernatural watching project.)

Gingermelon tiny mouse with swaddled kitten ornament

And I have another one in the works. I started it for my youngest daughter for a stocking stuffer, but switched projects at the last minute. I suddenly stalled out on the mouse when I accidentally made two left sides of the face. Once I remedy that, I only have the head to make and attach to finish it. This one will be on our Christmas tree; the other two mice were given to friends.

Making more tiny felt things

Rather than gifting a tiny mouse to my youngest, I ended up making a little panda. This was a much faster project than the mouse, and so much fun.

Kawaii felt panda ornament

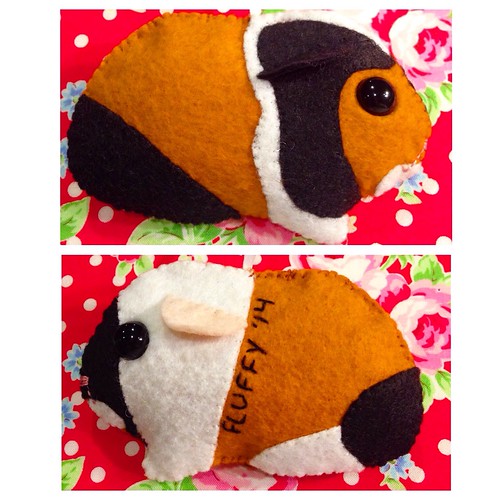
I made my 12 year old a felt guinea pig to match her guinea pig Fluffy. I spent a lot of time trying to match the Fluffy's color placement. The pattern I used is a free pattern from Cali Cavy Collective. The pattern is just perfect - the only change I made is that I used 10mm safety eyes rather than felt circles, which adds to the kind of bug-eyed wild look guinea pigs always seem to have.
Felt guinea pig ornament
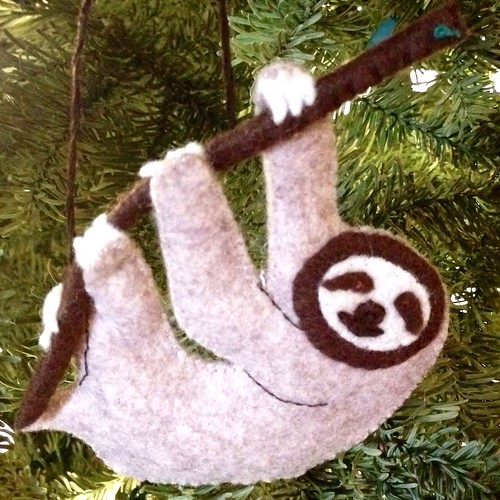
For my sloth loving daughter, I drafted a little three-toed sloth pattern. It turned out so much cuter than I expected. The little toes and tree branch are my favorite.

Felt sloth ornament

I was so surprised to receive two ornaments in the felt ornament swap. They are so very perfect and look fantastic on my tree; a male and female cardinal pair. 

Handmade felt Cardinal ornaments from a friend

Overall, I wish I had more time to make more felt ornaments to gift, but I am so pleased with how they turned out. Next year, less stockings and more ornaments.  

Wednesday, January 7, 2015

Handmade Stockings

Handmade Christmas stockings - finally.

Handmade stockings

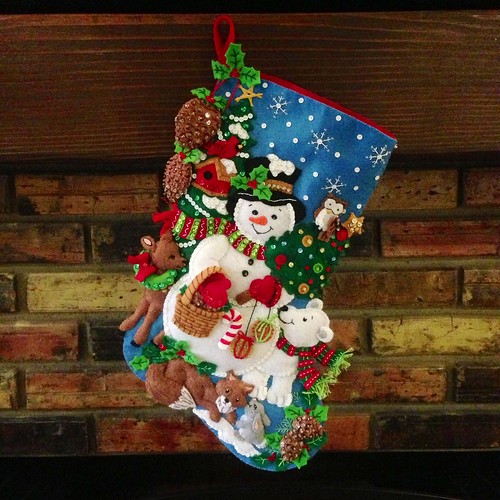
In 2013, it occurred to me that if I wanted to make childhood stockings for my children, as I have always intended to do, that I might want to get moving. After all, my eldest was due to turn 18 years old after the holiday. That was when I realized that her childhood was coming to a close, and her childhood memories were pretty well formed, but this was one last thing I could give her before she became an adult. That summer, fueled by guilt and a deadline, I purchased an 18" Bucilla felt Christmas stocking kit she picked out, and I hand stitched the stocking over the course of a couple of weeks. Several of my friends thought I was a bit nuts to start with my eldest, but they didn't understand that this was the only way it would get done, and I felt that she had earned the privilege to receive one first. 

This project was the first big embroidery project I had ever done, and I learned a lot about how to stitch, but also about the chaos and mess that a project like this brings to the house. First and foremost, I learned that it is best to not dawdle over it; just get it done quickly and say goodbye to the piles of felt, floss, sequins, and beads as soon as possible. 

I love how the stocking turned out, and I love that it matches my daughter perfectly. I substituted the backing felt that came with the kit for a wool/rayon blend, and added a silky lining. The kit does not come with lining, but I think stockings really need it.

Felt Christmas Woodland Snowman Stocking

I have two other girls who were eager to have stockings on par with big sister's. Earlier last year, they selected the stocking style they each wanted. I stuck them in a cabinet for months. In July I started feeling guilty and pulled out my now 12 year old's candy snowman stocking. I made a bit of progress on the background and snowman base, but quickly grew bored with the project and shoved it back in the cabinet until early November. My plan was to have both girls' stockings done in 2014, as well as mine, and I was behind schedule. Nothing like a deadline to get you moving.

This past Christmas was my Supernatural Christmas. I stayed up into the wee hours each night watching Sam and Dean fighting supernatural creatures season after season while I stitched stockings for my younger girls and then myself.

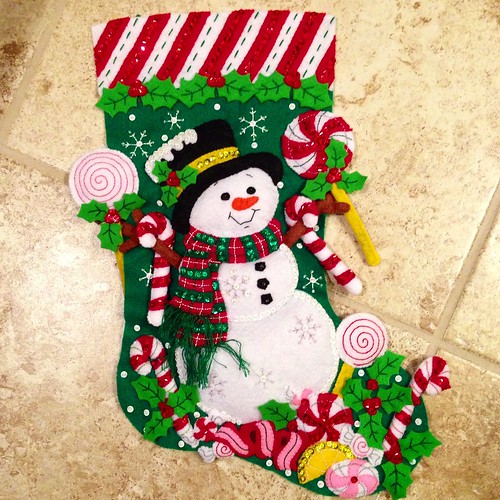
This candy snowman stocking makes me smile; making his scarf almost did me in (so many hours), but it was so worth it. I loved making all the little candy pieces, and it is so appropriate because my 12 year old is the one with a sweet tooth.

Candy snowman stocking

Predictably, my six year old daughter chose the girliest stocking she could find, but I was happy that the sugar plum fairy stocking is not too juvenile and will work for many years. (You may have noticed that they also all chose the most elaborate kits they could find. They think big - like me - and I don't discourage them often.) By this point, I was in full obsessive compulsive Supernatural and stocking mode, and I flew through this one. 12 days of sewing and 1.5 seasons of Supernatural, and it was done. It probably isn't evident in the picture, but the Christmas tree candy cane stripes are all satin stitched. It took forever, and Bucilla (as always) didn't supply near the amount of red floss that was needed for the stocking. They also failed to pack the beads for the tree garland, so I substituted with some beads I found at Michael's. They are larger, but I really like how they turned out. Again, I loved making the candy, especially the swirled felt lollipops and ribbon candy.

Sugar Plum Fairy Felt Stocking

I really didn't have any desire to make an ornate felt stocking for myself. I decided to make what I love most - quilted scrappy English paper pieced hexies. My husband has a lovely handmade felt stocking that his grandmother made for him when he was a child. It is huge, and I love the shape. I used it as a template for my stocking and started digging through my fabric. 

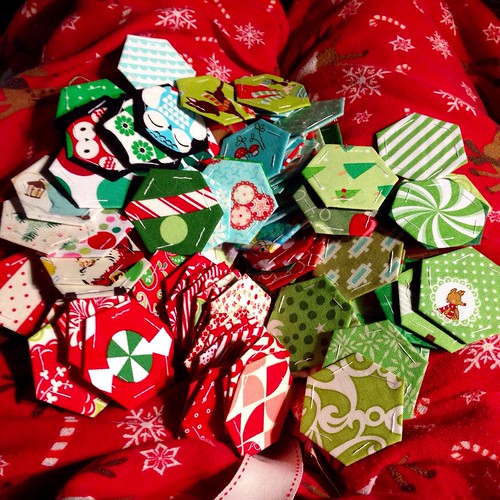
Stocking fabric pull

In order to not go crazy making hexies, I traced the outline of the stocking on wax paper and then traced tessellated 1" hexagons onto the paper so I could count how many I needed. I originally planned to add a white cuff to the top with my name, but I was so sad that I only needed 100 or so 1" hexagons and I didn't want to reduce that number to account for the cuff. Making it larger was also out of the question, as I didn't want it hanging in the fireplace.

Basted hexies for my Christmas stocking

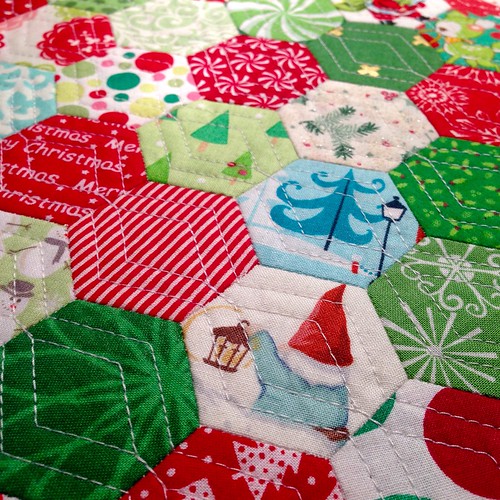
This stocking went by so fast, and I am in love with everything about it - the fabric, the shape, the quilting. It pained me to pack it away after Christmas, and I already can't wait to see it again later this year. The backing, binding, and hanger fabric is a snowflake print from Kate Spain's line In From the Cold. The lining is a solid pale aqua.

Hexie stocking quilting detail 

Quilted hexie Christmas stocking

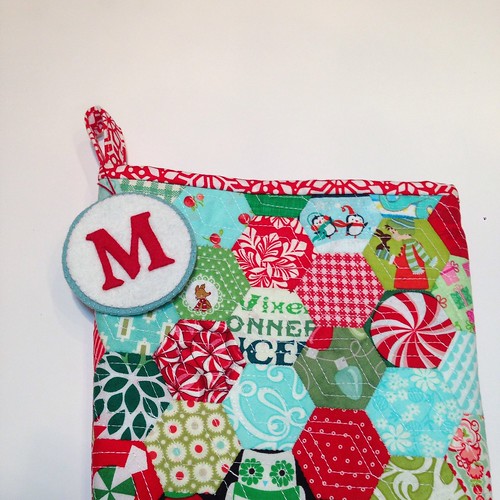
After Christmas, I sat down and made myself a simple monogrammed felt stocking hanger.

Monogram name tag

Finally, each family member has a handmade stocking. Next Christmas, the sewing will be more relaxed, but not nearly as epic.

Tuesday, January 6, 2015

Felt Winter Solstice Pillow

Somehow the last six weeks passed me by without a single Christmas crafting post. I guess I was so caught up in trying to finish all of my hand sewing that I didn't take the time to document here. Over the next few days I will be posting some of my holiday project finishes and some new projects as well.

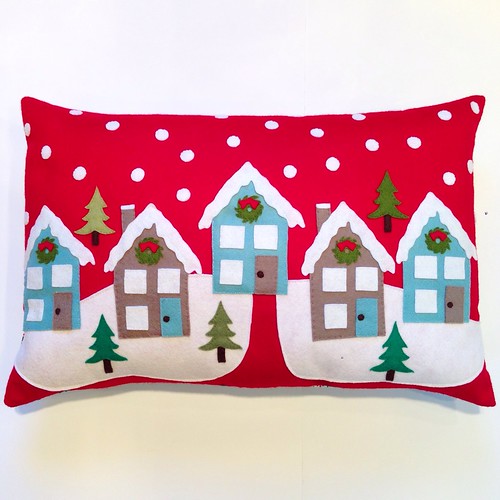
First up, one of my favorite projects to date - a 16" x 24" felt winter solstice pillow I copied from Crate and Barrel.

Felt Winter Solstice Pillow

When I was shopping at Crate and Barrel, I saw their Winter Solstice pillow and fell in love with everything but the price tag. I thought it might be a fun way to use up some of my wool felt stash and save $70.

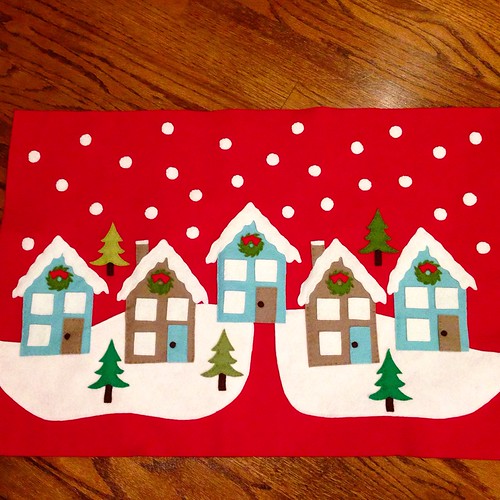
I used the same dimensions as the C&B pillow and cut a piece of freezer paper to size then eyeballed the approximate placement of the houses, and drew the snow shapes. I made a template for the houses, wreathes, trees and made copies to move around on the pillow for final placement. Once I was satisfied that my house and tree template sizes worked, I printed them on cardstock to make pattern pieces. 

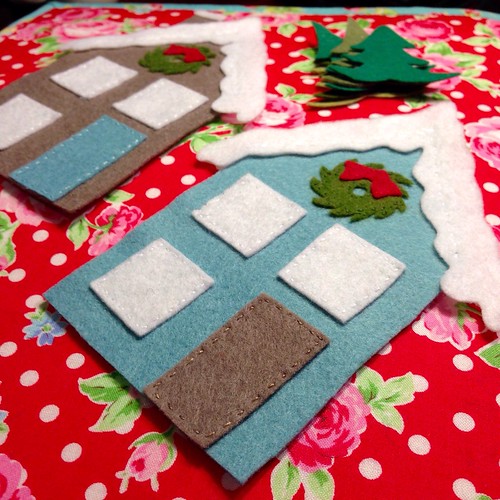
I am not excellent at drawing, but I was really impressed with my trees and wreaths. I spent an evening in front of TV watching Supernatural, cutting my felt, and hand stitching my little houses.

Little felt Christmas houses

I drew freehand circles on white felt with Frixion pen to make snowballs and whip stitched them into place. By the end of the weekend I had a cute pillow top.

Holiday felt pillow top

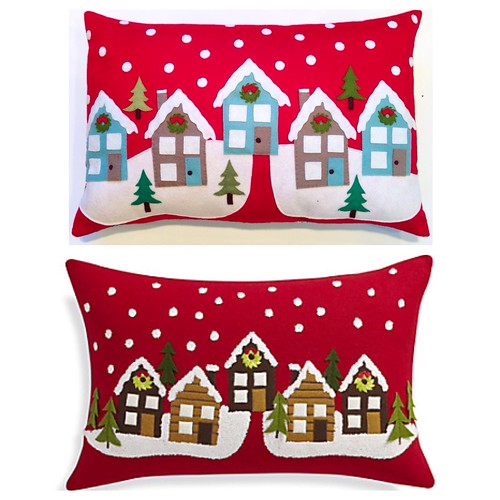
Here is the finished pillow next to the original Crate and Barrel one.


My winter solstice pillow on top - the crate and barrel pillow I copied on bottom
(Bottom photo credit: Crate and Barrel)

Next up, handmade stockings....