

Earlier this summer, I was thrilled to have the opportunity to test Aneela Hoey's new Project Caddy Pattern. Aneela writes very clear and detailed patterns with great design, and this pattern is no exception; I love the lid construction and zipper installation. So clever. This caddy was the perfect size for my college age daughter to take on her beach vacation to tote essentials.
Caddy Details:
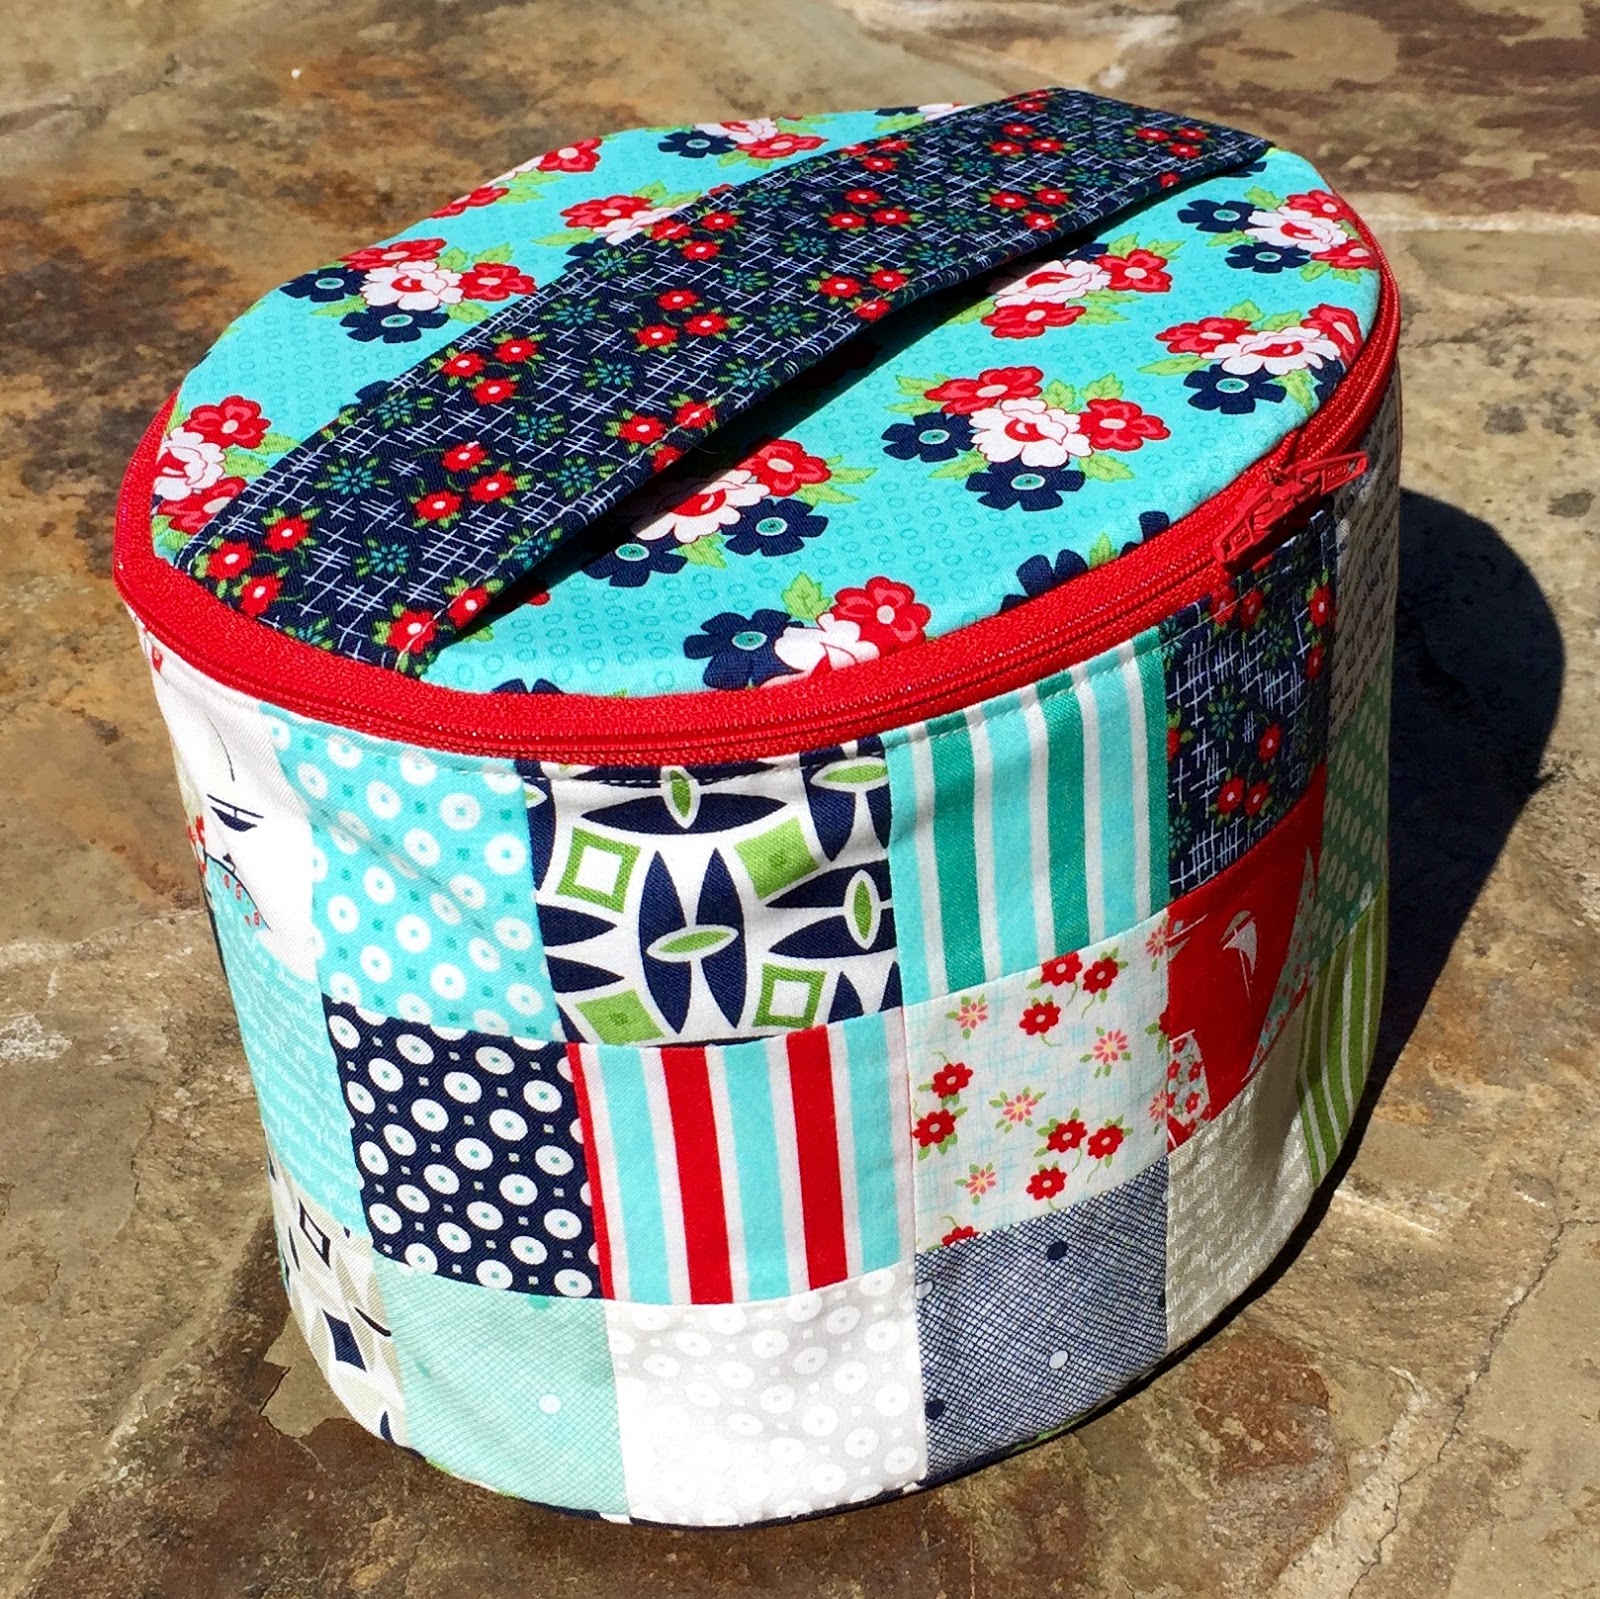
Fabric: Bonnie and Camilly Daysail
Exterior Patchwork: Mini Charm Pack
One complete mini charm pack works perfectly to piece the exterior
14 squares across x 3 down
There is an extra ½” that needs to be trimmed off to make the panel 28” across. To account for that, I just chain pieced four sections more towards the side of the panel, 2 across and 3 down and then trimmed 1/8” off those four before attaching them to the rest of the panel
I absolutely love the handled lid and double zipper on the exterior of the caddy. I am always interested in learning new techniques, and Aneela made the lid construction a breeze. With an added interior zip pocket and open pocket, it is easy to keep your items organized.
Construction options:
I appreciate that Aneela designs her patterns to be easier to assemble with less machine wrangling. I tested the pattern as written, but I am not afraid of a little machine wrangling (my motto: interface all the things and then interface some more), so I made some notes with two options in addition to the pattern instructions for the intrepid assembler to make the caddy sides super sturdy.
1. Quilted exterior: Add batting and then fuse Peltex 71 (cut the size specified in the pattern) on the back of the
batting and quilt through all of the layers (or use Peltex 70 behind the
batting and hold in place with basting spray to quilt).
When I pieced my
weekender bag panels, I used the fabric with shape flex fused behind, batting behind
the shape flex, and then a smaller piece of Peltex basted behind the
batting. I quilted through all the layers. I was so happy with the outcome, and I think the same technique works well here.
2. Peltex 70 placed
behind the exterior panel (1/2” from the bottom edge) with a piece of
Shape Flex the same size as the exterior panel fused over the Peltex 70. The Shape Flex will hold the Peltex in place.


The interior has a huge amount of storage to carry projects, toiletries, toys, etc.

it really is a good looking case!
ReplyDelete