Sunday, September 21, 2014

Hexie Apple Dumpling Pouch and Other Apple Goodies

I love swapping - there is little as satisfying as creating for another quilter. Some of my favorite creations have come from swapping, so when I saw Mari-Ann (Rockislander) was hosting a Dumpling Pouch swap with an apple theme, I immediately signed up. The secret swap called for using Michelle Patterns free pattern, the dumpling pouch, and filling it with goodies.

Once I received my partner assignment, Mari-Ann herself, I spent a day kind of staring at the wall waiting for inspiration on how to make a little pouch have big impact, and then it hit me that hexies could be made to look like apples. (I think I've mentioned how much I love tiny piecing - and hexagons.) I wasn't sure if it was a good idea at first, but I ended up loving it.
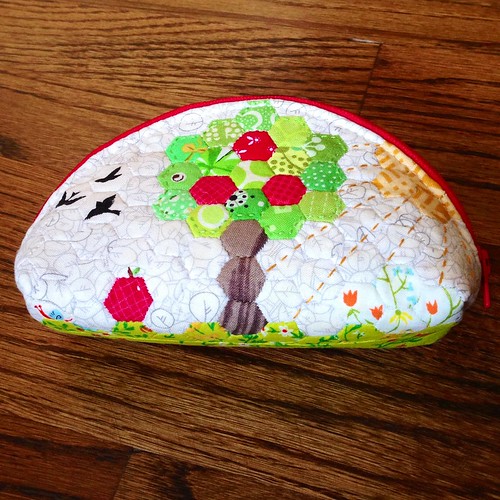
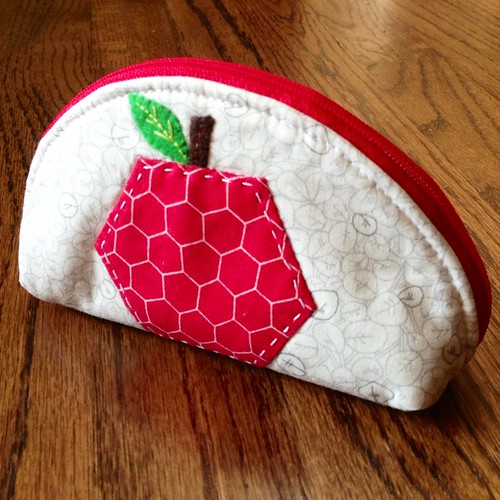
Apple dumpling pouch swap

Apple dumpling pouch swap

I used the free hexagons design sheets on the Paper Pieces site  to draw up some little apple shapes and a little scene with an apple tree and sun.


Once I was convinced that hexie apples would work, It traced the dumpling pattern with tracing paper and also used a free 1/4" hexagon sheet to trace the hexagon shapes onto the traced pattern piece. I drew a line down the center of the pattern piece to align the tree, and drew a horizontal line where the bottom of the bag folded. This really helped me to see if the tree would fit and to plan how many hexies to baste. The scene transformed as new ideas developed.
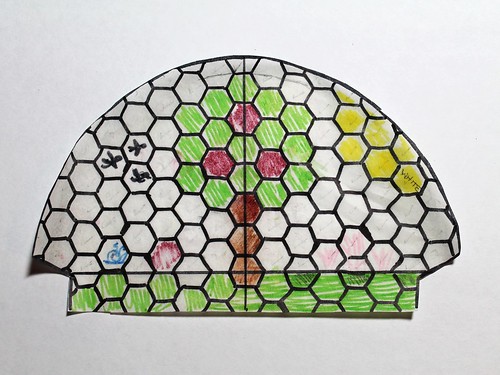
Apple Dumpling Swap Diagram

Then I commenced digging through my scrap bin to find small scale fabrics that matched the theme and my partner's likes. Lots of basting and hand stitching.
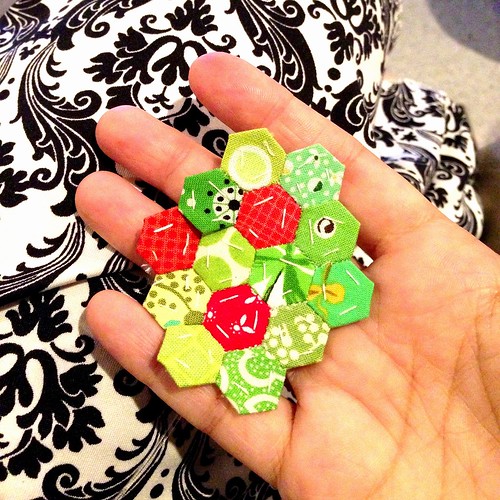
Preseason football & Dumpling Swap EPP

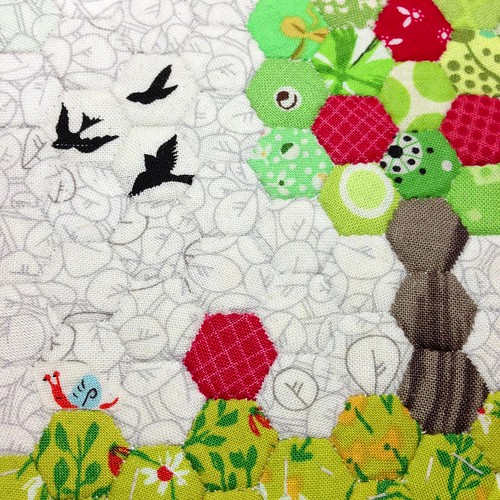
For the background I chose Carolyn Friedlander's Botanics low volume leaves. She designs my favorite low volume fabrics; they are subtle enough to blend into the background when they need to, but still provide organic visual stimulation. Luckily, my partner is also a fan. Alison Glass gold sun print streamers felt very much like sunshine. My partner likes Heather Ross, so I added Far Far Away reprint flowers in white, and on bottom fussy cut the flowery meadow around the unicorn print to create a grassy border. My two favorite touches are the Far Far Away snail I fused and hand appliqued on the bottom, and the Violet Craft Waterfront Park bird hexies. 
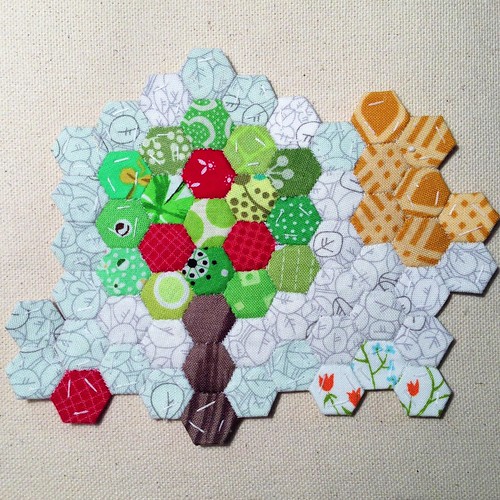
I've committed to my dumpling swap idea

Untitled

I set the pouch project aside for a couple of weeks, waiting for inspiration for the reverse side panel. I wanted to keep with the hexie apple theme, but on a larger scale. I hand appliqued a 1.5" hexagon using a hexagon print red fabric, and added an embroidered wool felt stem and leaf, and a sewed a simple running stitch around the hexie. On the tiny hexie side, I added embroidered details in lieu of quilting. I embroidered rays of sunshine, apple stems, a leaf and shiny spot on the fallen apple, a little snail slime trail, and a simple green running stitch around the tree leaves. I won't win any awards for my embroidery, but it turned out pretty cute.
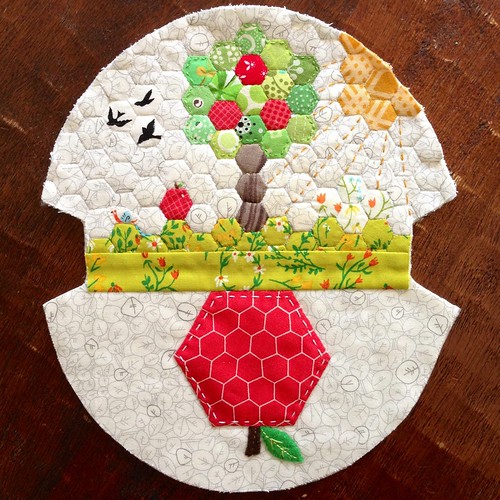
Apple dumpling pouch quilted exterior panel

This was the point where construction got a bit tricky. I cut square shapes to baste my hexies and there were so many little seams, so it was quite bulky. I knew I would have my scene wrapping around to the bottom of the pouch a bit, but I ended up losing a good 1/4" more than I anticipated, as I had to box my corners deeper to account for the bulk. It still worked out, but just not 100% as envisioned.

The pattern calls for hand basting the zipper twice, and it took a long time, but it did make the zipper very easy to attach.

For the pouch lining, I used Sandi Henderson's Farmer's Market apples. I love this print because it is green, has apples, and it isn't directional in a way that requires two panels.
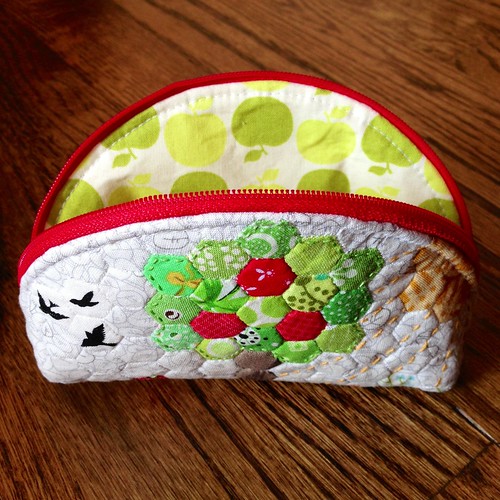
Apple dumpling pouch interior

My almost 12 year old daughter makes the cutest polymer clay creations, and she was kind enough to make an apple waffle clay zipper charm. It turned out so cute!
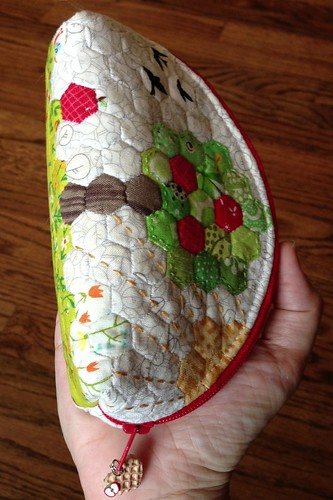
Apple Dumpling Pouch

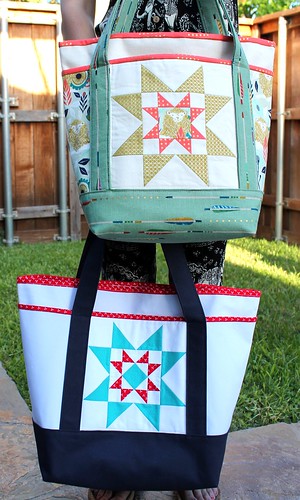
Once I finished the pouch, I moved on to making a little extra goodie. I found a free paper pieced apple pattern online, added a notched bottom to it, and used more of the red hexie fabric. I then experimented with my Nova Tote Pattern to make a small size. I don't know what I was thinking when I did my math, but my proportions are off - I'll work more on adjusting that later. Even so, I still really like it. I used an H&M duvet for the lining fabric, an Alexander Henry crosshatch binding, and some red and white chevron canvas I have had in my closet for ages.
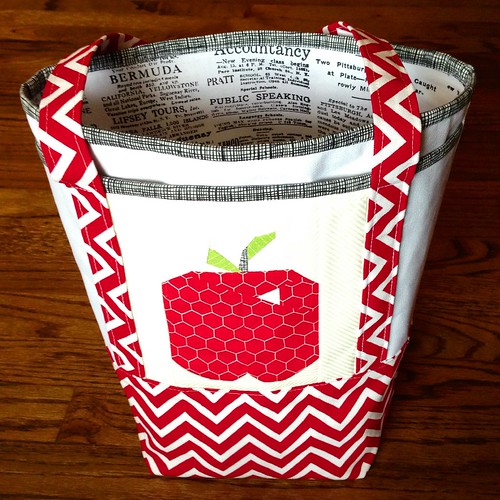
Small Nova Tote with apple quilt block pocket

While I was in the apple making mood, I made a little apple coaster for another friend using the super adorable apple pattern in the book Playful Little Paper-Pieced Projects: 37 Graphic Designs and Tips from Top Modern Quilters. I loved making this little block.
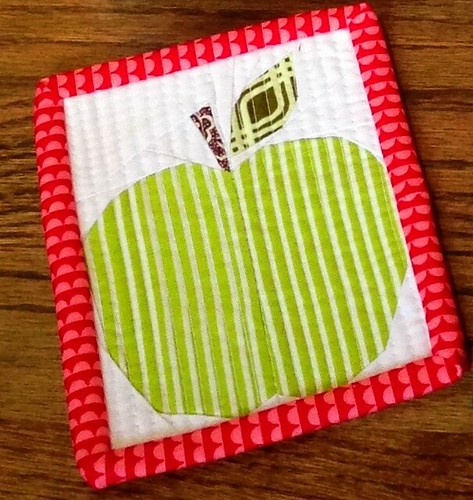
Apple coaster

These little apple projects were so much fun to make, and I am ready for apple season now.

Thursday, September 11, 2014

My Weekender Travel Bag Adventure

I have had many quilting friends ask me about how I constructed the Amy Butler Weekender Travel Bag that I made for myself at the end of June. The standard bag pattern calls for home decor weight fabric, interfacing, and peltex, but there are so many different pieced and quilted versions out there. There are also enough blog posts about tweaks people have made to this pattern that this may be somewhat redundant, but I didn't really see any one post that fit exactly what I envisioned construction-wise.

First and foremost, I wanted a sturdy, structured bag that would still hold its shape when stuffed completely full. I also wanted batting and quilting on the exterior, but didn't want to break needles due to thickness over interfacing and Peltex. I wanted to incorporate my favorite things into the theme of my bag and some of my favorite fabrics. I am pretty proud of my bag. I love how it looks, and I love that it is so sturdy. I also managed to avoid breaking any needles, so I feel like I was able to manipulate the thickness to keep it from getting overwhelming.

(Sorry in advance for the LONG post)

I am positively obsessed with English paper piecing hexies, scrappiness, and tiny piecing, so 1/2" hexies from 250ish fabrics seemed like a natural choice for one of the main pocket panels. The hexagons were all hand pieced, either while in front of the TV (thank you, season 2 of Orange is the New Black) or sitting poolside.

How I cut and sew my hexies - If I am cutting from my stash, I make a hexagon template with 3/8" seam allowance. I prefer a hexagon shape for anything larger than 1/4" hexies because I don't like the bulk or fabric waste of squares. I then scissor cut the fabric - a quick way to plow through a lot of fabric in a short period of time, and this works well for my fussy-ish cutting - I kind of cut out what I want on the hexie, but if it shifts a bit, that is ok. I wouldn't recommend this method if you want precise fussy cuts. Stitching - I will change up my stitch style when my hands get tired, but most often I use a tiny whip stitch. 


I also wanted to have a main pocket panel with tools of the quilting trade and added a Thimble Blossoms Mini Spool  paper pieced scissors and sewing machine. The hexie flowers are 1/4", hand pieced, and hand appliqued. 


On one side pocket panel, I used a Spell it with Moda M to boldly declare the bag as mine, and inserted a tiny 2” double star inside. 


On the other pocket side, I used Kate Spain’s In from the Cold quilt pattern to make a little kawaii mug because I love tea and coffee.


   Construction Notes
  • Main body fabric: Alexander Henry farmdale blossoms - one of my most treasured fabrics
  • Pocket panel background fabric:my favorite low volume - Carolyn Friedlander Architextures trees
  • Cording and straps: Bonnie and Camille April Showers navy floral. I am obsessed with this fabric and use it for everything
  • Zipper: a light gray 30" non-separating zipper I found at Joann - it is really hard to find a wide variety of zipper colors in this length. I used EZ Steam II to baste the zipper in place before stitching it down. 
  • Needle: I switched to a heavyweight denim needle when I started assembling the bag pieces.
  • Straps: My straps are completely different from the pattern. I constructed my straps using 6" x 52" quilting weight fabric. I pressed the fabric on each side in half to the center, and then in half again. I then inserted 1.25" cotton webbing into the straps and topstitched both sides. I love the width and the heavy duty feel, without the stiffness of Peltex. This length works perfect for me to carry my bag over my shoulder. (Way down at the bottom of the page I have included a pic of me carrying my bag on my shoulder). Also, there is a pic below showing how I sewed the straps to the main panels.) To hold the straps into position to sew them to the panel panels, I used a wonder clip on each side at the top and the bottom.
  • Lining: I used a heavyweight oxford cotton for the lining. If I had used a quilting weight, I would have interfaced with Pellon Shape Flex (SF101) - my favorite bag interfacing.
  • Interior pockets: pics below of interior divided pocket and 9" zip pocket. (The pattern does not include interior pockets.)
  • Outside side pocket construction: pieced quilt block quilted onto batting. Lining of the pocket is quilting weight cotton (not interfaced)
  • Main pocket panel construction: on the hand pieced hexagons, I added sheerweight interfacing to the back of the hexagons to add stability. Both sides have batting and then are quilted every 1/4". Pocket lining is not interfaced. To line up my quilt blocks, I did a little math about what size blocks would work, and I cut the pattern piece out on waxed paper to lay over the fabric, so I could figure out how many hexagons I needed, and to trim my sashing on the pieced side.
  • Main panels: Quilting weight cotton, quilt batting, with Peltex behind it. I cut the main panel out using the pattern piece. I cut the Peltex out in the same shape, 1/2" smaller, as the pattern recommends. I marked the centers of the main panel and the Peltex to help line them up.. The batting was larger than the Peltex and the exterior to allow for quilting. I spray basted the batting onto the exterior fabric. The Peltex needed to be centered so that it was not in the seam allowances. I held the layers up to a window and used the light coming through the window to position the Peltex, and  then I spray basted it on as well. I quilted through all the layers. Peltex works great quilted behind batting. This also keeps the Peltex in place without any bowing. (See pic below)
  • Top/bottom panels: Quilting weight cotton quilted onto batting. No interfacing.
  • Cording: I don't have a piping foot, so I used EZ Steam II and fused the fabric around 6/32" cording. It took approximately forever to do, but I sat in front of the TV with a small pressing pad and watched TV while I did it. I also used EZ Steam II to fuse the prepared cording to the main panels before sewing the layers together. It was really nice to avoid basting stitches, but again, such a slow process.
  • Bottom and bottom insert: I followed the pattern on this, and I love the result. The bag doesn't bow on bottom even when it is stuffed to the top.
  • Assembling the panels: I skipped using pins and used Clover wonder clips. I used my walking foot to attach. I prematurely high-fived myself after attaching the top/bottom panel to the first main panel; it is attaching the second panel that is tricky at the corners. I had one corner that I had to seam rip four or five times before I was finally satisfied with it.

I machine quilted the entire exterior, including the bottom panel, every ¼”


The weekender bag pattern does not include interior pockets, so I added a 9” zipper pocket on one side, and a divided pocket on the other side. The divided pocket panel is the same height as the exterior pockets and sewn down the center vertically.


You can actually see where I bled on the lining fabric while hand stitching the lining to the exterior. Oxford cotton lining was HARD to hand sew. My poor fingers, but well worth the end result (and a little Oxiclean removed the stain).


Strap stitching - I sewed it down every which way - these straps aren't going anywhere! You can also see how the Peltex is positioned behind the batting and quilted.


Fusing the zipper in place:


It took me a couple of weeks to piece, quilt, and assemble my weekender bag. I can't decide which side is my favorite; they are all perfectly me. My bag worked very well on our trip, even stuffed to the top (all of that interfacing paid off!).


Nova Tote Pattern Testers

While I love making quilts, I can't carry them everywhere, and I gravitate towards making quilted items I can integrate into my everyday life. When I drafted the Nova Tote pattern, I was really just looking to make a canvas tote with a bit of quilt block flare that is tough enough to take to the beach or Costco (we fill a lot of bags at Costco!), and can get a bit dirty without me crying over the many hours I spent making it.

Several people asked me to write the pattern to market, and I am so glad that I did. I knew that there would be a lot of options for finishing and quilt block pocket panels, but I have been astounded by the creativity of the pattern testers, and the possibility of customizing the Nova Tote to fit an individual's needs; it can be a simple market tote, it can be a plush pieced travel bag, or anything in between.

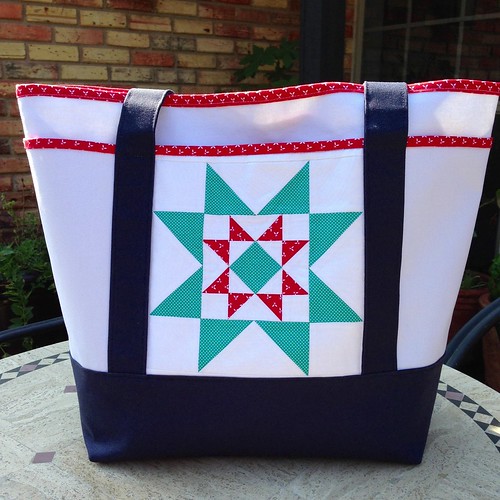
While any 8" quilt block can be used on for the pocket panel on both the large and medium size bags, I wanted to include a block pattern for purchaser's to use. I settled on a double star, which is fairly quick to construct and has a lot of visual impact.

The Nova Tote pattern is available to purchase on Payhip.

Untitled
I apologize in advance for a super long post, but there are some great tester finishes I want to share.

I owe a big thanks to Chrissy (Sew Lux) for being the first person to test my pattern while it was still in the rough draft stage; her jawdropping Nova Tote really showed the pattern's full potential. You can read Chrissy's post here.


The Nova Tote pattern includes instructions to make a plain pocket panel as well as the double star quilt block. I had a few testers volunteer to make plain pocket panel versions, and the looks are as diverse as the quilt block versions.

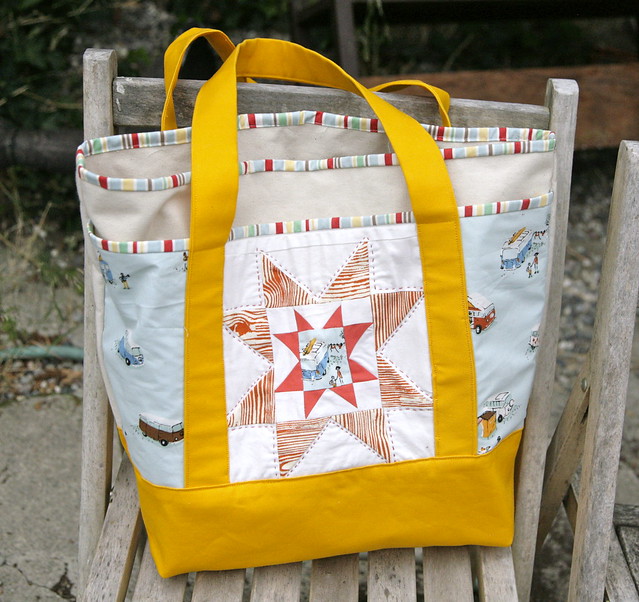
Jennifer made a large bag using an Alexander Henry print and Pellon interfacing. She really showcased how well large scale prints work on the tote:


I was so happy Jade (Stitch Mischief) was able to test my pattern. I love her work and felt really honored that she was able to find the time to help me in between running a house, blog, business, and creating beautiful quilted treasures for the Sewvivor competition. I am so in love with the polka dot canvas and indelible low volume pocket panel.


Erin made an unlined bag with a printed canvas as the second layer of canvas. Her interior is just fabulous. I love how every unlined bag what was tested used a contrast or printed binding; the unlined bag I have made has been with a binding color that matches the canvas and seem quite boring in comparison. I love this printed binding next to the polka dot canvas.


I roped one of my favorite people, Inder (Inder Loves Folk Art), into testing the pattern by first asking her to just proofread it, and then repeatedly reassuring her that she could make it quickly and with NO INTERFACING. I love her style, her blog post (read about it here), and her invaluable feedback. Check out the photos on her blog showing the contrast binding she did on the interior of her unlined bag.

Nova Tote

Hilary (Young Texan Mama) used the double star pattern to create a completely different look on Texas A&M bag. Read her blog post here and see all the additions she made and see how wonderfully she quilted the Essex linen.


Sharon (Daisy Cottage Quilting) makes some of the cutest things around. I just love her medium aqua and red Nova Tote! This looks exactly like a bag I would make for myself.


I was very excited for Lisa Chambers  to test my pattern. Her large Nova Tote, using Arizona fabrics, is one of my favorites - from fabric choice to fussy cutting.


I had a few testers offer to test the pattern using other quilt blocks.

Lisa Lake-Johnson aka Lisa Quilts Like a Boss (really she does!) blew me away with her quilting and super smart use of automobile headliner foam (available at Joann's) as stabilizer. I am dying to try this - the quilted texture is great! And I just love her Ferris Wheel Block (also called Country Crown on EQ7) in Cotton + Steel fabrics.


Gabrielle made a bag using Triangle Party block. I lover her color combos and contrasting straps to make the quilt block pop. Gabrielle added lining and pockets on both sides of the interior.


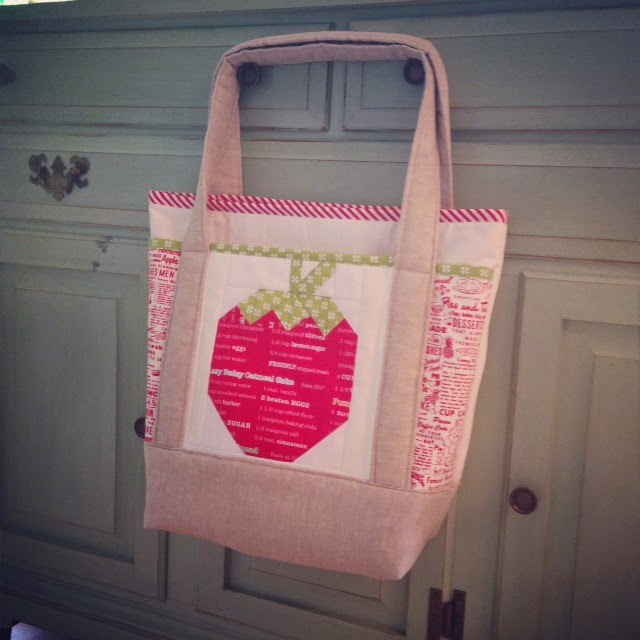
Michelle made the most adorable medium bag with a strawberry block on the pocket:


Abby made not one, but two different bags. I am super excited about the upcycled wool and leather Nova Tote she made:


Thank you to all Nova Tote pattern testers!


Monday, August 25, 2014

Nova Tote Pattern - Now Available

Nova Tote Pattern Coming Soon

I finally sat down to work on my canvas bag pattern. I hosted an Instagram contest to name the pattern, and Clover and Violet had the winning name: Nova Tote. The pattern is available for sell now on Payhip. Previously, I had the pattern available on Craftsy with my free patterns, but I moved to Payhip due to VAT collection required when selling digital patterns to purchasers in the EU.

I drafted this pattern several months ago with the idea in mind to have a rugged bag with quick construction that can go from beach to market and features some of my favorite quilt blocks. Over the course of months, I have I made several different versions of the bag in two different sizes - small and medium. I have made it in duck canvas, quilting weight cotton over duck canvas base, home decor with Peltex interfacing, lined and unlined.


Chrissy Lux of Sew Lux Fabrics unveiled the most gorgeous tricked out version of the Nova Tote for her quilted bag entry of Sewvivor. I am in love with all the added details and quilted panels!

Basic features of the Nova Tote include:
 Two sizes in one pattern
Approximate dimensions:
Large size: 20" W x 7" D x 14 1/2" H; bottom 13" W; handle drop 10"
Medium size: 16" W x 6"D x 13" H; bottom 10" W; handle drop 8 1/2"
Durable double layer of canvas
Contrast bottom and straps
Quick construction
Featured quilt block pocket
Instructions to make a double star quilt block pocket
Comparable sized quilt blocks can be substituted for a wide variety of options
Bias or twill bound interior seams
Optional lining

I am very excited to offer this pattern, but I would be lying if I said that I am not nervous as this is my first in depth pattern. I hope you'll take a chance on a fledgling pattern designer. 


Tuesday, August 19, 2014

Patchwork Baby Steps Quilt Tutorial

Untitled

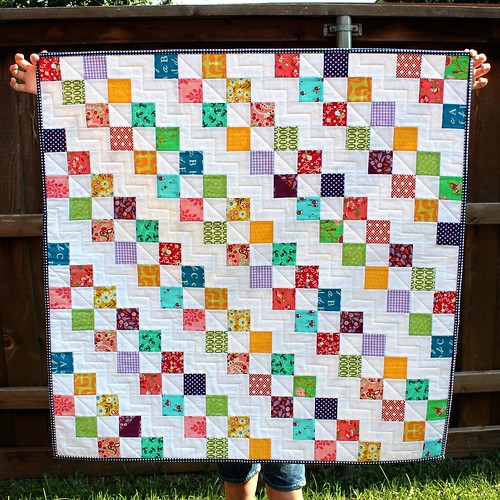
One day early this summer, my 11 year old daughter, K, and I were doodling on graph paper and she drew the inspiration for this quilt. It was perfect timing as I have a friend due to have a baby girl soon, and I wanted to make her a quilt. My challenge was to find a way to quick piece K's design and make it fat quarter friendly because that is the bulk of my stash. More graph paper doodling ensued, and I had a plan to use either fat quarters or jelly roll strips.

Quilt size: 36" square

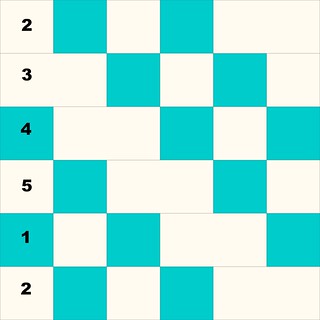
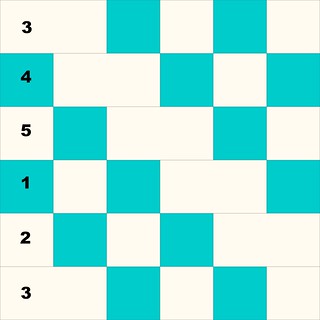
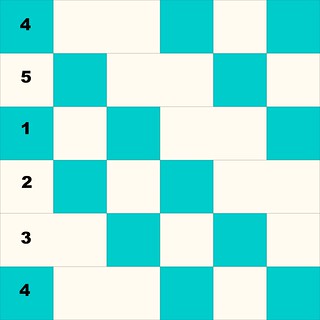
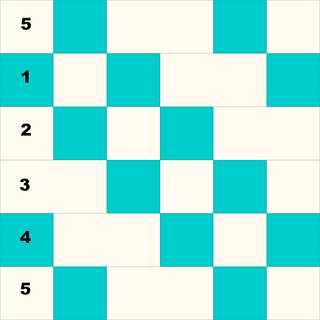
The quilt is composed of different five types of strip sets, which are then cross cut into 2.5" wide subsection strips and assembled into five different 12" block sets for a total of nine blocks.

Fabric requirements*
24 assorted fat quarter strips - 2.5" x 21" or 12 width of fabric jelly roll strips
white background - 1 1/3 yards

Cutting instructions
8 white 2.5" x width of fabric strips, cut each strip in half to 21" length*
5 white 4.5" x width of fabric strips, cut each strip in half to 21" length* (you may substitute with two 2.5" jelly roll strips)

*Do not cut into 21" lengths if you are using jelly roll strips

Make strip sets
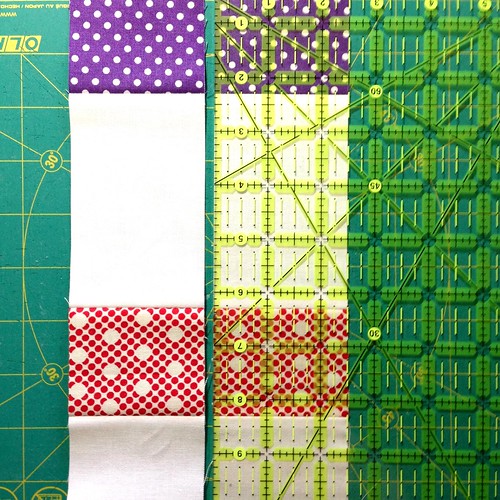
Using your color strips and white strips, assemble five different types of strip sets as follows. You will make TWO strip sets of each type if you are using FQ strips; if you are using jelly roll strips for the color portion rather than fat quarters, you will have one long WOF strip set. 

There will be excess fabric leftover from the strip sets. I find it easier to waste a bit of fabric than to cut multiple length strip sets, but you can reduce the length of the second strip set (if using FQ) from 21" to 10" for each of the fabrics if you want to eliminate waste.You may also notice that strip set 1 upside down is the same as strip set 4, and strip set 2 upside down is the same as strip set 3, so you can combine those for the second strip sets if you don't mind more repeat in fabric prints.

Strip set 1:
1 1/2 strip sets needed if using FQs

patchwork baby steps strip set 1

Strip set 2:
1 1/2 strip sets needed if using FQs

patchwork baby steps strip set 2

Strip set 3:
1 1/4 strip sets needed if using FQs

patchwork baby steps strip set 3

Strip set 4:
1 1/4 strip sets needed if using FQs

patchwork baby steps strip set 4

Strip set 5:
1 1/4 strip sets needed if using FQs

patchwork baby steps strip set 5

Cross cut strip sets into subsets
Cross cut your strip sets into 2.5" wide strips. Each strip will be 2.5" x 12.5".

Patchwork baby steps cross cut strips
Assemble quilt blocks

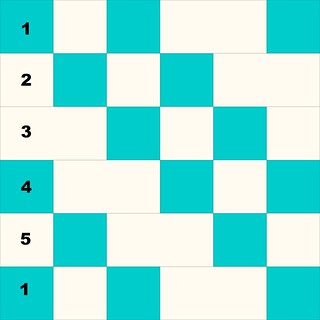
Assemble subset strips into quilt blocks as follows:

Block A:
Make three

patchwork baby steps block A order label

Block B:
Make two

patchwork baby steps block B label order

Block C:
Make one

patchwork baby steps block C label order

Block D:
Make one

patchwork baby steps block D label order

Block E:
Make two

patchwork baby steps block E label order

Assemble quilt top

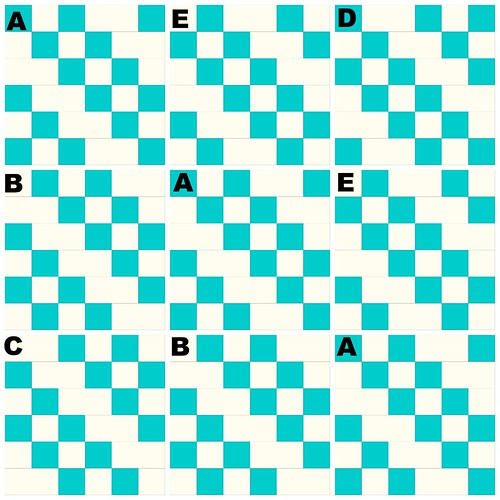
Assemble quilt blocks in the following order to make the quilt top:


Quilt block layout collage label order


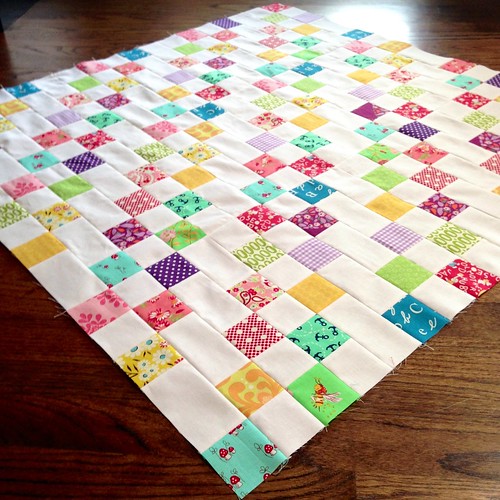
Baby quilt top


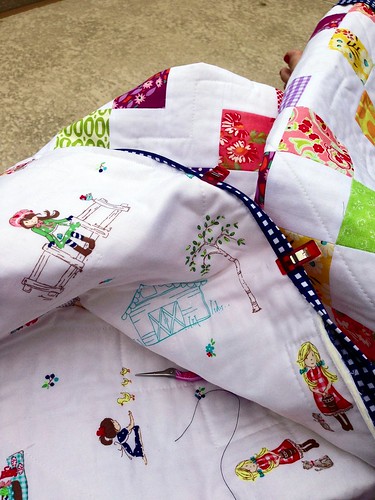
Untitled

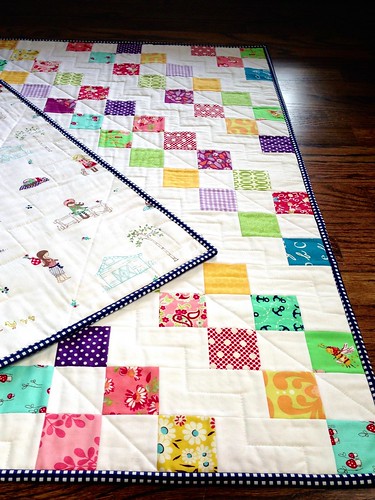
Patchwork baby quilt