

Quilting is such a tool and supply intensive hobby and I don't have my own dedicated space. I have a small sewing corner in the game room/family office and storage is a massive problem for me. My supplies are sprinkled throughout the house, and a lot of my tools sit on my sewing table where they should theoretically be right at hand to use. The problem is that I am constantly battling piles and tossing them about in my space. When Sports Authority closed over the summer, I asked my daughter to bring home some pegboards, thinking I might use them on the big game closet doors, but the smallest of the four pegboards she brought was 40" x 46.5". Then I had a revelation - I could move the print behind my desk to another room and install the pegboard behind my sewing table.
After months of contemplation and sporadic planning, I FINALLY tackled the project and I am thrilled with the results. I apologize in advance for the poor lighting. I live in cave and my photography skills are mediocre.
PEGBOARD SUPPLIES:
40" x 46.5" Pegboard (mine has 1/4" holes)
1" x 2" x 8' board cut into (2) 1" x 2" x 40" boards
Spray paint primer
Leftover Semi Gloss Paint - Sherwin Williams Dover White
Smooth foam roller
Leftover wall paint to paint 1 x 2
Drill & long screws
PEGBOARD ACCESSORIES:
(2) packages of Everbilt 32-Piece Pegboard Hook Assortment
CONSTRUCTION AND PAINTING
I enlisted the help of my 8 year old and we painted the pegboard using a smooth foam roller to match our house trim. We also painted the 1 x 2 to match the wall color, but where the pegboard is hanging the 1 x 2 is not visible.

While the paint dried, we found the studs in the wall behind my table and marked them. It's a weird area with unpredictable distances between the studs because we closed a large doorway in that spot when we moved in. I figured out how high I wanted the top of the pegboard, marked the center, studs and out 19.5" on each side. 45" down I marked the center, studs, and outer edges. My husband drilled the 1 x 2s into the studs at the top and bottom. We then centered the pegboard over the boards and drilled into the 1 x 2 along the top and bottom.

ACCESSORIES:
I opened the pegboard hook assortment and just played around with the different hooks until I found what worked best for each item.
Ledge:
I hung the IKEA MARIETORP ledge upside down so that the lip hangs down and doesn't obscure my little treasures and the holes for hanging are on the top and I used a longer straight hook through each pre-drilled hole to mount it. The best part is that this ledge cost only $5.99!

Planters as Buckets:
Really happy about this one because there are no handles and there are perfectly placed holes for hanging.
I filled the six SKURAR planters with:
Wonder clips
Pencils and fabric marking tools
Pens
Sharpie markers
Decorative scissors
Key fob and lanyard hardware
Have I mentioned that I am an avid collector of office supplies in addition to craft supplies?


Multiple tool holder and various tool hooks:
I used the multiple tool holder to store multiple types of scissors and shears, as well as the screwdriver I use to change out Juki sewing machine feet, and a backup seam ripper. Pliers holders store pinking shears and Gingher dressmakers shears. It is apparent that I own A LOT of scissors. And this is far from all of them.
Hooks store rotary cutter, pinking blade rotary cutter, key fob pliers, little snippers, hold punch, two strawberry pincushions made for me by my friend Gwen, a pincushion made for me by my friend Teal, measuring tape, elastics, twill tape, white chalk, blue chalk, seam gauge, Xacto knife.


The top of the pegboard houses cone thread, baker's twine, ribbon, perle cotton, embroidery hoops, washi tape, a hexie pincushion I received in a swap with Tracy Berrett of Quilter's Candy Box, Pouch with a View filled with 1/2" hexies, zippers, and various treasures including a Bonnie and Camille Ruby owl made by my talented friend Kelly and a 1960's fabulous pincushion that was my mom's.


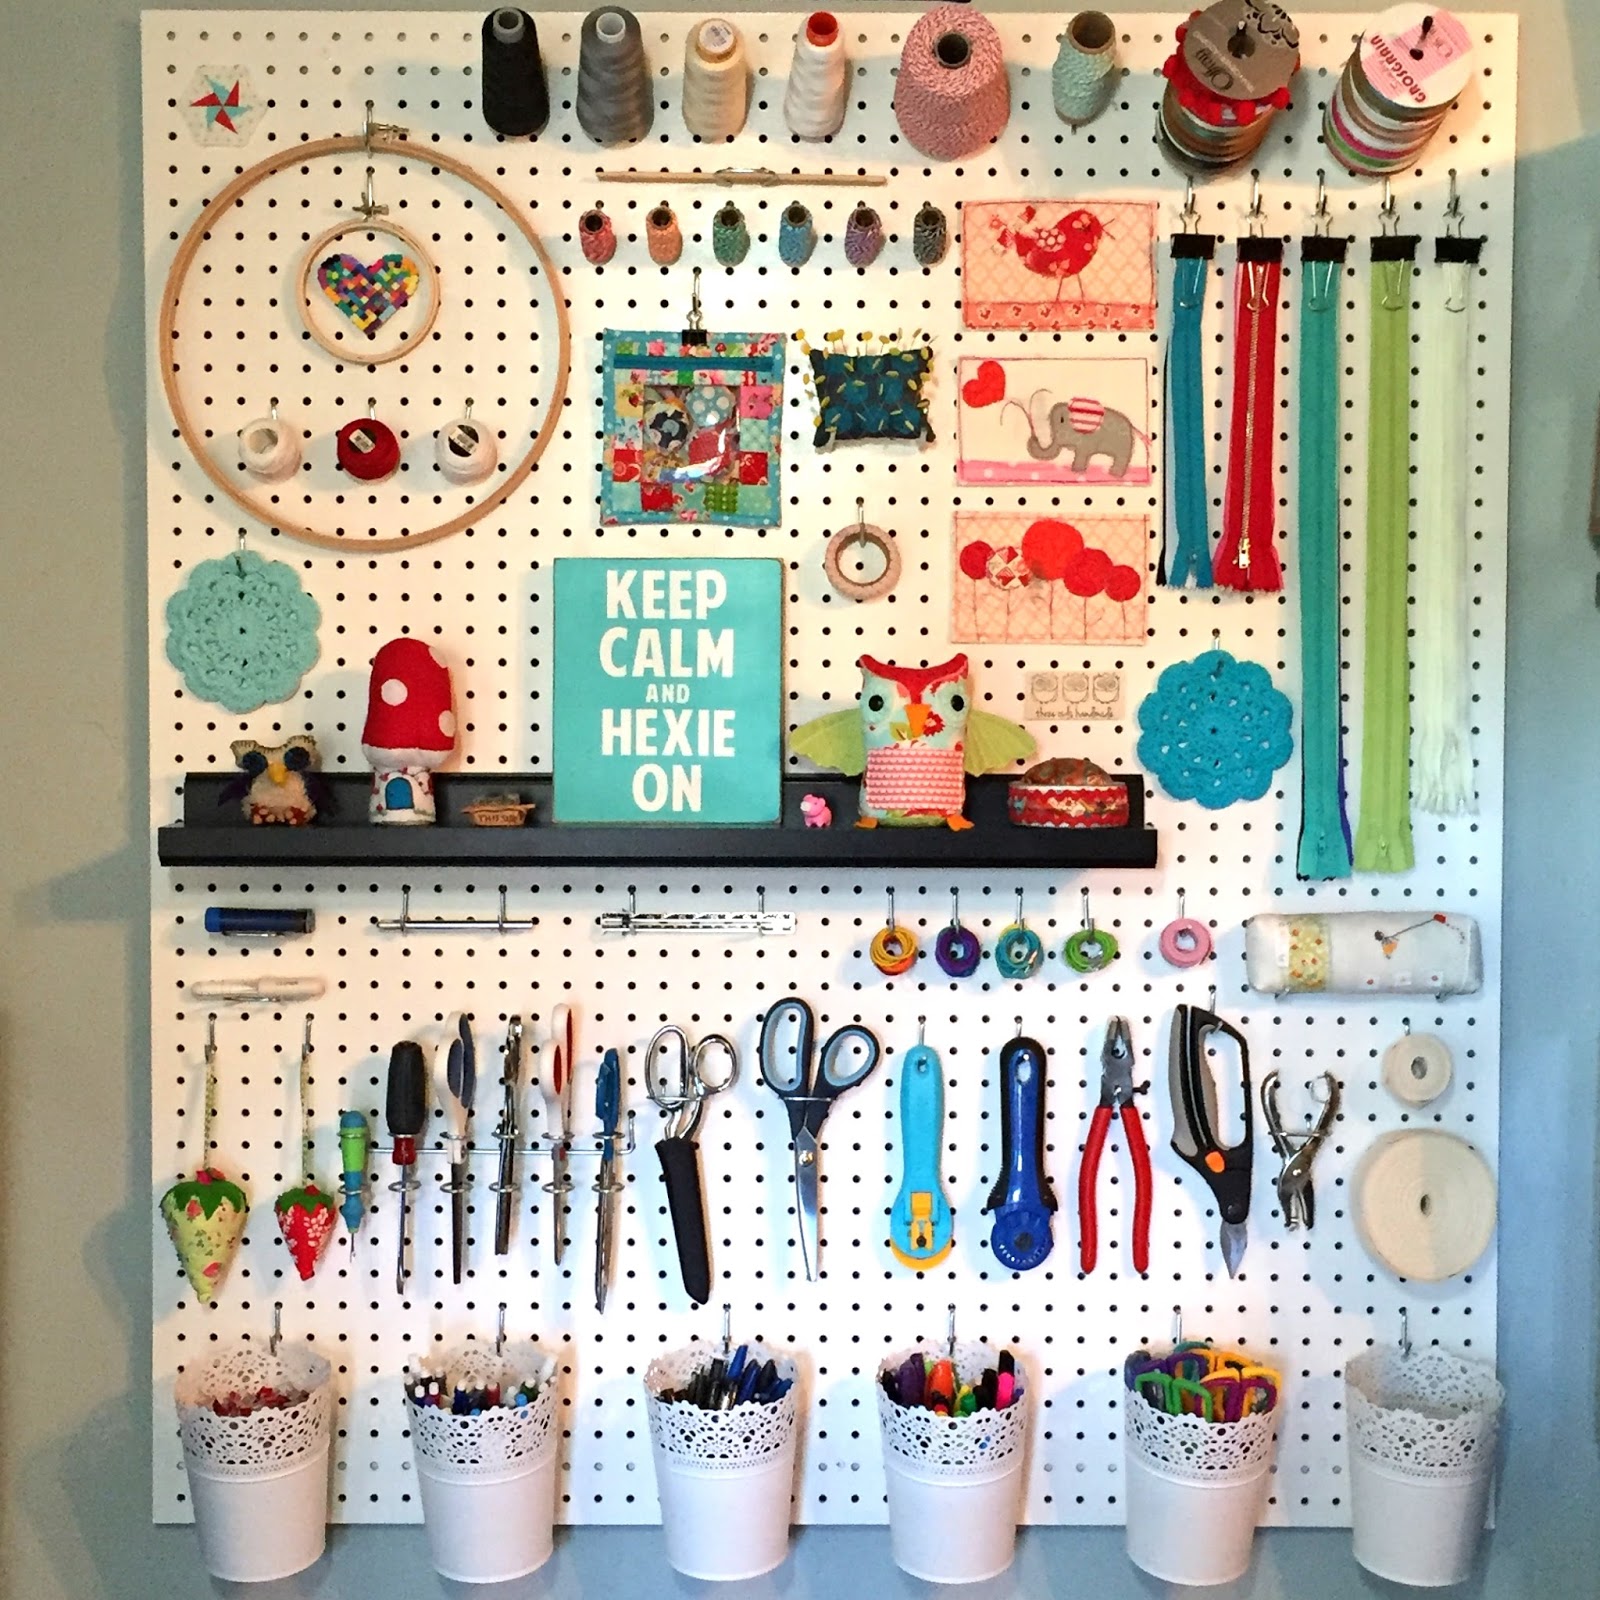
The cleanest my corner has been in a long, long time.

perfection my friend! I love this so much
ReplyDeleteThis is fantastic... so inspired to get one of these up in my sewing room. Thanks for sharing and for all the details!!
ReplyDeleteHello weekend project!!
ReplyDeleteNice job! How is it working out for you?
ReplyDeleteIt's working perfectly! Everything is still where it belongs and I am feeling so organized!
Delete