
Brambleberry Ridge and Indelible fabric lines match my house and style perfectly. I also thought they added a touch of whimsy for the girls without being juvenile. This was important because it's a bathroom guests also use. As I told my 12 year old, I know you like this, but I really made it so I can look at it all the time. Ha
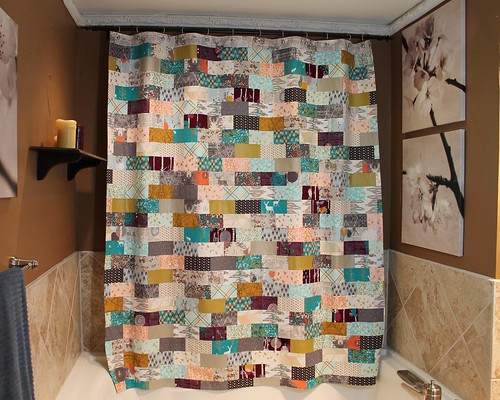
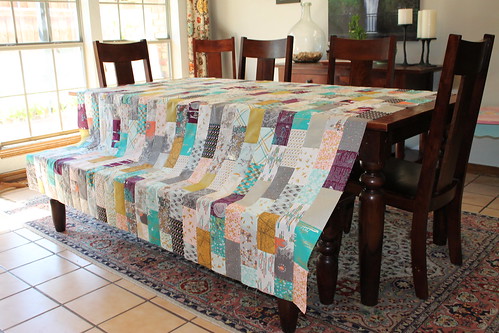
I didn't use a pattern for this shower curtain. Instead, I adopted the mentality my mom always used when sewing - take some measurements and make it up as you go along. I wanted to use a brick pattern for three reasons - it mimics the subway tile layout in the bath surround, looks great while being quick to piece, and can be hemmed on the sides and bottom without adding sashing or cutting into a design element.
I made notes and took pics along the way in case I want to make another one. This isn't really a full tutorial, but I'll list my notes and pics for anyone who is interested in giving it a try. This works with any 72" square quilt pattern (or 72" x 75", as I made mine)
My long shower curtain finished size: approximately 70" wide x 76" long
Standard shower curtain size: 72" x 72"
70" wide works great even on my curved rod shower curtain and was a good width for the quilt pattern I wanted to use without waste. With my higher shower curtain rod, 72" length is too short, so I added three additional inches. By omitting one row on the shower curtain, finished size is 73" if hemmed with a 1.5" width. Hem and top panel widths can also be manipulated to slight adjustments. I hemmed the bottom of my shower curtain last in order to double check length.
This is not a waterproof shower curtain. Add a vinyl/waterproof lining to the back when you hang it in your bathroom.

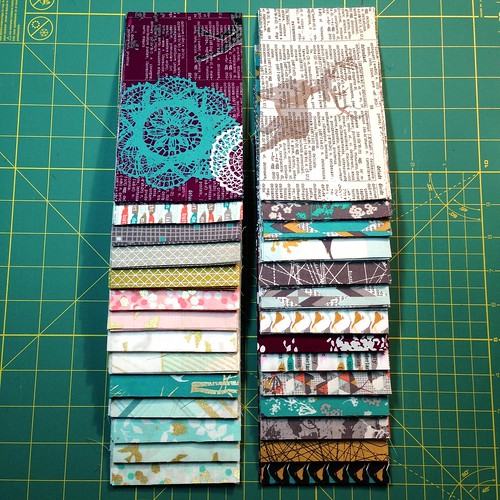
From fat quarters: 3.5" x 19.5" strips yield three 3.5" x 6.5" rectangles each
For my project:
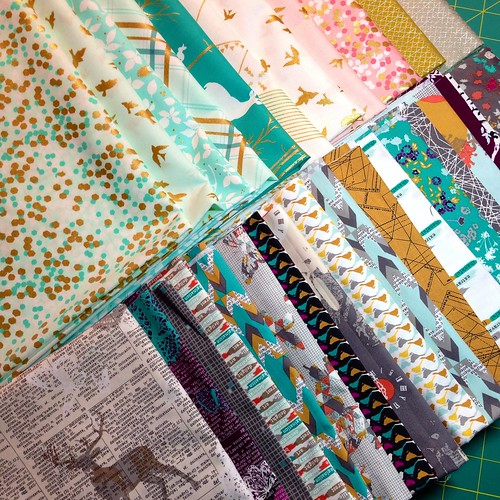
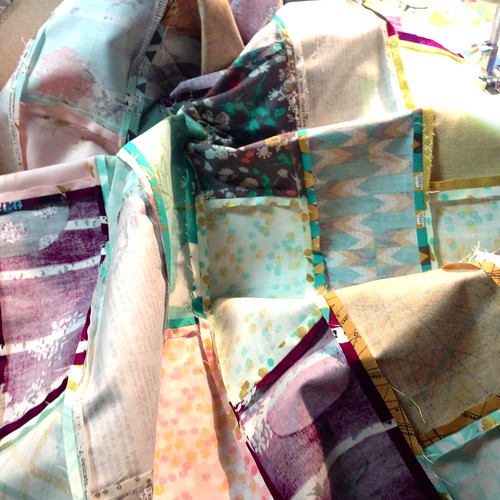
I used 28 different fat quarters. There is no reason for this other than that is the number of fabrics I had that matched my theme. Fabric on the left is Cotton + Steel metallic basics and Violet Craft Brambleberry Ridge. Fabric on the Right is Katarina Roccella Indelible.
Remaining 8 fat quarters - three 3.5" x 19.5" strips and one 3.5" x 6.5" strip
Subcut each strip into 3.5" x 6.5" rectangles
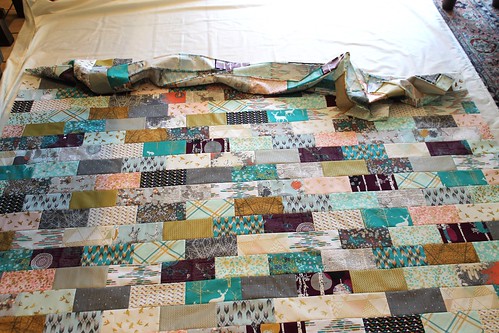
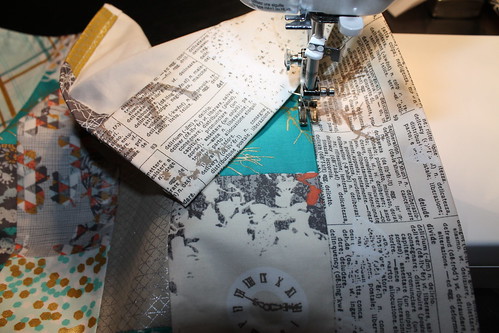
I laid out my fabrics prior to piecing and then chain pieced by row, but intrepid spirits can simply grab and piece randomly - 12 rectangles per row. Every other row, I slid each rectangle over to the left halfway, cut one end rectangle in half (into two 3.5" x 3.25" pieces), and used one at each end of the row. The rows that have not been cut end up a bit longer than the other ones this way, but I just pieced all in one direction, then trimmed the side even.
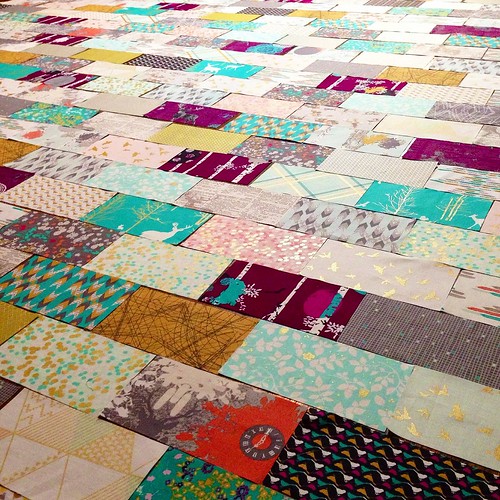
I pressed my seams open to lay as flat as possible.

My long shower curtain finished size: approximately 70" wide x 76" long
Standard shower curtain size: 72" x 72"
70" wide works great even on my curved rod shower curtain and was a good width for the quilt pattern I wanted to use without waste. With my higher shower curtain rod, 72" length is too short, so I added three additional inches. By omitting one row on the shower curtain, finished size is 73" if hemmed with a 1.5" width. Hem and top panel widths can also be manipulated to slight adjustments. I hemmed the bottom of my shower curtain last in order to double check length.
This is not a waterproof shower curtain. Add a vinyl/waterproof lining to the back when you hang it in your bathroom.
Materials
- For long length use (300) 3.5" x 6.5" rectangles to make 72 1/2" x 75 1/2" front (size prior to top panel and hemming)
For standard length shower curtain use (288) 3.5" x 6.5" rectangles to make 72 1/2" square front (size prior to top panel and hemming) - 2 width of fabric x 6" for top panel piece
- heavyweight interfacing or SF101 shape flex interfacing - 6" x 72"
- 1 full size flat sheet for backing (I bought the cheapest one I could find at Target)
- (12) 7/16" grommets - get the kit so you have the tools needed to install
Cutting and Layout
I drew a 72" square layout with 12" blocks just to get a visual of the shower curtain before cutting.
Long shower curtain layout - 25 rows x 12 rectangles per row = 300 rectangles
Standard shower curtain - 24 rows x 12 rectangles per row = 288 rectangles
From fat quarters: 3.5" x 19.5" strips yield three 3.5" x 6.5" rectangles each
For my project:
I used 28 different fat quarters. There is no reason for this other than that is the number of fabrics I had that matched my theme. Fabric on the left is Cotton + Steel metallic basics and Violet Craft Brambleberry Ridge. Fabric on the Right is Katarina Roccella Indelible.
From my fabric, I cut:
20 fat quarters - three 3.5" x 19.5" strips and one 3.5" x 13" stripRemaining 8 fat quarters - three 3.5" x 19.5" strips and one 3.5" x 6.5" strip
Subcut each strip into 3.5" x 6.5" rectangles
Piecing:
Backing:
I dislike measuring and cutting large pieces of fabric, so I tried to keep this as simple as possible. I bought a cheap full size flat sheet from Target, pressed it well, and then laid it on the floor. I laid the shower curtain front on top, and spray basted in place. I wasn't overly concerned about it laying completely flat because I just wanted it to adhere temporarily. So I decided not to tape the back to the floor before basting. I cannot recommend this method - it was more work in the end - but it didn't have any large wrinkles either, so it worked out. In the future, I would recommend to trim down the sheet a little bit and tape it to the floor as though you are basting a quilt. I didn't use batting, but batting can be used if you want to quilt the layers.
After basting the layers together, trim the backing to the size of the front.
Top Panel:
Piece the two WOF x 6" strips on one short edge, making one long piece. Fuse the interfacing on the back. I was lazy and didn't measure my cotton fabric length. I just fused the interfacing on the back, then attached the fused top panel to the top of the shower curtain with 1/4" seam allowance, and trimmed off the excess. Press the seam toward the top of the shower curtain.
A note about interfacing: I was lazy about that as well. I didn't really want to measure a long piece of interfacing and have a 6" chunk missing 72" down my bolt. I cut 4 pieces by the 20" width of shape flex. The last piece I cut down to 6" x 12". I fused the pieces on the back of the top panel, slightly overlapping the edges.
Hem the Sides:
On each side, fold over the raw edge 1/2" and press. Fold over another 1/2", press, and topstitch in place.
On each hemmed section, I used school glue to baste the raw edge down when I folded and pressed it. It helps the two layers of fabric lay nicely. (Tip: if you glue baste, use the iron to heat set the glue.) I then used wonder clips to hold the fabric in place to topstitch.
Hem the Top Panel:
Fold the top raw edge of the top panel down 1/2". Fold the top down again so that the top folded edge is over the stitching line by at least 1/8". I glue basted the second fold as well. Steam a Seam also works really well to hold the fabric in place.
Flip the shower curtain to the front and stitch in the ditch where the top panel meets the body of the shower curtain.
Hem the Bottom Panel:
Fold over the raw edge 1/2" and press. Fold over another 3/4" and press. Topstitch in place.
Again, you can adjust the hem length to add or subtract length.

Add Grommets:
I purchased Dritz grommets at Joann Fabric. I bought a kit with 10 grommets, and a refill pack with 10 grommets. 12 are needed for a shower curtain.
You can use an old grommet shower curtain to measure hole placement. I used the following measurements, tracing the inside of the grommet holes onto the fabric, with success:
From top edge: top of circle 5/8" down
First and last grommet: outside of circle 1 3/4" from outside edge
All other grommets: 5 1/2" apart from edge of circle to edge of circle
The grommet tool kit explains how to use them; it is not hard, so don't be scared. I poked a hole in the center of the circle I drew with an awl, cut the fabric inside the the circle to just barely inside the lines I drew. The grommets should be snug, but not tight, and definitely not loose.
You do need to whack the grommets pretty hard (try not to hit your fingers). Make sure to attach the grommets on a hard surface like concrete, and not on wood floors or precious tile.
Add a vinyl shower curtain liner to the back, and you are done!
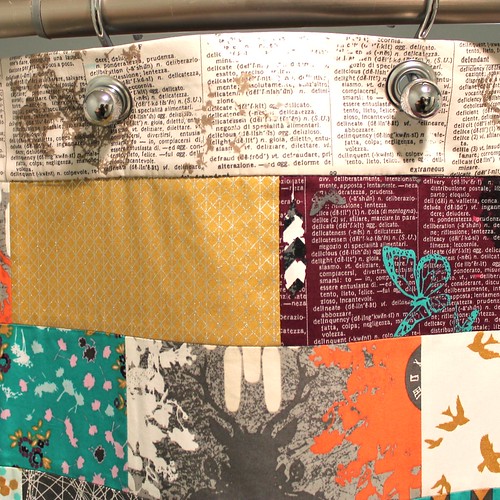
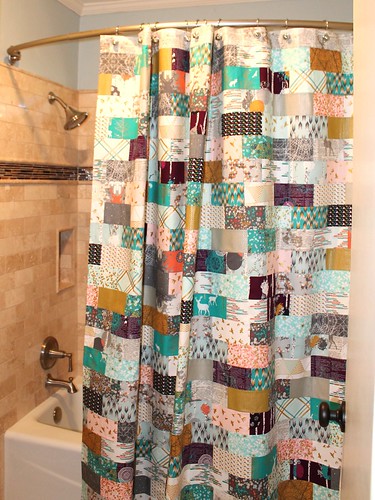
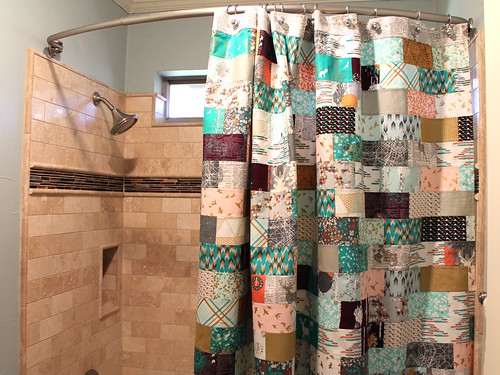
Here is the shower curtain in its permanent space.
Here is the shower curtain in its permanent space.
It is gorgeous!! What a great curtain and such fantastic fabrics. I also love the earthy colors of your house and that tile?! Crazy beautiful
ReplyDeleteit looks so great! now I'm thinking my guest bath needs a quilty shower curtain. sheesh.
ReplyDeleteBut of course you do!!!
DeleteM! It is STUNNING!
ReplyDeleteThanks, Gwen!
DeleteWhat a pretty idea for a shower curtain. I've been enjoying having a browse through all your posts. I arrived here while searching for a tutorial for adding the binding to the Sew Together Bag as that would also work for the Bionic Gear Bag. All your Sew Together Bags are just lovely. I've started following you on bloglovin and look forward to future posts.
ReplyDelete